8 Reasons why plants love cinnamon (These really work!)

 Did you know that plain old kitchen Cinamon is an amazing fungicide? Not only that, but cinnamon can be used in the garden so many different ways. I've discovered 8 different ways to use cinnamon for plants. From fungus killer to rooting hormone, cinnamon has got ya covered!


There are 2 things that I'm sure you know about me by now.

1) I'm frugal
2) I prefer to do things as natural as possible.


Pretty simple right? I try to do things the way my great-grandma did. She lived on a farm in the 1920's, and raised 6 kids on 1 income! Everything did double duty and it was done the cheapest way possible. I'm just like her! 


So I'm often looking for simple solutions instead of the expensive commercial crap the media tries to convince us we need now.


That type of search is exactly what led me to cinnamon as a remedy for what ails my plants. I mostly use cinnamon for seedlings since cinnamon prevents dampening off disease, but it can be used several other ways. 


Here are my most common uses for cinnamon in the home & garden.

How to use cinnamon in your garden


1) Cinnamon saves seedlings.
The term dampening off covers a range of diseases that attack a seed/seedling either before or after germination and cause the seedling to die. They can be caused by several different fungus and soil conditions. 


A few years back I read that if you dust the soil of seedlings with cinnamon, it will prevent dampening off. I've been doing it since with great results! This makes a lot of sense too, since cinnamon has antifungal properties. 


This also gets rid of those little fungus gnats that somehow appear around seedling trays. Cinnamon kills the fungus they feed off of. 


2) Prevent wild mushrooms.
Nothing worse then having to waste a beautiful day pulling mushrooms from the mulch in my flower beds. Mushrooms are fungus and luckily cinnamon has antifungal properties. 


By dusting cinnamon all over the garden mulch, it helps to control mushroom growth. Don't worry, it won't hurt your plants.


3) Cinnamon as rooting hormone.
Cinnamon is much cheaper than the chemical rooting hormone they sell in the big box store and just as effective! Just allow the cutting to dry slightly then apply cinnamon powder to the stem before you plant the cutting.


4) Cinnamon as ant deterrent.
Ants do not like cinnamon! Sprinkle cinnamon in your greenhouse or around your garden beds to deter garden pests. It will not kill the ants, but they will stay away from it. 


Sprinkle a line of it in front of your doors if ants are coming into your house. They really hate to cross a line of cinnamon!

5) Cinnamon heals plant wounds.

Overzealous pruning or a slip of the weed whacker and you'll have a plant with a wound that needs fixed up. Simply dust cinnamon on the wound to encourage healing and prevent fungal infection at the same time. 

6) Deters furry pests.

Dust cinnamon along the outside of the garden to deter rabbits, squirrels and even moles. Small critters are close enough to the ground that as they walk through the cinnamon they will get it on their face and breathe it in. 


Cinnamon will irritate the mucous membranes of their nose and mouth without causing permanent harm, but will deter them from visiting again.

7) Flying bug deterrent.

Cinnamon oil is known to be a deterrent for flying bugs like mosquitoes. When dusted around the garden, cinnamon powder can have the same effect. Also see #8 for more flying bug info... 

8) Cinnamon for house plants.

Cinnamon gets rid of molds and mildew in house plants too. Simply sprinkle a bit of cinnamon on the soil. Fungus shows up as discolored spots on the soil.


It will also get rid of gnats if you happen to have them buzzing around your house plants. These are the same gnats seedlings get. The cinnamon destroys the fungus they feed on and the gnats will die.


Gardening for Beginners: 11 Tips for a Successful Start

 by 


My garden is my favorite place to be. I love everything about it- from planning to starting seeds inside to digging in the dirt. But gardening can sometimes seem like an overwhelming venture for those just starting out.

So if this is your first year gardening- or if you are a beginner who was seriously overwhelmed last year- here are 11 tips for beginning gardeners to reduce wasted time, energy and resources as well as prevent getting in over your head.

If you are BRAND new gardener, be sure to also check out my list of  Common Mistakes Made By Beginning Gardeners– so you don’t make them!


11 Tips for Beginning Gardeners


1. Start Small

I know, you want to feed your family all summer long. Or you want to preserve food for the winter. Or you want to try every single seed from the catalogs. Trust me, if you start out with a huge garden you will get overwhelmed.

If this is your first year gardening, take it slow. Plant a few tomatoes and peppers. A small herb garden. Some beans and lettuce. Maybe some onions. Get used to how certain plants grow and their needs. Try out something like Square Foot Gardening to grow a lot of food in a smaller space.

Keep your small plot weeded, watered and pest-free. If all goes well this first year, you can expand just a bit more the following year.


2. Plant what you eat [mostly]

Do you love fresh tomatoes and tomato sauce? Is salsa your thing? Then tomatoes should definitely be on your to-grow list. Are potatoes detested by the entire family? You might want to skip them. If you only use peppers in salsa and the occasional stir-fry or soup, 1 or 2 plants is probably enough.

That being said, homegrown food is always better. Have you tasted a pea straight from the garden? There is no comparison to the bland store-bought varieties. Especially in the case of picky kids, growing your own, and letting them help, will help them expand their palate and introduce new foods. Gardening is also an excuse to build up your own tastes.

Your menu might never include kale, cabbage or chard- unless it’s right outside your door begging to be used. Once you have your gardening legs under you don’t be afraid to try a few new things!

My article on the 11 Easiest Vegetables to Grow for Beginners will give you the basics of how to grow some of the easiest and most popular crops.


3. Plant to your climate

Knowing your zone is one of the most important parts of gardening. It will determine what you can plant and when. If you live in a colder northern climate you will have to pick more cold-weather crops and short-season varieties of all the others.

If you live in an area that stays warm much of the year you will plant your warm season veggies much earlier than much of the country. When choosing your seeds, pay attention to how many days it will take to mature as well as what growing zone it is best suited for.


4. Pay attention to Plant Spacing

I know many home gardeners- myself included- that try to squish as many plants in an area as possible in the name of conserving space and making room for more plants. This is not the best practice as it tends to invite more pests and disease into your garden as well as having plants that are not as strong and healthy since they will be competing for light and space.

You can usually get by with somewhat smaller spacing than seed packets tell you, but make sure that each plant has ample nutrients and sun. You can also use vertical gardening techniques to conserve space.

Here’s my guide on correct garden spacing, and you can get a chart for space recommendations for common crops.


5. Use Mulch

I don’t know any true statistics, but I would think that weeds are the #1 gardener frustration. They grow fast and can choke out your plants in a matter of days. Weeding should be done daily, but if you don’t want to spend hours and hours on your knees pulling weeds, mulch can be your best friend!

Mulching your plants will help to choke out the weeds as well as protect from soil loss and retain moisture. You have a lot of choices when it comes to mulch- from wood chips or grass clipping to straw or plastic. You can use one or all sorts of different mulches, but get that soil covered!


6. Write it down!

Don’t rely on your memory when it comes to the garden. Keep a journal- sketch out your garden so that you can rotate crops next year, keep a list of pests you fought, of what did well and what didn’t, and any other thoughts that might help you.

Also make sure to label you plants in your garden. Some seeds are slow to germinate and you might forget that a plot was already planted. It is also helpful to label different varieties so you can begin to keep tract of which do best in your garden- there is no sense in wasting money on seeds that never produce well!

7. Learn your plants. And your Weeds.

There is nothing quite like tending a tiny little corn seedling for weeks until it blossoms into a lovely shoot of grass! It is helpful to become familiar with what certain plants look like as seedlings- so that you can pull the weeds and not the plants.

It is equally as helpful to know your weeds as small shoots and seedlings so that you are cultivating plants not weeds (of course don’t forget about your edible weeds as well, some are easier to grow than greens!)


8. Amend your soil.

Healthy soil makes healthy plants. Your soil is the most important part of your garden- poor soil will not produce much more than unhealthy plants. Before starting your garden each year make sure you amend the soil with well-rotted manure or compost.

Feed your soil and plants throughout the year with manure, compost tea or Epsom salts. At the end of the season top your beds with chopped leaves or sow a cover crop that will provide some green manure for the following year. Your plants can tell you a lot of about the condition of your soil- check out my article on Soil Nutrient Deficiencies and How to Fix Them for some tips on diagnosing common nutrient deficiencies.


9. Be Prepared for Pests.

Don’t be fooled into thinking that you can just plant your garden and let Mother Nature take care of the rest. There will be pests and you will have to do something about them if you want your plants to survive.

Read up on companion planting and other organic measures of garden pest control. Be prepared to get up close and personal with the insect pests and pick them off! But remember, a few bug holes in your kale or tomatoes never hurt anyone. Cut off the offensive part of the produce and eat up!

10. Don’t forget the flowers.

Unless you have a garden full or greens and roots, you will need pollinators to help your garden grow to its potential. Planting flowers around your vegetable beds- and in them too- will help draw in bees and other pollinators as well as beneficial insects that will help you fight your garden pests.

Plus they are beautiful, smell wonderful, and make a room and yard that much more cheerful! Here’s a list of Flowers to Grow in the Vegetable Garden.


11. Water when needed

Water is just as important as healthy soil. Too much water can cause disease in plants- and too little- well they just won’t grow. Most plants need a deep watering at least once a week, so if Mother Nature doesn’t take care of it you will need to step up to take the job.

Just remember that it is best to water the base of the plants as opposed to from above, so using a drip hose or irrigation is better than a sprinkler that sprays water through the air. Watering early is the morning or in the evening is best to minimize water loss from evaporation.

If you are new to gardening I would love to hear what the hardest part for you is. And if you are experienced, what advice would you give to those just starting out?


source: https://thefreerangelife.com


How to Grow Hydrangea from Cuttings

 by Linda Parker

Hydrangeas are fascinating flowering plants that produce pretty leaves and large flower heads in various bright colors.

An explosion of new cultivars reflects the popularity of hydrangeas. And it’s no surprise, as the plant is resistant to pests, grows in sun or shade, and bounces back from cold temperatures. Luckily, hydrangeas are an easy plant to start from cuttings. And a mature plant can yield dozens of new hydrangeas to fill your garden.

For the process you will need:

  • Hydrangea cutting,
  • Peat moss or potting mix
  • Pot
  • Water
  • Sharp scissors or pruning shears
  • Rooting hormone

The first step for how to root cuttings from hydrangea is to select a stem for cutting. In early fall, choose a stem for hydrangea propagation that is at least 6 inches (15 cm.) long, has no flower and is new growth. A new growth stem will be a lighter green than old growth. Also be aware that if you live in a colder climate where the hydrangea dies back to the ground, the whole shrub may consist of new growth

Once you have selected a stem to propagate the hydrangea, take a sharp pair of shears and cut the stem off just below a leaf node. A leaf node is where a set of leaves will be growing. The hydrangea cutting should be at least 4 inches (10 cm.) long and should contain at least one additional set of leaves above the selected leaf node. Snip the cutting from the stem.

Next, strip all but the top most set of leaves from the cutting. The cutting should have only two leaves left. Cut the two remaining leaves in half crosswise (not lengthwise).

If available, dip the end of the cutting in rooting hormone. While rooting hormone will increase the chances of successfully propagating hydrangeas, you can still propagate hydrangea shrubs without it. Now, stick the cutting into damp potting soil.

Cover the pot with a plastic bag, making sure that the bag does not touch the leaves of the hydrangea cutting. Place the pot in a sheltered location out of direct sunlight.

Check the hydrangea cutting every few days to make sure the soil is still damp. In about two to four weeks, the cutting will be rooted and your hydrangea propagation will be complete.

Hydrangea shrubs are excellent for personalizing yard landscaping and garden design with color and shape. Shrubs can be trimmed to suit any outdoor home decorating plan and garden design of any size or layout.

Here are some ideas for outdoor home decorating with hydrangeas:


Pruning Hydrangeas


Knowing if your shrub blooms on old or new wood will help you make timely cuts


I know people are confused about how to prune hydrangeas because I get asked about it all the time. The three most common reasons for their confusion are the plant’s dead-looking appearance in winter, its failure to bloom in summer, and the reasoning that because it’s a shrub it needs to be pruned. But these popular woody plants can live long, floriferous lives without ever feeling the cold blade of a pair of Felcos. Hydrangeas, though, can handle pruning (which, if done at the wrong time, may be the cause for the lack of flowers), and sometimes you might want or need to cut them back a bit. For example, you may not like the look of the fading blooms, or your shrub may be a bit too tall. Pruning hydrangeas can also improve a shrub’s vigor and increase the size of its flowers.

Not all of these shrubs should be pruned at the same time. Those that bloom on old growth should only be pruned after flowering. Others bloom on new growth and should be pruned before they wake up in spring or as they are going dormant in fall.

Blooms on old wood


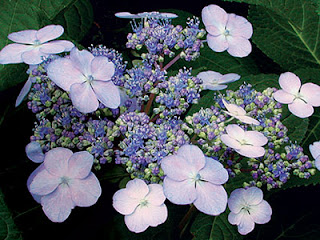
Bigleaf hydrangea. Photo: Steve Aitken

Bigleaf hydrangea. Photo: courtesy of hydrangeasplus.com

Oakleaf hydrangea. Photo: Melissa Lucas


  1. Bigleaf hydrangeas (Hydrangea macrophylla cvs., USDA Hardiness Zones 6–9)
  2. Bigleaf hydrangeas (H. serrata cvs., Z 6–9)
  3. Oakleaf hydrangeas (H. quercifolia cvs., Z 5–9)

Prune after the flowers start to fade in late summer


To determine if your hydrangea blooms on old wood, think about when it flowers. Shrubs with this characteristic generally begin blooming in early summer and peter out by midsummer, though sporadic blooms may appear afterward. These shrubs form next year’s flower buds in late summer or early fall as the days get shorter and temperatures cool off. To reduce the risk of removing these buds, prune just as the flowers begin to fade. Often, the earlier you get it done after bloom, the quicker the shrub can recover, producing more and larger blooms next season.

1. To tidy up, remove old blooms


Gardeners who want to maintain a tidy appearance can snip off spent blooms just below the flower head and remove any wayward or straggly canes at the soil line.

2. To improve vigor, remove the oldest canes

When a hydrangea gets old and woody, it can produce smaller blooms. Regular removal of a few of the oldest canes at the soil line can keep the shrub vigorous, producing large and abundant flowers. The same method can keep a shrub from getting too tall by targeting the tallest canes for removal.


Blooms on new wood


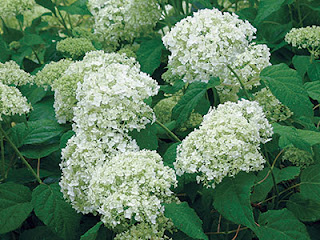
Panicle hydrangea. Photo: courtesy of provenwinners.com

Smooth hydrangea. Photo: Michelle Gervais

  1. Panicle hydrangeas (H. paniculata and cvs., Z 4–8)
  2. Smooth hydrangeas (H. arborescens and cvs., Z 4–9)

Cut back these shrubs in late winter before new growth begins


Because they need to grow and set buds the same year that they bloom, shrubs that flower on new wood generally start blossoming later than old-growth bloomers, beginning in midsummer and continuing until the first frost. These shrubs are forgiving if pruning is not done at a certain time as long as you avoid pruning when the flower buds are opening.


1. To get bigger flowers, cut them all the way back


In late winter or early spring, these shrubs can be cut all the way back to the ground. Smooth hydrangeas will produce much larger blooms if pruned hard like this each year, but many gardeners opt for smaller blooms on sturdier stems.


2. To reduce flopping, leave a framework of old growth


Some hydrangeas’ branches often fall over under the weight of their blooms, especially after overhead irrigation or after a good rain. One way to alleviate this flopping is to cut the stems to a height of 18 to 24 inches to provide a sturdy framework to support new growth.


—Janet Carson is the horticulture specialist for the University of Arkansas Cooperative Extension Service.

Photos, except where noted: Steve Aitken

Illustrations: Chuck Lockhart


source: https://www.finegardening.com


Copyright @ 2013 Krobknea.

Designed by Next Learn | My partner