by
Coffee grounds left over from freshly brewed coffee have many uses in the garden. You don’t necessarily have to be a coffee fan to use the grounds in your garden. Many coffee shops offer them for free, all packed and ready for you to pick up. This valuable waste is being generated in large quantities on a daily basis.
Here are some exciting ways to give old coffee grounds a fresh life while benefiting the health, beauty and vitality of your garden.

COMPOST COFFEE GROUNDS

Adding the coffee grounds to the compost pile with other kitchen and garden waste is the simplest way to use them.
Despite its brown color, coffee grounds constitute green waste similar to grass cuttings and weeds from your garden. In a compost heap you need two kinds of materials, often referred to as green and brown.
The greens add moisture, nitrogen and other nutrients to the compost pile, while the browns such as dry leaves, sawdust, waste paper, and straw provide carbon.
They also keep away foul smells by aerating the mixture and adding dry mass to mop up the extra moisture. Ideally, you should maintain a 50-50 balance between greens and browns in the compost dump.
Even after the coffee liquid is filtered away, the grounds still contain many proteins, fatty acids and carbohydrates which will provide nutrients to the microorganisms that turn your organic waste into compost.
It has been found that adding the grounds to the compost pile increases microbial activity, which raises its internal temperature. This in turn helps kill many pathogenic bacteria and fungi as well as the seeds of weeds that get into the pile from your garden waste.
One worry about adding coffee grounds to the compost pile in large quantities is that it may make the compost too acidic. You can remedy it by sprinkling some lime or wood ash over a layer of grounds and turning it well.
If you’re using a wood-burning stove or fireplace, you know very well how ash dust rises and spills into the room when you try to clean out the grate.
If you sprinkle the damp grounds over the ashes before removing them, it will keep the dust down and you will get a mixture ready for composting. Nevertheless, limit coffee grounds to 10% of your compost pile by volume.
If you have a regular supply of coffee grounds in large quantities, composting alone may not work out unless you have a large amount of yard waste to go with it. There are a number of other ways you can use this organic waste in the garden to your advantage.
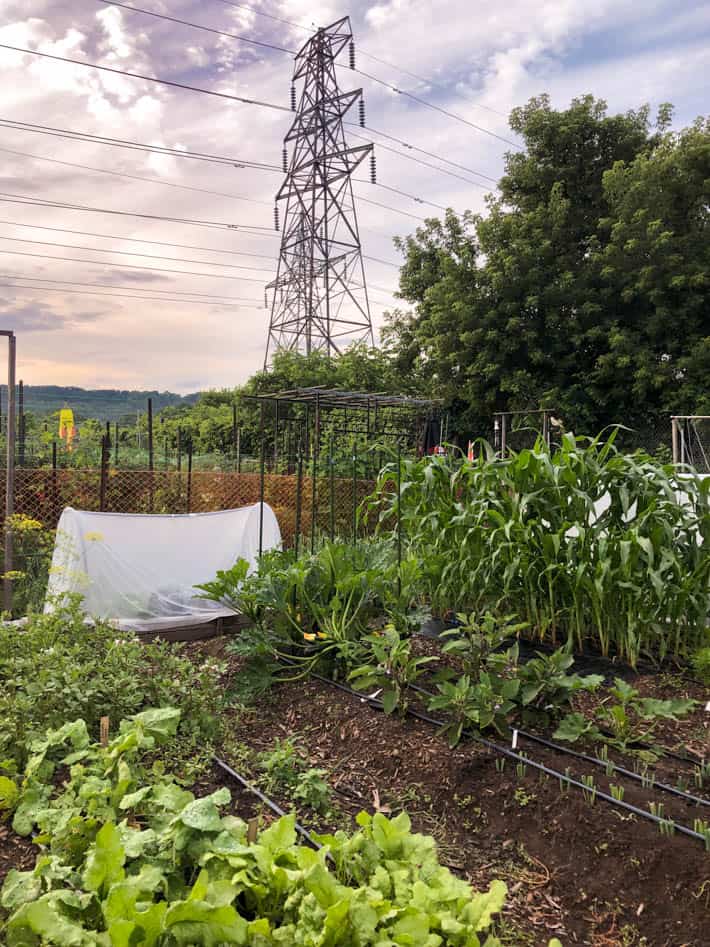
USE COFFEE GROUNDS TO IMPROVE THE TEXTURE OF YOUR SOIL
If you add coffee grounds to the soil in a thick layer, they will be compacted into a crust and be nearly impermeable to water. But if it is incorporated into the soil, they greatly improve both the texture as well as the organic content.
Being slightly acidic, coffee grounds lower the pH of the soil. They are very slow to break down, releasing nitrogen and other nutrients to the plants over an extended period of time, while keeping the soil loose and aerated. This is particularly beneficial for clayey soils which are usually alkaline and heavy.
Most gardeners in the Midwest and the Western United States would greatly benefit from adding coffee grounds to their garden soil.
All you have to do is spread an inch of coffee grounds in a part of the garden and work it into the soil with a rake. After you have covered a large area over several days or weeks, it’s a good idea to till it deep into the soil with a rototiller.
It is good to add coffee grounds to sandy soil too. If you are worried about increasing the acidity of your already acidic soil, try adding some to a small area.
Test the soil after a few weeks. You may even be surprised by the result because not all coffee grounds are equally acidic. Laboratory tests of coffee grounds have produced mixed results ranging from moderately acidic to mildly alkaline.
Tap water is generally alkaline, so if your garden is watered by it, there’s every chance that any acidity resulting from the addition of coffee grounds will be neutralized.
The soil organisms also play a part in this drama, so unless you try it, you’ll never know how coffee grounds work in your garden. Moreover, you can always amend acidity by adding wood ash or dolomite to the soil.
FEED COFFEE GROUNDS TO THE WORMS

Coffee grounds have many nutrients that make them attractive to the earthworms in your garden as well as the red wigglers and nightcrawlers in your worm bin.
It has been observed that earthworms carry the coffee grounds particles deep into the soil. Worm bin populations also increase when they are regularly fed with grounds. In fact, the worms are attracted to a spot if there are coffee grounds present. It is thought that they are either attracted by the smell or addicted to the taste.
You can directly add the dry grounds to your vermicomposting bin after dampening it slightly, or just dump your disposable coffee filters in along with the residue.
The worms eat shredded paper, so they consider the paper filters a treat. Some people find that soaking the papers and cardboard with weak coffee make them more delectable to the worms.
You can extract this tea-colored liquid from the grounds by adding warm water to them.
Most vermicomposters bury small quantities of kitchen waste in different spots in the bin to avoid a strong aroma and flies, but you shouldn’t do that with the grounds. They have a tendency to clump together.
Either mix it into the kitchen waste or spread it evenly on the surface and incorporate with a fork. The grounds not only provide nutrition, but add grit to the worms’ diet. They help with digestion and movement of food through their long digestive tract.
It is possible for worms to overdose on coffee grounds, so watch out for odd smells like ammonia and vinegar. The high nitrogen content of the grounds may be responsible for the ammonia smell.
So balance it with carbon-rich materials like shredded paper or straw. The smell of vinegar indicates increase in acidity.
Add ground eggshells to bring it down. Worms do well in a medium that has its pH level between 6 and 8.
USE COFFEE GROUNDS TO MAKE YOUR ACID LOVING PLANTS HAPPY

Long before soil pH and other finer aspects of gardening became known, coffee grounds were used to fertilize roses. Now we know that coffee grounds make the soil acidic, and that roses love acidic soil.
Although the acidity of the grounds decreases with time, a constant supply ensures happy conditions for a group of plants referred to as ‘ericaceous’ because they are acid-loving plants.
Heath and heathers growing in the acidic soils around bogs are typical examples. Blueberries, azaleas and rhododendrons always prefer extra acidity.
USE COFFEE GROUNDS AS A GENERAL FERTILIZER

It is not just ericaceous plants that would benefit from an occasional dose of coffee fertilizer. Coffee grounds release a good amount of nitrogen as they decompose.
This is one of the three macro nutrients every plant needs for healthy growth, the other two being potassium and phosphorous. Leafy vegetables like spinach and cabbages do well with extra amounts of nitrogen.
Coffee grounds have a good amount of potassium too, but the phosphorous in this material is not in a readily available form. Now we know why crushed egg shells were mixed with the coffee grounds that gardeners of old used to spread at the bases of roses.
The calcium and phosphorous in the eggshells can combine with the nitrogen in the coffee grounds to form a complete N-P-K fertilizer.
Magnesium and copper are other plant nutrients found in the grounds in sufficient amounts. They also contain manganese, calcium, zinc, and iron in small amounts, but they are not readily available, except for magnesium.
You will get better harvest of carrots if you use coffee grounds while sowing carrot seeds. Mixing the seeds with grounds not only makes the sowing easy, but keeps the seedlings safe from many pests and diseases, including root maggots.
Root vegetables do best in well aerated soil that allows good root run, but organic materials like manure are an invitation to root maggot flies to lay eggs in them.
Coffee grounds, on the other hand, repel the flies while keeping the soil loose. Being completely organic, they are a safe alternative to applying pesticides in the soil in which the root crops are growing.
The seeds of sugar beets exhibit better germination in soils that contain coffee grounds, but the opposite is true for several other plants such as alfalfa and clovers.
Also, don’t use coffee grounds, or compost containing them, in the vegetable beds where you grow mustard greens, Japanese mustard (komatsuna) or asparagus. Geraniums also seem to hate coffee grounds.
Coffee liquid has been found to have negative effects on the germination of many seeds, including that of weeds, but it is not really known why.
KEEP YOUR PLANTS SAFE FROM PATHOGENIC MICROBES
Coffee grounds seem to work against soil pathogens including many fungi such as Pythium sp. and Fusarium sp. that cause several diseases in vegetable crops.
The exact anti-bacterial mechanism of the grounds is not clear, but it is thought that the non-pathogenic bacteria and fungi that thrive in the decomposing grounds may be responsible.
The coffee brewing process does not strip off all the nutrition from the coffee grounds. Several lipids, proteins and hard to digest carbohydrates like cellulose are left behind.
These nutrients offer sustenance to many different types of microbes. Being fine in texture, it also makes a large surface area available to microbial action. The microbes that colonize the grounds are thought to suppress the growth and proliferation of harmful organisms.
Spinach, cucumbers, beans and tomatoes are some of the vegetables that seem to benefit from the anti-microbial activity of coffee grounds. They are prone to many rust and mildew diseases, especially when they are in the seedling stage. Compost containing just 5% coffee grounds can provide this protective effect.
MAKE A FOLIAR SPRAY FROM THE COFFEE GROUNDS
Used coffee grounds from most sources have plenty of coffee power left. If you soak the grounds in water overnight and filter out the tea-colored liquid, you will have a completely organic foliar spray that packs in some antimicrobial power along with nutrients for your garden plants.
It is found to repel insects and caterpillars. The lingering coffee smell or flavor could be making the leaves less appealing to the critters.
If you have a compost bin or worm bin, you can fortify the coffee liquid with compost tea for extra punch.
USE COFFEE GROUNDS TO PROTECT YOUR PLANTS FROM SLUGS & SNAILS
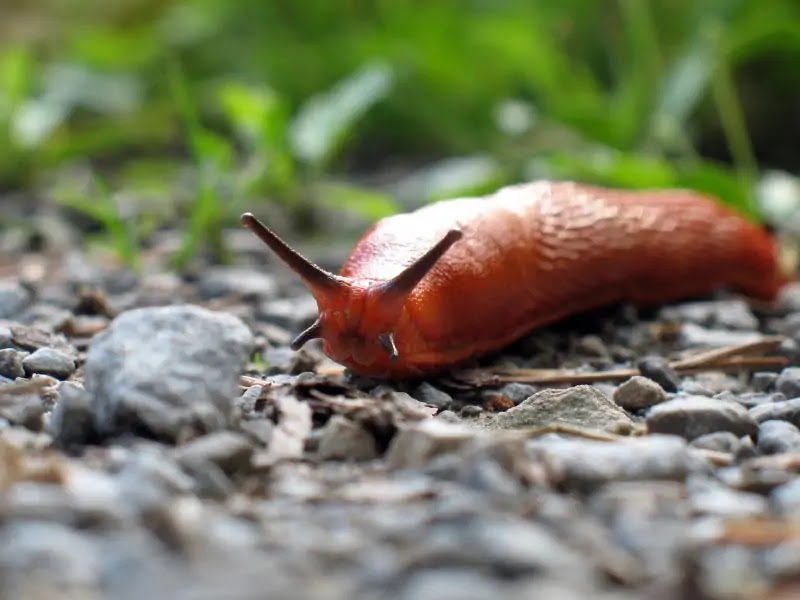
Spreading dry coffee grounds around plants may deter soft bellied pests like slugs and snails. The particles may not be as sharp as that of diatomaceous earth, but they can still be quite irritating.
Repeated application may be necessary as the grounds break down in the soil.
USE COFFEE GROUNDS AS MULCH
If you have plenty of coffee grounds, they can be used as mulch around your plants, but never alone. They tend to get compacted because of their small particle size.
If applied in a thick layer, it might become an impediment to drainage and air circulation. It is best to mix the grounds with other organic or inorganic mulches that have larger particulate size.
TRY CHANGING THE FLOWER COLOR OF HYDRANGEAS WITH COFFEE GROUNDS
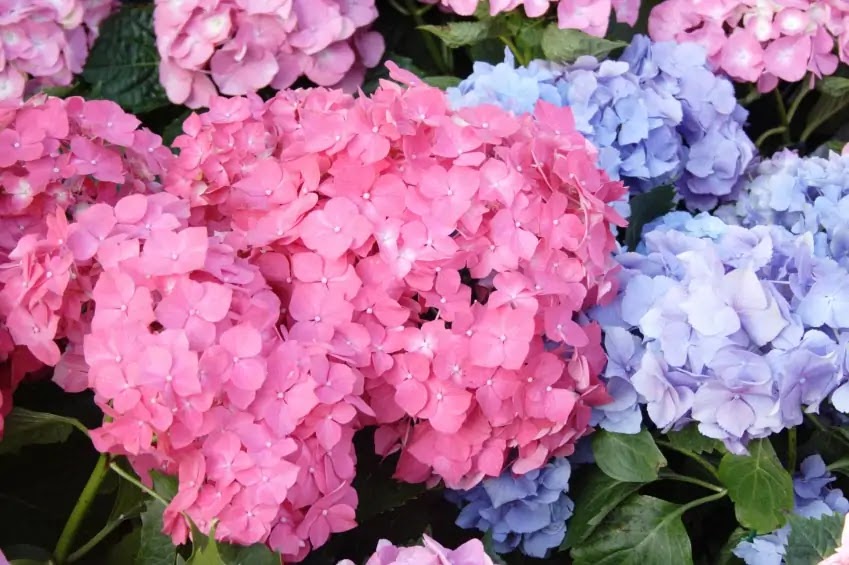
A fun way to use coffee grounds in the flower garden is to experiment with the color of hydrangea flowers. It is common knowledge that sweet (alkaline) soil produces pink hydrangea flowers, while a bit of extra acidity gives you blue flowers.
If your plants happen to have pink flowers, feed them coffee grounds and check whether they show inclination for a color change.
As we mentioned earlier, the acidity of coffee grounds is variable, so you might end up with flowers in a range of colors that fall between pink and blue on the same plant.
Remember that it is not the pH of the soil alone that controls flower color, but the ability of the plant to absorb aluminum salts from the soil which is enhanced by soil acidity. So if your soil is deficient in aluminum, you may want to add some aluminum sulfate for blue flowers.
When you use coffee grounds in your garden, whether it is from your own use or from the coffee shops, you are turning this organic waste into plant food that your garden will love!
PIN THIS TO SAVE FOR LATER