If you’re heating with wood, there’s always plenty of wood ash to go around. While you may be hard-pressed to think of uses for wood ash in a modern home, historically it was used in many different creative ways. Wood ash was a precious asset, used for food preservation, gardening, pottery, pest control, and even cosmetics.
Long before baking soda was discovered, wood ash based leveners allowed for holiday cookies. Our ancestors wouldn’t have invented soap without wood ash lye…the list goes on.
While some of these uses are merely a historical curiosity, many are still incredibly useful in our modern world. Looking for free garden fertilizer? Natural pest control? Stain and odor removers? Wood ash can do that!

A cord of hardwood produces roughly 5-8 gallons of wood ash, so that means we have around 30-40 gallons of wood ash in the spring. That’s way too much for any single-use, so we’ve had to find creative ways to use what would otherwise be a waste product.
YARD & GARDEN USES FOR WOOD ASH
Using up wood ash in your yard and garden is a natural solution. The minerals from the wood are restored to nature where they can be reused again.
GARDEN FERTILIZER
Wood ash contains all the trace minerals from inside a trees wood, which are the building blocks needed for plant health. While it doesn’t contain carbon or nitrogen, those are in ready supply from compost. The University of Vermont recommends about 5 gallons of wood ash per 1,000 square feet of garden. Since wood ash will raise the pH of soils, it’s not good for acid-loving crops like blueberries or potatoes.
BOOST COMPOST
A small amount of wood ash can help give compost piles a boost. While birds may be beautiful around a backyard compost pile, in rural areas open compost can attract bears. We’ve found that dusting a bit of wood ash on top of the pile helps keep bears and other large omnivores from digging in the scraps as well.
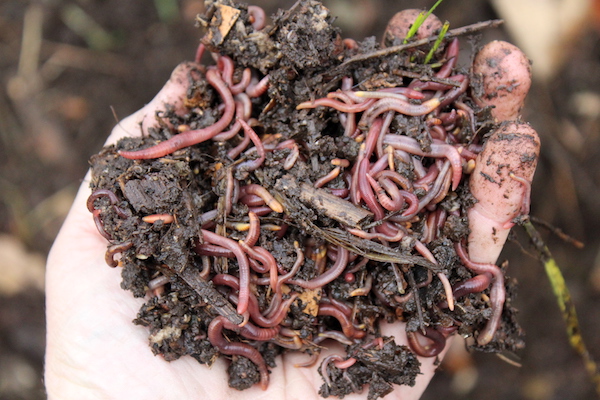
After we started adding wood ash to our compost, we noticed that it was markedly more healthy. Stick a hand into the middle of the pile, and you’ll come out with a palm-full of hard-working worms actively converting everything into nutrient-rich compost.
CONTROL POND ALGAE
Since wood ash contains micronutrients that plants need to thrive, it can also help strengthen aquatic plants. The potassium in wood ash can boost rooted aquatic plants in a pond, making them better able to compete with algae. That in turn, slows the growth of algae in a pond. Be careful not to add too much.
Use some rough math to calculate the volume of your pond, and then add about 1 tablespoon per 1,000 gallons of water.
PREVENTING PLANT FROST DAMAGE TO PLANTS
I’ve heard that dusting plants with wood ash before an early light frost can help prevent frost damage. It makes sense, as the mineral salts in wood ash would lower the freezing point of water without harming the plant tissues as other types of salt might.
Our garden is always packed or undercover early in the season so I tested this method, but it might be worth a try.
PREVENT CALCIUM DEFICIENCY IN TOMATOES
Those ugly black spots on tomatoes are often the result of calcium deficiency. Eggshells and bone meal are often added to tomato planting holes to provide them with calcium, but wood ash can do the same job. Add about 1/4 cup of wood ash to each tomato planting hole and scratch it into the soil before setting out transplants.
")
RAISING SOIL PH
As noted above, wood ash helps buffer acidic soils and can help raise soil pH if that’s needed on your particular plot. This is handy for most garden vegetables, with the exception of potatoes which grow best in slightly acidic soils.
Be aware that not all parts of the world have acidic soils, and if your soils are already alkaline then adding wood ash could cause issues.
SLUG AND SNAIL REPELLANT
Creating a circle of wood ash around crops prevents slugs and snails from crossing into plant beds. We use this around our homegrown shiitake mushrooms, which are particularly susceptible to snails and slugs.
It’s also a good solution for leafy crops like lettuce. The wood ash barrier is only effective until it rains or the ash gets wet, which is unfortunate because you’ll need to reapply regularly. The benefit, on the other hand, is that it’ll wash off easily at harvest time.

NON-TOXIC ANT REPELLANT AROUND KIDS & PETS
Placing a pile of wood ash on top of an anthill gives them notice that they need to move their nest. It won’t kill the nest, but they will have to pack up and relocate, which works great for relocating ants nests away from kids play areas.
PROTECTING BEE HIVES FROM ANTS
Generally, bees are capable of defending their own hives from intruders, but with all the challenges they currently face most hives are in a slightly weakened state. They can take all the help they can get! One of my readers suggested making a circle of ash around a beehive to help deter ants.
Since ants will move a hive in the presence of wood ash, it makes sense to me that this would help keep ants from invading a beehive to steal honey. I do not know if it would have unintended consequences, but I think it’s worth a try if ants are getting to your bees.

DUSTBATH FOR POULTRY
Since wood ash helps treat fleas and other insects, it’s perfect for helping poultry relieve themselves of parasites. Chickens and turkeys naturally dust bath to help clean their feathers of unwanted intruders and adding a bit of wood ash to the bath only helps get the message across.
Our turkeys had a particularly bad infestation of avian lice, and we filled a plastic children’s swimming pool with wood ash for them. They dove on it with excitement and spent long hours rolling in the ash. No need to apply pesticides, the birds know how to solve their own problems organically given the right tools.
No need to worry if they eat a bit since wood ash is also an avian mineral supplement…
CHICKEN FEED SUPPLEMENT
Since wood ash is high in minerals, it can be good as a food supplement for chickens in small amounts. Community Chickens notes that “Wood ash offers calcium and potassium. Adding wood ash to your chicken feed (less than 1% ratio) may help to extend a hen’s laying period and can help reduce the smell of chicken droppings.”
One of my readers also mentioned to me that charcoal bits are used to help treat eggbound chickens. A bit of further research and I found that charcoal bits are given to chickens to help prevent diarrhea and treat for intestinal parasites. So the tiny flecks of charcoal in with the ash will also help the chickens.
When using ash as a feed supplement, be especially sure that you didn’t burn anything but clean untreated wood in the stove.

HOUSEHOLD USES FOR WOOD ASH
Even if you don’t have a “homestead” or a back garden, there’s plenty of ways to use wood ashes around the house, indoors and out.
NATURAL ICE MELT
Probably one of the most practical uses for wood ash is to use it slowly over the course of the winter as ice melt. The natural minerals in wood ash work the same way as salt does to melt ice on driveways and walkways. Be careful using it near your front door though, tracking wood ash into the house makes a big mess.
We use it as ice melt on our front walkway, and once the ice has melted sweep it to the sides so we don’t track it in the house. Chemical de-icing salt really isn’t that different, and it often gets tracked into the house too.
Winter is a messy time one way or another. At least with wood ash, you don’t have to worry about it being toxic to kids and pets, as some walkway salts are.
STOVE GLASS CLEANER
Adding a bit of water to a small amount of wood ash creates an effective stove glass cleaner. Let the mildly abrasive wood ash scrub the soot off the glass so you can enjoy watching the fire all winter long.

CLEANING CLOUDY HEADLIGHTS
One of my readers told me they “make a rubbing paste from wood ashes and remove clouded headlights on a vehicle.” It makes sense because road grit and the accumulated exhaust fumes from the car in front of you isn’t that much different than dirty stove glass. It’s a bit more than Windex can clean but just right for a wood ash scrub and solvent.
SILVER POLISH
In the same way that wood ash works to clean glass, it can also polish silver. Just dampen a towel and add a bit of wood ash before working some tarnished silver.
SKUNK ODOR REMOVER
Wood ashes naturally help neutralize skunk odor on pets. If an animal gets sprayed, dust them thoroughly with wood ash and leave them outside for a few hours before giving them a thorough bath.
While this method is likely effective to an extent and may have been important historically, these days there are many better options. If you have a skunk sprayed animal, use wood ash if you have nothing else on hand, but I’d highly recommend keeping skunk off spray and skunk off pet shampoo on hand if you live in the woods as we do.

HIDING STAINS ON PAVING
Wood ash is naturally grey, and it can help cover up stains on sidewalks and paving. Simply dust a bit on and scuff it in with your boot.
CLEANING OIL SPILLS
In the same way that wood ash can be used to hide stains on concrete, it can absorb oil spills to help prevent them in the first place. My dad kept a bucket of kitty litter in the garage for cleaning up the garage floor, since it would absorb any spills. Wood ash works just as well, and it’s free.
COCKROACH REPELLANT
Spreading a bit of ash in dark corners of the house or under appliances will keep roaches out. Their hard outer shell doesn’t stand up well to wood ash, and it’ll keep them from setting up shop in your house.
CLOTHING MOTH REPELLANT
I’ve read that putting a bit of wood ash on stored clothes keeps moths from eating it. While that may work, I’d worry about ash stains. Sources say you can just dust the ash off when you take them out of storage, but I’m skeptical…
NATURAL FLEA TREATMENT FOR PETS
You may have heard of using diatomaceous earth on pets to kill fleas naturally. Wood ash works the same way. The tiny particles in the ash leave micro cuts on the hard-bodied fleas, which causes them to dry out and die.
We’ve tried this on our cat and it works well, but you need to wash it out after about 24 hours. A cat is naturally unhappy about cleaning itself when it’s covered in wood ash, so do the treatment and then help your feline friend out with a bath.

SMELL ABSORBER
Similar to baking soda, wood ash can help absorb odors around the house. Try adding a small jar to the fridge to absorb odors. It works even better if there are small pieces of charcoal still left in the ashes to help out.
DESICCANT
Wood ash can be used to absorb humidity and help prevent moist areas from developing mold. Place a cup of wood ashes in a damp cupboard or basement room. Again, small chunks of charcoal left in the ashes help for this purpose.
WOOD ASH TOOTHPASTE
I’ve heard mixed reports about wood ash toothpaste. The theory is that it works just like modern baking soda toothpaste, but I can’t find a reputable source or recipe. Those I can find mention mixing wood ash with bentonite clay and putting that on your toothbrush. To me, it sounds like a recipe for micro-scratches on your enamel and I’m not willing to risk my teeth to test it.
If you have tried wood ash toothpaste, I’d love to hear how it went (and if you found it palatable).
STAIN REMOVER
Sifted wood ash, mixed with water to form a paste, can be rubbed on stains to remove them. It works best if applied as soon as possible after the stain. I would imagine the action is similar to applying baking soda paste as a stain remover.
While I’ve read plenty of sources that verify this, I still worry about the ash actually making more stain than it fixes, but I’ve yet to test it out.
PRIMITIVE & SURVIVAL USES FOR WOOD ASH
Long before our modern wood stoves and households, humans made fire and therefore wood ash. You can bet if there was a way to put wood ashes to good use they worked hard to find it. Waste not…
TREATING WOUNDS
Wood ash has been used to clean wounds, and modern studies have shown that it actually significantly speeds wound healing. The ash is also effective as an antiseptic.
I’ve been told that wood ash is also used to treat some topical skin conditions.
BRONZE AGE MEDICINAL ASH TATTOOING (OR PRIMITIVE ACUPUNCTURE)
An archeological find from 1991 indicates that ash may have been inserted under the skin at injury sites in as a form of medicinal treatment.
Ötzi, the oldest iceman ever discovered, was found in the Swiss Alps and dated to around 3300 BC. He is most famous for carrying two mushrooms, Birch Polyspore, and Tinder Polyspore, both known to be medicinal according to modern science indicating very early use mushroom medicine. Beyond that, he’s also the oldest evidence of tattooing in the archeological record, with a total of 61 tattoos. The tattoos themselves were made by inserting wood ash under the skin, in the same way that ink is used today.
The most interesting part though is that each of the tattoos corresponds to a location on his body that had an injury. Both chronic pain like injuries such as spinal degeneration, and several acute accidents like injuries in his ankles. It’s thought that the wood ash tattooing was a traditional form of medicine similar to how acupuncture is used today in eastern societies. (Source)
HIDE TANNING WOOD ASH PRE-SOAK
Brain tanning is an ancient method of preserving hides and helps keep them soft and supple for clothing. I found a reference on a brain tanning instructional site that mentions that a wood ash soak was used by Neolithic peoples for tanning, but also by more modern native American peoples:
“Many tribes soaked their skins in wood-ash water prior to scraping. The reason for this is often credited to the ashes causing the hair to fall out. The real value of the ashes lies in the alkalinity’s ability to disrupt the mucoid bonds. It opens the structure in two to four days… By adding ash to your pre-scraping soak, you can get complete brain penetration in one simple braining with fresh hides.”

REMOVING TANNINS FROM ACORNS
Acorns were a staple food supply for ancient peoples around the globe, not just native Americans. They were critical to the stone age and iron age food supply in Greece, Italy, Spain, North Africa and throughout Asia. The earliest direct evidence of their importance in the food supply comes from an archeological site in Morrocco dated to around 15,000 BC.
All acorns must be leached of tannins prior to consumption, regardless of the type of acorn or the peoples that consumed them. Leaching strategies differed across regions, but most involved soaking the acorns in several changes of water to remove the water-soluble tannin, leaving a sweet, nutritious acorn flour.
While adding wood ash to acorn leaching is not strictly necessary, its use as a leaching agent arose in multiple locations across the globe. The theory is that wood ash helps to leach tannins more effectively, binding them so that they are removed from the acorn flour easier. The flavor is changed in the process, and sources I’ve read noted that the resulting acorns taste more like pickled olives than starchy nuts. Depending on the tastes fo the culture, this may have been seen as a positive or negative change, but regardless, the consensus was this processing step rendered the acorn flour more nutritious and digestible.
This fall, we harvested a large crop of acorns and I’m still slowly working through processing them all into flour, acorn coffee, roast acorn nuts and all manner of delicious acorn based foods. Thus far I’ve only done hot water and cold water leaches, but I’ve saved some aside for wood ash leaching this winter, with fresh clean hardwood ashes from our woodstove.

ICELANDIC MOSS
Iceland may be beautiful, but it isn’t exactly known for being the land of milk and honey. Before modern trade, life was hard and the traditional cuisine reflects that. The Nordic Cookbook (which is one of my favorite cookbooks of all time, seriously read it…) describes how Icelandic moss was prepared using wood ash, to leach out the toxins and render it edible:
“[Icelandic Moss] is rich in carbohydrates and has historically been of vital importance as a source of food in the region. It contains a lot of mildly toxic lichenic acid, which will upset your tummy and taste very bitter. The lichen was traditionally made digestible by soaking it before cooking in potash, a potassium carbonate solution produced by soaking wood ashes in water.”
He then describes how the lichen was eaten with porridge or other grains to help add calories during lean times. He notes that some traditional Icelandic breads that you can buy in the store still contain ash treated lichen as an ingredient. You can buy Icelandic Moss by the pound for use in recipes, cosmetics and for medicinal use.
PUTTING OUT A FIRE
The most obvious and practical use for ashes in a primitive world is putting out the fire. Simply bury a campfire in ashes to help smother it.
OUTHOUSE DEODORIZER
Since wood ash helps absorb the smell and boosts compost, it can work double duty in an outhouse or composting toilet. Add a small amount to help boost speed the breakdown, but be careful not too add too much and change the chemistry too much.
It might also be helpful on extended camping trips…
WOOD ASH POTTERY GLAZE
An ancient form of pottery glaze that is still used today, wood ash glazes originate around 1500 bc in China. We’ve played around a bit with making primitive pottery, harvesting the clay from our own backyard. I’m excited about trying out wood ash glazes on our homemade bowls. Here are detailed instructions on how to turn fireplace ash into a glaze, along with a bit more of the history behind wood ash glazes.
")
WOOD ASH SOAP
The idea for soap had to come from somewhere and as the story goes, soap was discovered when rain combined with cooking ashes and animal fat drippings, resulting in primitive soapy water. Obviously, the process has been refined since then, but you can still make soap with wood ash lye and fats.
WOOD ASH CEMENT
You can make a primitive wood ash cement by mixing wood ash with terra cotta. There’s a process to it, and this video from primitive technology demonstrates all the steps (turn on the subtitles for a more detailed description of what’s going on).
WOOD ASH LEVENING
Wood ash is an alkalizing agent, like baking soda. For the most part, straight wood ash wasn’t added directly to baked goods because it added a lot of ash flavor along with lift. More often it was processed into potash and then pearl ash, more on that in a minute. Still, there are some records of wood ash being added directly to baked goods as a leavener. One particular Native American Dish that uses wood ashes directly in the batter is Piki, or hopi blue corn pancakes, which I discuss later.
According to Joe Pastry who writes about historical cooking and food chemistry, “It was Native Americans who first invented chemical leavening, using ashes as they did to “lighten” grain cakes…. ashes contain alkaline salts. Put them into a wet grain porridge and the result will be bubbles. Not a lot of bubbles mind you, but enough to make a difference in the cooked porridge cake’s texture.”
I was all fired up to put wood ash leavening to the test, but then I found a site called Homestead Laboratory that had already done extensive experiments leavening biscuits with wood ashes and wood ash water. In the end, they made some pretty good looking wood ash leavened biscuits.
POT ASH LEVENING
When the European settlers saw native Americans using wood ashes for leavening, they started to work with chemical leaveners too. Baking soda didn’t come into use until the 1860s, and before that yeast and whipped egg whites were the primary leaveners in Europe. They weren’t the only leaveners though, and a compound refined from wood ash known as “pot ash” was an alkali that reacted with acidic ingredients in the recipe like buttermilk or honey.
Potash is still used in many traditional Scandinavian holiday recipes, as well as traditional german and eastern European baked goods. It’s still sold in Europe around the holidays, and there are online sources to purchase baking potash as well.
The downside is that potash tends to give baked goods a woodsy or smokey flavor, and people accepted that when there were no other options for levening holiday treats, but when better options became available potash levening was quickly abandoned.
The book Caveman Chemistry contains detailed instructions on making potash from wood ashes, including all the applicable chemical reactions. If you’re interested in a fun science book that’ll really get kids engaged and will help everyone learn lost skills in the process, I’d highly recommend it.
The instructions are also on the caveman chemistry website:
“Whatever we extract from wood ashes must be there to begin with. Wood ashes are a complex heterogeneous mixture of all the non-flammable, non-volatile minerals which remain after the wood and charcoal have burned away. Because of the presence of carbon dioxide in the fire gases, many of these minerals will have been converted to carbonates. Burned soil may also be present. So the ashes probably contain predominately sodium and potassium carbonate, sodium and potassium chloride, silica, and calcium carbonate.
If we add the ashes to water, the soluble potassium and sodium salts will dissolve while the insoluble silica and calcium carbonate will settle to the bottom. We can then drain off the water (containing the “good stuff”) and throw the insoluble material away. To separate the chlorides from the soluble carbonates, we will exploit the greater solubility of the carbonates in hot water.
We will bring the liquid to a boil and continue boiling until enough water boils away for an insoluble precipitate to form. This is very likely a mixture of sodium and potassium chloride. From this point, we will continue boiling until half of the remaining water is removed. At this point, we can be reasonably certain that only the soluble carbonates remain in solution. We will carefully pour off the hot liquid into another container, leaving the solid material behind.
As the liquid cools to room temperature, the less soluble sodium carbonate will precipitate leaving the more soluble potassium carbonate in solution. Finally, the remaining solution can be drained off and boiled to dryness, producing solid potassium carbonate.
One of the observations you make should be that it takes a lot of wood to make a little ash and a lot of ash to make a little potash. Thus, while it is not particularly difficult to extract potash from wood, you will go through an enormous amount of wood to produce commercial amounts (pounds and tons) of potash.”
PEARL ASH LEVENING
After potash came pearl ash, or a refined form of potash. It no longer gave baked goods a smokey flavor, but it still wasn’t as clean as modern baking soda. When used in recipes that contained a lot of fats, pearl ash would give the food a soapy aftertaste so it was quickly abandoned once baking soda came to the market.
King Arthur Flour describes the process for making pearl ash from raw wood ashes, “To make pearlash, you first have to make potash which itself is made from lye. To make lye, you pass water through a barrel of hardwood ashes over and over until an egg can float on the residue. (To make soap you boil this “lye water” with lard or other fat until it is thick, pour it into molds and harden it into cakes.) To make potash, you evaporate lye water until you have a solid. Pearlash is a purified version of potash.”
Their description stops before the refining process, but I found another source that says, “The potash was refined in a kiln at a high temperature to burn off the impurities. The resulting white salt or ‘pearl ash’ (potassium carbonate or salt of tartar) was water-soluble, and formed a strongly alkaline solution.”
RECIPES USING WOOD ASH
I know, you’re skeptical here. Eating wood ash, seriously? It’s actually a part of a number of traditional cuisines, and some recipes just can’t be made without it. Wood ash is also used in haute cuisine to create unique flavors, and each type of wood has its own characteristics.
HOMINY
Native Americans soaked field corn in lye made from wood ashes helps to render make certain B vitamins bio-available, which can prevent nutritional deficiencies. (source)
PRETZELS
If you’ve ever made homemade soft pretzels, you know they’re boiled in baking soda water before being baked. Historically, they were boiled in lye water instead, made by mixing wood ash with water and then straining. Lye is also used in other bread to keep the dough soft and prevent crumbling.

BAGELS
Similar to pretzels, bagels used to be made with lye water, and according to the New York Times, it’s hard to make a good bagel without lye. The lye on the outside of the bagel helps to create a chemical reaction in the oven, which makes them extra brown and crispy. All the lye itself is removed by the heat of the oven, leaving crispy browned bagels with a soft interior.
CHEESEMAKING
There are a number of cheeses that include a wood ash layer in the cheese, and others that are coated in wood ash. That wood ash serves a purpose, and just as it reduces the acidity in soil, wood ash also makes the cheese less acidic.
“Where the cheese has a high acidity such as fresh acid cheeses (cheese made without the use of or minimal use of rennet; most of the cheeses mentioned above are this style) the ash will neutralize the surface acidity. The surface flora required of those cheeses, some added to the milk and some occurs naturally, do not grow well in very acid environments but will grow earlier than would be expected if ash is added and results in a more complex microflora of the final cheese. The ash in this situation also restricts the growth of unwanted microflora.” (Source)

WOOD ASH PICKLES
While these days people use something called “pickle crisp” made from a calcium compound to keep pickles crisp, they used to be made with a lye solution soak.
According to a food science textbook, “Lye is an alkali (a mixture of sodium and potassium hydroxides) traditionally obtained by leaching wood ashes. We have to be a little cautious with regard to the role of lye in pickling. Firstly, it does not, being alkali, contribute to the pickling process per se, but to the breaking down of food matter as an aid or adjunct to pickling.”
CURING OLIVES
While wood ash curing is optional for cucumber pickles, it’s absolutely required for curing olives, which is only the beginning of traditional wood ash use in Mediterranean cuisine…

MOUSTALEVRIA
A Greek grape must pudding was made with lye water.
One writer describes the process, “Traditionally the grape wood was made with wood ash to reduce the bitterness of the wine and remove the impurities from the must. If the grapes were very ripe and sweet, the addition of ash or baking soda is not necessary.
How to use the wood ashes: (please, pure wood, no paper no other additions!) Boil must with ashes, let sit overnight, strain and let sit for a few hours again, strain again. I this way you will remove the grape sediment as well as the ashes completely!” The ashes themselves do not end up in the dish, but the “lye water extract” is made from wood ashes.
MELOMAKARONA
Greek honey cookies contain lye water as an ingredient. About 1/4 cup of wood ashes are soaked in 1 liter of water, and then the water is filtered through very fine cloth. The resulting lye water goes right into the cookie batter.
PIKI (HOPI BLUE CORN CAKES)
Piki is a native American bread that is leavened directly with wood ashes, rather than wood ash water like many of the others. According to Wikipedia, “Blue corn, a staple grain of the Hopi, is first reduced to a fine powder on a metate.
It is then mixed with water and burnt ashes of native bushes or juniper trees for purposes of nixtamalization (nutritional modification of corn by means of lime or other alkali). The thin batter is then smeared by hand over a large flat baking stone that has been heated over a fire and coated with oil made from pounded seeds of the native American plants squash and sunflower…Piki bread bakes almost instantaneously and is peeled from the rock in sheets so thin they are translucent.
Several sheets of the bread are often rolled up loosely into flattened scrolls.”
I would love to find a recipe from a more reliable source than Wikipedia, and if you know of a reputable book or study article that contains instructions for making Piki let me know in the comments.
")
NIGERIAN AKANWU OR KAUN
Nigerian cooks use wood ashes to make a type of potash that is used in cooking, known as Akanwu or Kuan.
One source notes, “Potash (Kaun) is edible and is usually used for cooking pulses like beans… in order to tenderize the pulses so easily. Akanwu is also added in ewedu and okro soup during preparations in order to boost the viscosity as well as to increase the greenness and texture of the vegetables. It is used for mixing water and oil while preparing local dishes like abacha, ugba, and nkwobi.”
It’s still readily available for purchase online to make traditional recipes.
CHINESE NOODLES
Some types of Chinese noodles are made with lye water, which gives them a distinctive yellow color, chewy texture and subtly eggy taste (source).
CHINESE MOON CAKES
Another baked good made with lye water to help the dough stay soft and the outside brown during cooking.

LUTFISK
A Norwegian dish, lutfisk is made by soaking salt cod in a bucket of lye water made from wood ashes for several days. It gives the fish a gelatinous texture.
SURSTRÖMMING
A Swedish fish dish, it’s made from herring prepared is also prepared using wood ashes.
WOOD ASH SEASONING
The book Original Local discusses native American uses for wood ash to season food. The author says once you try maple ash on a meal, “you will want to fill a shaker and use it regularly.” Buffalo Bird Woman also mentions using the ash from elm and cottonwood trees in the same way. Beyond wood, other tribes extracted salt from plants with fire, namely coltsfoot, and goosefoot, and used the ash as a seasoning.

WOOD ASHES FOR FOOD PRESERVATION
Besides using wood ashes or wood ash extracts directly in the food, they’ve also been used as a preservative. Wood ash contains natural salts, and repels pests too.
PRESERVING EGGS IN WOOD ASH
Historically, having eggs year-round was a bit of a challenge. Chickens stop laying in the coldest part of winter, right when holiday baking is at its peak. Eggs can be stored in a variety of ways, but one of the simplest (and most effective) is simply covering whole, unwashed eggs in sifted wood ashes. They’ll keep for months in a cool dark cellar that way. Some sources say up to a year…
The problem is the ashes flavor the eggs a bit, and they’ll have a musty flavor after a few months. There are plenty of other better ways to preserve eggs even without refrigeration, so this isn’t high on the list.
1,000 YEAR EGGS
While whole eggs placed in wood ash will keep for an extended period, they very different than thousand-year eggs. This Chinese dish is made by “coating duck or chicken eggs in a paste of clay, wood ash, tea, lime, and salt, then burying them – separated by rice straw to stop them from sticking together – for a mere 100 days or so. The resultant egg, once you have washed off the foul-smelling gunk and peeled and sliced it, has a grey-green yolk and a dark, translucent, bottle green ‘white’.” (source)
")
TOMATOES PRESERVED IN WOOD ASH
A few years back I read an article about a farmer in Africa that discovered a technique to preserve tomatoes for months, simply by covering them in wood ashes. Since the tomatoes are all harvested at once, he can store his and sell them at a higher price later once the market is no longer flooded.
PRESERVING SEEDS IN WOOD ASH
In moist climates where seeds are susceptible to fungus (or insect infestation), studies have shown that storing seeds in wood ash is effective in both preventing rot and insect predation. Corn, bean and melon seeds were used in the study.
CHEESE PRESERVED IN WOOD ASH
The book Preserving Food without Freezing or Canning describes a method for preserving cheese in wood ash. “Take a piece of Gruyere that is not too thin. Put it in a stoneware pot and surround the cheese with one to one and a half inches of sifted wood ashes. Store the pot in the cellar. Three months later, the cheese will be as fresh as when it was stored.”
I decided to give this a try and I got a ceramic preservation crock, added wood ashes and a thick cut of gruyere cheese. I left it there for three months as suggested, and I was pleasantly surprised when I pulled it out. Not only was it still good, but the flavor had actually improved!
The whole process and results are detailed in my article on preserving cheese in wood ash.

PRESERVING RENNET
I’ve seen multiple sites claiming that rennet for cheesemaking was stored in a horn, which was sealed in a paste made from wood ash for preservation. Since modern rennet is refrigerated to keep it from denaturing, it makes sense that they would have needed some technique to preserve rennet. However, I can’t seem to find any reputable source for this information.
COSMETIC USES FOR WOOD ASH
Long before synthetic cosmetics and dyes, used what they had as cosmetics. There are many references in ancient Greek and Roman texts to depilatory agents, and the use of makeup is centuries old. Given that even modern makeup brands market products explicitly to give you a “charred ash look” it’s only natural that wood ash was used in ancient cosmetics.
WOOD ASH MAKEUP
According to Dress and the Roman Woman, a dark eyeshadow called Kohl was made by mixing ashes with other darkening agents, along with a bit of saffron to improve the smell. The powder was then applied with a dampened or oiled stick. Along with dark ashy eye shadow, dark thick eyebrows that almost met in the center were popular, and ashes were used to create the near “uni-brow” look that was fashionable at the time.

HAIR DYE PRETREATMENT
A peer-reviewed scientific study looked into using wood ash, specifically from eucalyptus wood, to pretreat grey hair before dying. The hair was then dyed with pigments extracted from purple corn, which makes it all the more interesting to me since the entire process involved natural and historical ingredients.
The study notes that the “Alkalinizing agents such as ammonia and ethanolamine are commonly used as hair pre-treatments to loosen hair scales and remove the natural cuticle lipids, which enables penetration of dyes across the cuticle and into the cortex of the hair shaft. However, strong alkalis and hydrogen peroxide can also oxidize cysteine, resulting in irreversible damage to the structure of the hair.”
Using wood ash instead of a more caustic peroxide can help the dye to adhere without damaging the structure of the hair.
REMOVING HAIR DYE FROM SKIN
One of my readers mentioned that she’d used wood ash “to remove hair dye from the scalp in the past, and it worked really well, just dabbed a bit on a wet cloth and rubbed it away.” I did a bit more research, and several beauty sites and cleaning sites recommend using cigarette ash to remove hair dye from the scalp or skin.
I guess these days cigarette ash is more accessible than wood ash to many people, but it’s good to know that both work to remove hair dye from skin.
HAIR REMOVAL
An article on historical hair removal strategies mentions that wood ash was used to remove hair in a few different ways: “To remove hair from the nostrils – Take some very fine and clean wood ashes; dilute them with a little water, and with the finger rub some of the mixture within the nostrils. The hair will be removed without causing the least pain.”
High foreheads used to be in vogue, even when my grandmother was a child. Historical references note that women used to wrap their foreheads in linens soaked in wood ash water (among other things) to cause their hair to fall out along the edge of their hairline, thus producing a high forehead.
OTHER USES FOR WOOD ASH?
I spent a while putting this list together, but I know that this list just barely scratches the surface. I’d love to hear any if you’ve experimented with any other ways to use wood ash. Old stories your grandpap used to tell, or just about any creative ideas you have. Share in the comments below.

source: https://practicalselfreliance.com


.png)

