In this tutorial you will learn how to create a classic pin-up with a traditional tattoo art finish. Using ink liners, watercolour paints and water-based markers, we will create a bold, stylised portrait focusing on strong lines, exaggerated features and solid colour. As this is not a classic realistic portrait, it allows you as an artist to be innovative and have fun with the design.
The pin-up girl dates back to the 1890s, when men's magazines featured scantily clad, glamorous models and actresses that their readers could 'pin up' on their walls. They moved into the realm of tattooing in the Second World War when soldiers immortalised beautiful women on their skin to carry with them at all times. The tradition of the pin-up and pin-up tattoo is as strong today in many different guises and for everyone, not just the soldier.
If you're wanting to look further into this style, check out the following sources of inspiration: Sailor Jerry, Vargas girls, Gil Elvgren and Photoplay magazine.
What You'll Need
You will need the following equipment and materials in order to complete this tutorial:


- Tracing paper, any kind or weight
- Watercolour paper (I used Saunders Waterford 300gsm/140lb)
- Tracedown graphite paper
- B Lead pencil (I use a mechanical pencil, lead size 0.7 mm)
- Red coloured pencil or replacement leads for the mechanical pencil, size 0.7 mm
- Bold Faber-Castell artist pen
- Ink fine liner pen, size 0.8
- Watercolour brushes (I used Pro Arte Prolene plus size 7 and 5)
- Dr. Ph. Martin's radiant concentrated watercolours in black, antelope brown, scarlet, ice blue, sunset orange, grass green and Tahiti red
- Watercolour paint tray
- Posca, or equivalent, water-based marker in red, size 3 mm
- Masking tape
1. Start With a Grid
Step 1
Use standard anatomy principles to form a face shape. I have chosen to demonstrate a 3/4 view of the face with a slightly upward tilt. You are looking to create an egg shape, tilted to the 3/4 angle.
Next, draw a line to indicate the centre line—this should move from the top of the head in an arc to the point of the chin, and will form a guideline to split the face into two parts.
Now section the face shape using three lines, which will help form the guidelines for the position of the eyes, nose and mouth. The top line should be roughly halfway down, and as she has an upward look should arc from left to right, reaching a higher point on the right side.
The following two lines should follow the same trajectory, with the width between the first and second being slightly bigger than the second and third. Finally add a second through the three lines from top to bottom, following the first line drawn to form a guideline for eye positioning, width of nose and mouth, and hair parting.

Step 2
Now to form the neck and shoulder. The neck line is around 1/2 inch from the chin point and 1 cm long, because when we add the shoulder line it will create an impression of her looking back over her shoulder. The shoulder line is the shape of a candy cane and angled forward to add to the slightly coquettish look.

Step 3
At this put the fun starts as we create the face. I find it easier to use a coloured pencil for this so that it doesn't become too confusing and you can clearly see the grid underneath as you add the details.
Use the facial grid as follows, matching the points on the grid. Tattoo pin-ups tend to have exaggerated features such as big, heavily lashed eyes and pouty mouths. My pin-up is looking upward, but you can play around with the positioning of the eyes to give different looks.

Also have fun with the hair. It should be big and voluminous. I have opted for a vintage 40s look like seen on Rita Hayworth or Lauren Bacall, which should have soft waves and fall in a curving sweep over the shoulder. A side parting was very common in this era, and I've added a little curl onto the face to give a slight softness to the style. Hair accessories were also de rigueur in the 40s, and I've chosen a rose as it is a very traditional tattoo element, but you could also use any flower, ribbons, headscarves or hair accessories.
2. Transfer Your Draft Using Tracing Paper
Step 1
Using a fresh sheet of tracing paper, overlay the sketch and redraw, omitting the original grid for the finished basic design.

Step 2
Take the tracedown paper and cut a section so that it measures slightly smaller than the watercolour paper, trimming the basic design so that it matches the measurements of the tracedown.
Now you need to layer them. Place the tracedown centrally, graphite side down onto the watercolour paper, next the tracing of your basic design on the top, again centrally.
At this point I would recommend using masking tape to secure everything together, taping the tracedown and tracing paper to the watercolour sheet, because if any of the sheets shift while you are completing this process, the portrait will be compromised.
Once secure, using a pencil, follow the lines of your drawing, using a medium pressure to transfer the pin-up to the watercolour paper at the bottom. Remove the top two sheets.

Step 3
Now we have the first stage of the finished artwork. Take the bold artist pen and draw over the graphite lines.
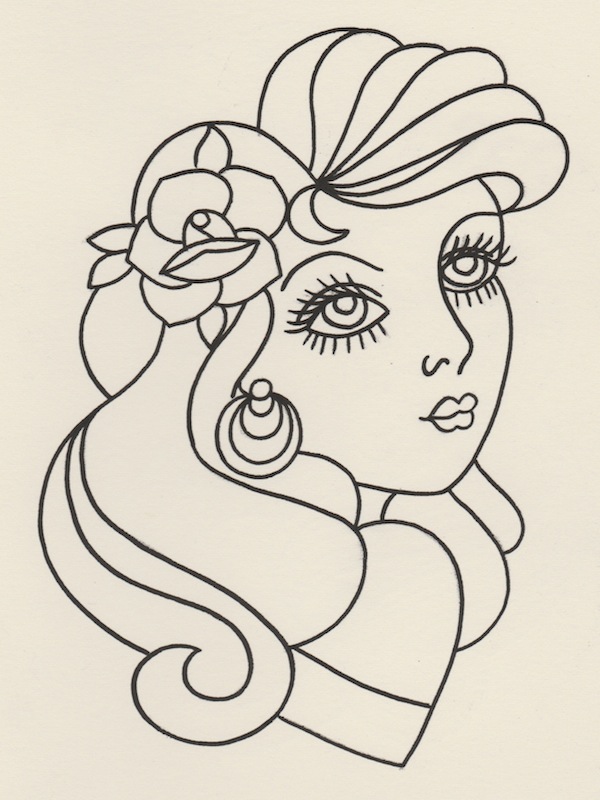
3. Add Line Art Detailing
Add texture details to the hair. This should be done with the 0.8 fine line pen to give a more delicate touch to the hair and follow the basic shape of each section of the hair. The lines do not need to be uniform or the same distance apart. It is fun to be quite free at this point and allow your hand to glide the pen within the different sections.
Using the same fine liner, fill in the pupil of the eye, leaving a small white circle in the top left corner of the pupil that will act as a reflection of light.

4. Add Colour to Your Illustration
Step 1
We will now begin to paint. I would recommend keeping a second piece of watercolour paper next to you while painting to test out colour washes before application to the design. This way the correct shade can be practised before working on your finished artwork.
Add the watercolour dyes to the separate compartments of the painting tray. Leave a few spare to mix colour if necessary.
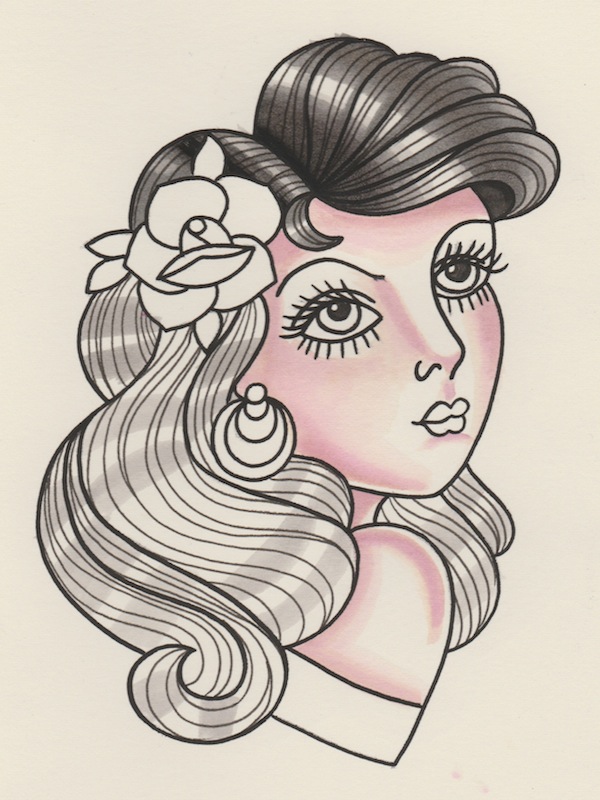
Using the black dye, watered down to 1 part black 4 parts water, start to mark out the shine of the hair with the size 7 brush. When painting a tattoo pin-up, the shine of the hair is very important, as it shows depth and gives a glossy, bouncy feel. The lightest parts are always at the hair's natural high points, which often match with the fattest point of the section of hair.
Use the Tahiti red dye to add the basic shading tones to the face. These areas are the high forehead, cheeks, nose, lip philtrum, chin, jawline, neck and shoulder. Add water gradually to get a smooth gradient from a darker to lighter tone.

I think it is advisable to work from light to dark when starting to learn to paint with watercolour dyes, as it is easier to darken than to lighten, therefore helping to avoid mistakes.
Step 2
Start to darken the hair using pure black dye. Work from the darkest point, gradually adding water to the brush to dilute the black and achieve a good gradient. Work the brush widthways in each section of hair, using smooth strokes. Keep a piece of paper towel or soft cloth to hand to absorb any excess water on the brush if necessary. Always leave a strip of unpainted hair at the highest light point to maintain the shine.
Step 3
Continue shading the hair—this may take several layers of colour.
Now we can move on to darkening the skin tone using brown, which you should again mix with water and test on the practice sheet until you find a good colour.
Sweep over the darker areas of the forehead, cheeks, nose, jawline neck and shoulder to get a good, smooth skin tone. Add a slightly darker line, using the size 5 brush, to the lip philtrum to give definition.
The eyes are a key feature so should be dark and alluring. To achieve this, mix brown and black to a nice rich tone and sweep over the upper and lower eye, leaving a lighter tone just above the eye to give contrast to the deeper section of the eye socket.

Step 4
The cheeks should be a dark red/pink tone, in the unrealistic and exaggerated style that is typical of a tattoo pin-up. Work in a downward circular motion from under the eye, and be bold at this point as this adds to the stylised approach of the portrait.

Step 5
This is the final stage of finishing off the pin-up portrait, adding small details and smoothing out the painting.
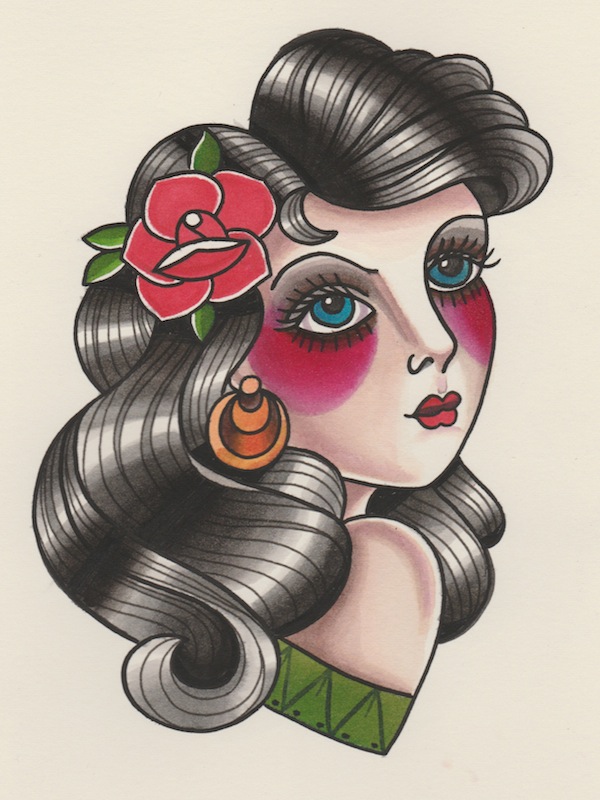
Smooth out any of the tones in the hair, adding more black if necessary. Add ice blue to the eyes and a pale wash line to emphasise the eyeball. Add orange and brown to the earring, and green to the leaves and fabric. Get a darker green by adding a touch of black, and use the size 5 brush to add a pattern to the fabric.
Again, at this point be creative and go as wild as you desire with the pattern. I chose a very simple pattern to give you a basic idea. Add a black shadow to the lower line of the upper lip, and then at this point move to the water-based marker and fill the lips and rose to give a nice, solid, true colour. As you can see, I have left a small, uncoloured line at the edge of each leaf and petal, as this gives that tattoo feel to the piece.
And Here Is the Finished Artwork...
Drawing and painting in a tattoo style allows the artist a great deal of freedom within the design and execution of a pin-up, as there are no realistic rules to strictly follow, so be brave and daring with your work. I hope you've enjoyed this tutorial and go away with a better understanding of working in a quirky tattoo style using traditional methods of painting.