Ever wanted to create your own magazine or learn more about publishing design? In this tutorial I’ll show you how simple it is to create your own magazine template in Adobe InDesign, which you can use as a foundation for your own creative magazine designs.
On the hunt for an instant template which you can quickly customize? You’ll find a huge range of great-value, stylish magazine templates on GraphicRiver and Envato Elements—a great choice if you're in a hurry!

In this tutorial, which is suitable for beginner or intermediate users of InDesign, we’ll be creating the blank template for the magazine so that it's ready for you to come back to again and again in your own magazine design projects. Here I’ll guide you through the technical aspects of creating the inside pages and cover of your magazine, including setting up sections, masters, page numbers, and headers.
Ready to dive in? Fantastic, let’s get started...
1. How to Create Your Cover Template in InDesign
It’s much easier to split your magazine template into two separate documents—a cover (including the front and back of the cover, plus a spine) and the inside pages. As you would have to export these separately for printing anyway, this is a good first step to help you feel organized and in control of your magazine as you design.
Let’s create the cover template first.
Step 1
Open up Adobe InDesign and go to File > New > Document.
In the New Document window that opens, keep the Intent set to Print. Set the Number of Pages to 1 and deselect Facing Pages.
Under Page Size, choose US Magazine*, and keep the Orientation set to Portrait.
Set the Margins on all sides to an equal width—here I’ve gone for 13 mm. Finally, add a Bleed of 5 mm on all sides of the page.

Click OK to create the magazine.

* A note on page sizing—Magazines come in a range of sizes, and these sizes will vary depending on the type of magazine you are publishing and where you are publishing it. Look up standard magazine sizes for your country online. This will give you a good idea of what is normal for printers producing magazines in bulk and also what is acceptable for retailers stocking magazines. However, if you’re creating a magazine for a more local audience, e.g. a college magazine or a shop lookbook, you can be more flexible with sizing.
Step 2
Expand the Pages panel (Window > Pages), which is docked to the right side of your workspace. This page, Page 1, will form the front of our cover.

In the Pages panel, click and drag the Page 1 icon onto the Create New Page button at the bottom of the panel, to duplicate the page. This will be the reverse side of your cover.

Step 3
From the Pages panel’s drop-down menu, click on Allow Document Pages to Shuffle.

Grab Page 2 (the back of your cover) in the Pages panel and drag it up to the left side of Page 1, dropping it into place when you see a black bracket appear ([).

Step 4
With your cursor still placed on the back cover page (which is now Page 1), click on the Create New Page button at the bottom of the panel.
This will insert a new page directly into the middle of the spread. This page will be the spine of your cover. By creating it as a separate page, you can easily change the width to suit the number of pages in your issue.

To do this, select the Page Tool (Shift-P) from the Tools panel and click once onto the central page to select it.

To make the spine width quite narrow, you’ll probably have to reduce the margin size of this page to allow InDesign to compress the page. Go to Layout > Margins and Columns, and from here reduce the Margins to something like 1 or 2 mm. Click OK.

Then, from the Controls panel at the top of the screen, set the new Width of the page. Here, I’ve set it to 10 mm.


You’ve now got an easy-to-edit cover template, ready for embellishing with your own designs!

Awesome work! Let’s take a look at how to set up the inside pages of your magazine template...
2. How to Set Up the Inside Pages of Your Magazine
Now that you’ve got your cover template prepared, you can move on to setting up the inside pages of your magazine. This takes a little more time, but once you’ve finished it, you’ll have a flexible template which is super easy to adapt to different magazine genres.
Step 1
Go to File > New > Document in InDesign and, as before, set the Intent to Print.
For now, set the Number of Pages to an even number—here I’ve opted for 16 pages. This will create an opening right-hand page and closing left-hand page for your magazine, but you can easily add or subtract spreads later as you work on your magazine design. Make sure that Facing Pages remains checked.
For Page Size, set the Width and Height to match the dimensions you set for your cover. Here, I’ve chosen US Magazine from the drop-down menu.

Step 2
It’s very important to set appropriate margins for your magazine. If the way in which your magazine is to be bound will allow the reader to open the magazine fully, with all elements across the inside edge (the inside of the spine) visible, you can create even margins across all edges of the page. This is appropriate if your magazine is going to be stapled or saddle-stitched, or if it's very slim.
If your magazine has around 30 pages or more, it will probably need to be perfect bound, where the pages are glued into the spine of the cover casing. If this is the case, you will need to make the inside margin more generous. This forces content slightly off-center, allowing more blank space on the inside edge, which will be sucked into the spine by the bind.
Let’s set up our template to have margins which would suit a perfect-bound magazine. Set the Top margin to 13 mm, the Bottom to 14 mm (this allows a little more room for page numbers and helps your layouts to look more elegant), Outside to 13 mm, and Inside to a slightly more generous 14 mm (if your magazine is going to be very thick, you might want to add an extra millimeter or two to this).

Finally, add a Bleed of 5 mm to all edges of the page, except the Inside edge, which you can set to 0 mm. As the document will be made up of facing two-page spreads, you won’t need a bleed on the inside edge.

Click OK to create the document.

3. How to Add Consistent Elements to Your Magazine
Flick through any magazine and you’ll notice that there are always a few consistent elements applied across the pages. The three main consistencies in any magazine layout are column structure, page numbers, and running headers. If you use master pages in InDesign, these are quick and simple to set up, and they will help you to promote a uniform look across your magazine.
Step 1
With your inside pages template still open, go to the Pages panel (Window > Pages) and double-click on the A-Master icon in the top section of the panel. This will open up the master on your screen.

The pages of your magazine will likely be made up of both text and images for the most part, and creating a basic column structure for your pages will allow you to channel text and images into a consistent grid layout.
Highlight both pages of the A-Master in the Pages panel, and head up to Layout > Margins & Columns. Increase the Number of columns to 2 or 3, depending on your preference. Increasing the Gutter between them to between 5 and 10 mm will help to keep the columns of text nice and separate. Click OK.

Step 2
From the Pages panel’s drop-down menu, choose Master Options for “A-Master”.

Rename the master ‘Master - Inside Spread’ and click OK. This master will be the generic master for most of the pages in your magazine.

Step 3
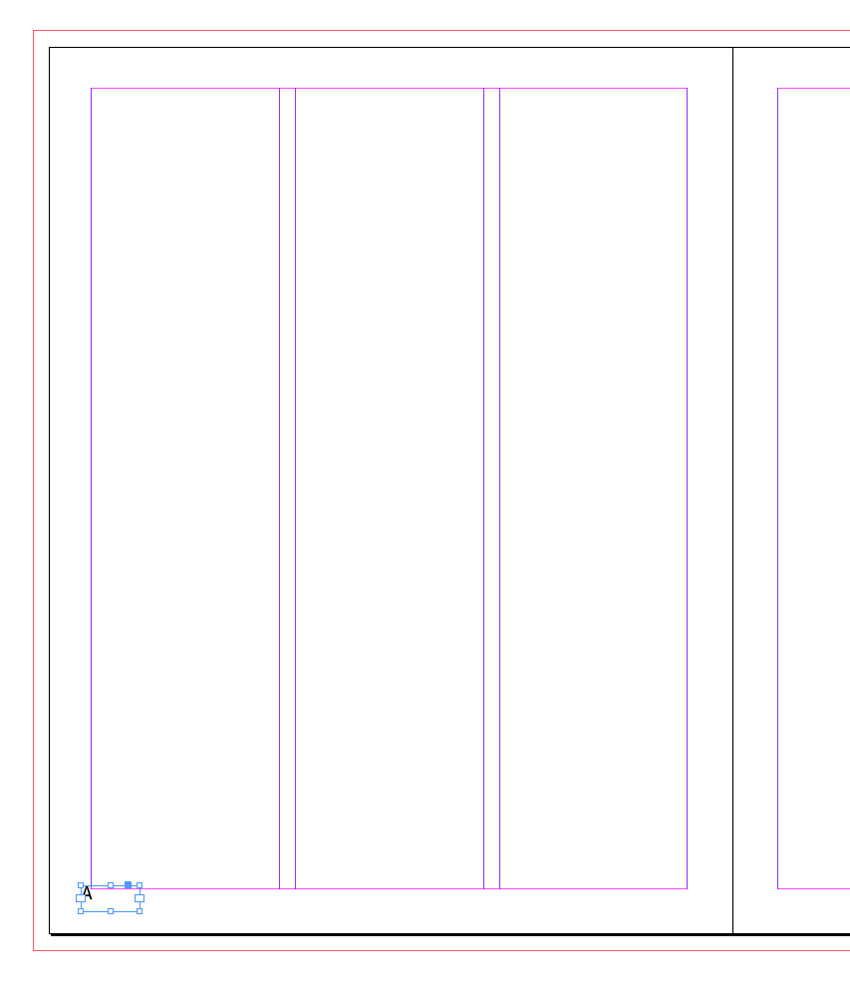
Take the Type Tool (T) and drag to create a small text frame in the far-right bottom corner of the right-hand page of the A-Master spread. Set your type cursor into the frame and head up to Type > Insert Special Character > Markers > Current Page Number.

InDesign will drop an ‘A’ character into the frame, which you can format with your own choice of font, color and size using either the Character Formatting Controls panel at the top of the workspace or the Character panel (Window > Type & Tables > Character).
InDesign will adapt the ‘A’ to the page number of any page in your document which has the A-Master applied to it.

Select the page number text frame and Edit > Copy, Edit > Paste. Move into a mirrored position at the bottom-left corner of the left-hand page, and adjust the text to Align Left.
Step 4
Take the Type Tool (T) again and create a longer text frame across the top left corner of the left-hand page. Type in ‘MAGAZINE NAME’ and, as before, adjust the formatting until you’re happy with the result.
Then Edit > Copy, Edit > Paste the text frame, moving over to the right page, and adjust the text to read ‘ISSUE NO. MONTH’. Adjust the text to Align Right.

When you start designing your magazine, you can easily head back into the A-Master and adjust these to adapt to the magazine title, issue number, and date.
Step 5
Select the Type Tool (T) and drag onto the left-hand page, creating a text frame that fits neatly within the first column. Allow the top of the text frame to sit a bit below the magazine title text frame, and the bottom to sit a bit above the page number text frame.
Select the text frame and Copy and Paste it repeatedly, moving a new text frame into each column.
Finally, hover over the bottom-right corner of the first text frame, and click on the blank white square you can find there. A chain link symbol will appear next to your cursor. Click into the next column along, linking the first text frame to the second. Repeat until all the columns are linked in a sequence.

This means that when you have a full page of text in your magazine, you can simply Place or Paste text directly into the column structure, and the text will flow automatically throughout the column sequence. This is a neat little timesaver when putting together long magazine layouts.
Step 6
Not every page of your magazine layout needs to feature page numbers, and indeed sometimes the opening pages of features or articles look better without page numbers. For this, we can create a new master.
Select the A-Master page icon in the Pages panel and choose Duplicate Master Spread “A-Master - Inside Spread”. This will create a new B-Master.

Select the B-Master icon, and choose Master Options for B-Master from the menu.

Rename the master ‘Master - Article Opening Spread’ and click OK.

Step 7
Double-click the B-Master icon to open it up on screen. You can edit this spread to better suit the opening spread of a feature. Say, for example, you wanted to use a full-size picture across the spread to announce the start of an article. You wouldn’t need text frames for this sort of layout, so you can select the text frames in the columns and delete them.
You might also want to get rid of page numbers, by selecting these text frames and deleting them.

You can also select the running header text frame and reduce the Tint of their color to make them more subtle. You can do this directly from the Swatches panel (Window > Color > Swatches) by pulling the slider at the top-right of the panel to the left.

To apply this B-Master to the opening pages of your articles, you simply need to click and drag the B-Master page icon down onto your chosen page in the Pages panel.
4. How to Adapt Your Template to Sections of Your Magazine
Most long documents, such as books and magazines, will benefit from being divided into sections. For magazines, you can create a very simple sectioned structure, with page numbers throughout only the main bulk of the magazine and a short section without page numbers at the start. Many magazines fill their first few pages with adverts, a contents page and sometimes an editor’s letter, and there’s often no need for these to be numbered.
Step 1
Let’s say, as an example, that you want to start the actual content of your magazine on the fifth page of your layout. You can always edit the sections later to make the numbered pages start earlier or later.
Remaining in your inside pages template, click onto Page 5 in the Pages panel to highlight it. From the panel’s drop-down menu, choose Numbering & Section Options.

Step 2
In the New Section window that opens, check the bullet next to Start Page Numbering at: and keep the number set to 1.
Under Style, choose 1, 2, 3, 4... from the drop-down menu.

Then click OK. InDesign will flag up a warning that you have duplicates of some page numbers (1-4) in your document, but that’s not a problem for our purposes here, so go ahead and click OK.

Step 3
Now you’ll see in the Pages panel that Page 5 is now Page 1, marking the start of a new section. The page numbers on the pages themselves will also reflect this change.

Now you can get rid of the visible page numbers on the first section of your magazine, by either removing the A-Master from pages 1-4 (to do this, drag down the [None] page icon at the top of the Pages panel onto each of these pages) or applying a different master without page numbers.

I’ve done the latter here, dragging down the B-Master page icons onto pages 1-4, allowing me to keep the running headers but removing the visible page numbers.

Conclusion: Your Finished Magazine Template
Now you have a ready-to-save magazine template for both the inside pages and the cover of a magazine. Awesome work! Head up to File > Save As, and save each separate template in a folder you can easily come back to.
When you come to work on a magazine design, File > Open the template in InDesign, and File > Save As the document straight away with a new file name, corresponding to the specific magazine you are creating.

Now that you’ve laid down the groundwork for your magazine, including setting up the correct page sizes, margins, custom masters, running headers, page numbers and sections, you’re ready to dive straight in to designing. Get some more ideas about how to lay out your magazine with these tips and tutorials:


