Amazing Listerine Garden Uses That Work

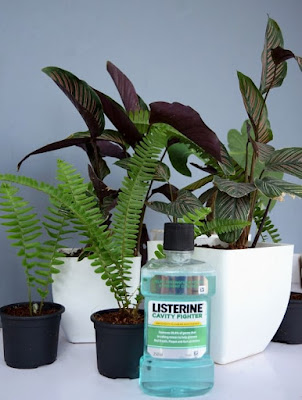
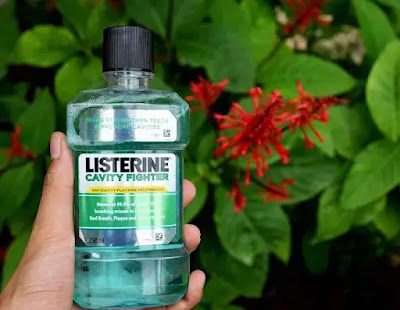
 Not only to protect your teeth, you can also use mouthwash to protect your garden. Find out 7 amazing Listerine Uses in the Garden!


Are mouthwashes like Listerine harmful to plants?


So far, there is no evidence or reports that suggest that mouthwash can be toxic to plants. On the contrary, there are mouthwash uses that are beneficial for the plants.
For example, orchids, you can use Listerine on orchids suffering from bacterial infections and crown rot. Spray the undiluted mouthwash directly on the infected part.
Also, spraying Listerine (follow the recipe in point number one) on roses affected by black spots helps to control this fungal disease.

1. Get Rid of Powdery Mildews and Other Fungal Infections


Mouthwash has strong anti-fungal properties. It can be used to get rid of powdery mildew and other fungal infections from your garden. For this, mix 75% of water and 25% of mouthwash to make a working solution and spray it on the infected parts.

2. Prevent Cats From Peeing


Most cats have this irritating habit of peeing on the furniture, in corners, or near the plants. You can use mouthwash to stop the problem of inappropriate urination. All you need to do is to mix water and mouthwash in equal proportion (Or apply the mouthwash undiluted) and spray it at cat peeing sites. The smell may not be that subtle for a human nose, but it is too intense for the cats, and therefore they avoid the sprayed spots.
*You can apply the same trick for dogs.

3. For Aphid Control


If you’re looking for a harmful-chemical free way to control aphidsmouthwash can be an effective ingredient. Just add water and mouthwash in equal proportion and spray it on the plants suffering from aphid infestation. You can also add a similar amount of mild liquid dish soap to make this recipe even stronger.


4. Mouthwash Fertilizer


One of the quirkiest Listerine uses, you can make a homemade lawn fertilizer using other ingredients. Make a combination of mouthwash, Epsom salt, liquid dish soap, and ammonia, 1 cup each and a can of beer, apply it using a 20 gallon hose-end sprayer. Use it once every 3 weeks!

Another Listerine fertilizer recipe has the following ingredients, 1 cup each–Mouthwash, Epsom salt, Ammonia, and mild liquid dish soap. Mix all of them well and transfer the fertilizer into a 20 gallon hose-end sprayer. Apply this to your trees, shrubs and foliage plants like hostas, ferns, etc.

5. Listerine Mixture for Mosquitoes


Use Listerine to get rid of mosquitoes, when you’re enjoying time outdoors. Mist the surrounding area and air around you, especially where mosquitoes are buzzing the most. Lightly mist it on your exposed skin as well.


This is not as effective as commercial mosquito repellants and DEET, but it is safer and works because Listerine contains eucalyptol, a derivative of eucalyptus oil, in low amount. *Eucalyptol is used as a key ingredient in Eucalyptus-based mosquito repellants.

6. Get Rid of Foul Odors


Get rid of foul odors in your garden using mouthwash. Make a solution of mouthwash and water in equal proportion and apply it at the affected site. This solution will kill the acting bacteria and other microorganisms that function the rotting process and fill the place with freshening smell.

7. Listerine to Disinfect Garden Tools


This is the last hack in our mouthwash uses garden. You can use Listerine to disinfect garden tools. Simply, soak them for one minute, or spray full strength Listerine on your smaller garden tools to disinfect them to prevent disease.


source: https://balconygardenweb.com
How to Grow Bushy Basil to Harvest All Summer Long

Basil is a fragrant, tasty, warm-weather annual herb that may be found in nearly every summer garden. Basil's flexibility makes it an essential herb, whether you're seeking to fuel your pesto addiction, enjoy a caprese salad with your home-grown tomatoes, or just want to amp up your renowned pasta sauce.

While fragrant basil (Ocimum basilicum) is reasonably simple to grow, the plants can quickly become tall, lanky, and sparse. Everyone desires huge, bushy plants with high harvests. The good news is that if properly maintained for, basil will provide you with an unending harvest all summer long.

What is Basil?

Basil plants are a common herb native to southern Asia and the South Pacific islands. This member of the mint family is easy to cultivate. Basil herb plant, considered a delicate annual, provides fragrant leaves that are frequently used in Italian and Mediterranean cuisines. Basil seeds are a common Thai ingredient as well.

Basil grows incredibly rapidly since it is an annual. In fact, it can take as little as 3 to 4 weeks from seed to harvest. This quick-growing herb is a good choice for inexperienced gardeners.


Starting Basil

Basil is a simple plant to cultivate from seed, or you can buy starting seedlings at your local garden shop. Pick up a couple different kinds! Classic Italian or Genovese basil, Opal (purple) basil, Lemon basil, and even Cinnamon are some of our faves! Check out this wonderful mixed-variety bundle of certified organic basil seeds, or these 12 locations to get premium organic, heirloom, or non-GMO seeds.

Basil, like other garden vegetable seeds, prefers to be started from seed. Using a light fluffy seedling start mix, keeping the soil equally wet (particularly before sprouting), providing heat to help in germination, and providing sufficient light as soon as the sprouts develop are all examples.

1. Keep Them Warm

Basil plants dislike frigid temperatures and are sensitive to temperature fluctuations (those of us in Maine who can't get basil to do much of anything know what this means!). To minimize frost damage, avoid placing basil seedlings in the ground too soon. If you grow basil in containers, move them inside (your garage would suffice) if you expect a chilly night.

2. Ensure Proper Drainage

Basil requires well-draining soil to thrive. Make use of a planter with a lot of drainage holes. If the bottom of your favorite planter lacks holes, drill some if feasible. Drainage is also improved by lining the bottom of the pot with a couple inches of gravel.

3. Keep Soil Moist

While basil prefers well-drained soil, it also like to be kept wet. It might be difficult to maintain regular moisture without waterlogging them. Overwatering can produce mildew and rot on the stems, limiting the development of your basil. Once a week, thoroughly water your plants. Basil grown in pots has to be watered more frequently since the soil dries up faster than ground soil.

4. Water the Soil Not The Leaves

Water the plant from the bottom up, avoiding showering the leaves and stems. It is recommended to soak slowly and thoroughly. Drip watering systems are also effective. Mulching around plants also aids in the retention and conservation of water while keeping weeds at bay.

5. Let The Sun Shine In

Basil plants require a lot of sunlight. Place your plants in a bright, sunny location where they will receive six to eight hours of direct sunlight every day, away from chilly breezes. If you're growing plants inside, set them on a sunny windowsill with plenty of light.

6. Fertilize Properly

Basil, like other plants, benefits from nutritional supplementation. Feed your basil plants every four to six weeks for indoor plants and every 2-3 weeks for outdoor plants using a good organic fertilizer. A well-balanced fertilizer with equal parts nitrogen, potassium, and phosphate will assist in increasing leaf output.

7. Harvest Early and Often

Harvesting and trimming basil are practically the same thing. Pruning tips are provided below, and what you pruned can be used in your harvest.

Begin collecting your basil early in the season and continue to harvest every week or two throughout the season. If you observe flower buds beginning to emerge on your mature plant, it's time to prune. If not, the plant will use its energy to producing seeds rather of producing more of its delectable leaves. Furthermore, blooming alters the flavor of the basil. If you are late to the game and blossoms have begun to form, simply pinch off the flower heads, which are delicious as well.


8 Good Luck Plants To Place Indoor

Plants are well-known for adding a fresh and appealing aspect to your yard, but according to certain traditions, they may also bring luck and optimism into your house. So, in today's post, we'd like to present ten good luck plants for indoors.

They are really simple to cultivate indoors and do not want a lot of attention. Most of them adapt well to various environments, and some even thrive in your absence.

Whether you don't feel like you're having the luckiest time of your life, it's time to explore planting some of these 8 good luck plants and seeing if they work for you!

Lucky Bamboo


Lucky bamboo is one of the finest plants for attracting positive energy, money, and good fortune into your life. It has a certain number of stalks, and it is said that the more stocks in the arrangement, the higher the benefits. It is also regarded as a Valentine's Day gift for a male.

Money Plant


Money plants are frequently advised for keeping inside the home since they offer good luck and generate positive energy in daily life. It cleans the dirty air in your home and improves the flow of oxygen. Some believe it relieves tension and fosters a peaceful and happy environment in the household.

Jade Plant


The leaves of the jade plant are certain to bring good fortune. Place it near the entrance to your home or business to attract prosperity and success. It is also a wonderful present for a businessman, therefore if your spouse is a businessman, this is an excellent Valentine's Day gift.

Orchids


Orchids in your home provide happiness and increase your sense of contentment. Orchids bring affection into your life and strengthen your bonds with those you care about. Purple orchids are said to bring good fortune. They are also said to bring love and fertility into the home.

Basil


Basil is a culinary herb as well as a good luck plant. A basil plant is thought to bring you love, money, luck, and pleasure.

Snake Plant


Did you know that this lucky plant has been scientifically proved to absorb harmful chemicals in the air? Snake plant is an excellent indoor houseplant that emits a pleasant scent and enhances the appearance of your living area. This plant not only brings you luck, but it also has health advantages.

Peace Lily


Peace lily's beautiful white blossoms can enhance the charm of any environment. This plant represents calm, purity, and balances the energy of the home.

Citrus


These citrus trees, which are said to provide wealth and pleasant feelings, also look nice while bringing luck to your house.


4 Natural Ways to Get Rid of Dark Spots

Let's start with four natural treatments for lightening or fading dark spots on the skin.


1. Lime Juice


The acidity of lemon juice serves as a whitening agent, reducing discolouration on your face. Apply the juice to your liver spots twice a day with a cotton ball or Q-tip. It is best to start with a tiny section of your face to evaluate how your skin reacts to the lemon juice. If you have sensitive skin, dilute the juice with a little water.

2. Gel Aloe Vera


Aloe vera gel contains antioxidants such as vitamins A, C, and E, which assist to eliminate brown spots and level out skin tone. Vitamin A hastens the natural shedding process of your skin, while vitamin C enhances your complexion and vitamin E renews the epidermis. Because the plant has been used to treat sunburns for hundreds of years, aloe works especially effectively if you have dark patches produced by sun exposure.

Although you may purchase 100% aloe vera gel from a health food shop, utilizing gel directly from the plant is preferred. To achieve this, cut one aloe vera leaf in half and divide it in two. Carve out the jelly-like flesh and apply it on your skin immediately.


3. Buttermilk or Yogurt

Lactic acid, which lightens and exfoliates the skin, is abundant in both yogurt and buttermilk. Apply one of these dairy products directly to your skin as a mask and let on for 20 minutes before rinsing.

4. Toner with Apple Cider Vinegar


Apple cider vinegar, which is high in antioxidants and minerals, is a popular home remedy for a variety of illnesses. Because alpha hydroxy acid removes dead skin cells, many with scars and discoloration swear by this easy treatment.

In a mixing bowl, combine equal parts apple cider vinegar and water. Because it is pH balanced, you may use it as a toner on your entire face. If you don't like the fragrance, leave the solution to sit for 20 minutes before rinsing.


Lemon Juice Natural Remedies to Remove Dark Spots

Juice of lemon

The acidity of lemon juice serves as a whitening agent, reducing discolouration on your face. 

Apply the juice to your liver spots twice a day with a cotton ball or Q-tip. It is best to start with a tiny section of your face to evaluate how your skin reacts to the lemon juice. 

If you have sensitive skin, dilute the juice with a little water.


Homemade Face Pack For Pimples And Dark Spots

Are you looking for a homemade face pack for pimples and dark spots? You've come to the right place. A homemade face pack for pimples and dark spots can effectively eliminate this skin problem.

Natural ingredients used in these homemade face packs for pimples and dark spots are also commonly used in OTC products, so you can achieve results that match, and sometimes even exceed, those of readymade skincare products.

There are numerous homemade face packs for pimples and dark spots that you can try using simple ingredients that you already have in your kitchen. Check out these ten homemade face packs for pimples and dark spots that can help you.


Image: Shutterstock


Turmeric Face Packs Gets Right To Work On Acne


Image: Shutterstock


Turmeric has antibacterial and antiseptic properties that treat active acne the right way. Mix two teaspoons of fuller’s earth with ¼ teaspoon of turmeric and a teaspoon of aloe vera gel. Make it into a paste and add more aloe vera gel if required. Apply this pack to the affected areas and rinse it off after 20 minutes with cool water.


Tip: It can visibly reduce the size of pimples and help fade away dark spots.

Honey Is A Surprising Anti-acne Ingredient That Is Unmatched

Image: Shutterstock


Honey is a natural humectant and so it manages the pH levels of skin beautifully by only retaining the skin’s natural moisture levels and not adding extra heaviness. This natural moisture helps keep acne in check and soothes skin. Mix a tablespoon of organic honey with half a teaspoon of cinnamon powder and a pinch of turmeric. Apply this mixture to your face and rinse it off after 15 minutes.


Tip: Avoid the eyebrows and hairline as honey can bleach the hair.


Aloe Vera Gel Masks Will Give You Instant Relief

Image: Shutterstock


We can all agree that aloe vera gel is one of the best ingredients to reach for if you want instant relief from acne. Simply extract the gel from the leaf and apply it to your skin. You can even mix a teaspoon of honey with it. Let the mask sit for 20 minutes and then rinse it off.


Tip: Aloe vera gel is rich in antioxidants that can help with treating skin damage.

Rose Water Has Essential Anti-inflammatory Properties

Image: Shutterstock


If you haven’t reaped the benefits of rose water for your skin yet, you absolutely should. Rosewater gently moisturizes skin and soothes inflammation. Mix a tablespoon of rose water with a tablespoon of lemon juice and apply it to the acne-affected areas. Rinse it off after 15 minutes and use it once a week.


Tip: Rosewater can be used by itself as a skin toner.

Bentonite Clay Detoxifies And Cleanses Skin

Image: Shutterstock

Bentonite clay is used to treat acne, wounds, ulcers, skin allergies, bloating, and diarrhea. It is an ancient home remedy that totally works. It comes in clay powder format and needs to be mixed with water to form a soft paste. Take a tablespoon of the clay and add enough water (about one or two teaspoons) to form a thick paste. Apply the paste to your face and rinse it off once it dries up completely.


Tip: Bentonite clay has oil-absorbing properties that eliminate excess sebum from the skin that causes acne.

Fuller’s Earth Can Clear Up Acne Quickly

Image: Shutterstock

Fuller’s earth, better known as Multani mitti, is a great acne-fighting ingredient that has been passed down by generations in Indian culture. Its oil-absorbing properties also have the ability to banish blackheads and help brighten skin. Mix a tablespoon of fuller’s earth with ¼ teaspoon turmeric and half teaspoon sandalwood powder. Add enough rose water to this dry mix to form a paste. Apply the paste to the face and rinse it off when it dries up.


Tip: Milk can also be used as a substitute for rose water in this recipe.

Activated Charcoal Will Draw Out Impurities

Image: Shutterstock

Acne-causing bacteria can trigger pimples and blackheads on the skin, resulting in irritation, redness, and swelling. The antibacterial properties of activated charcoal can treat this acne-causing bacteria and draw it out of the skin. To prepare a mask, you will need activated charcoal powder.


Mix two teaspoons of water with a drop or two of essential oil like lavender or tea tree. Now, add two teaspoons of the activated charcoal powder to the water. Next, add half a teaspoon of raw honey. Apply this paste to the skin and rinse off after 20 minutes.


Tip: Blackheads will be in check with activated charcoal.

Mint Is Great To Soothe Inflamed Skin


Image: Shutterstock

Mint is a refreshing skincare ingredient that invigorates the skin and promotes cell renewal. It will provide relief from acne and huge pimples instantly. Simply crush up a bunch of mint leaves, mix the mint paste with a little bit of cucumber juice and honey to form a thick face pack, and apply it to your skin. Leave it on for 30 minutes and rinse it off with water.


Tip: You can also invest in a vial of mint essential oil for more acne-fighting DIYs.

Papaya Can Fade Dark Spots

Image: Shutterstock

The enzymes found in papaya namely papain and chymopapain are great to decrease skin inflammation. It helps reduce acne by removing dead skin cells that clog pores. To make a face pack of papaya, cut up the fruit, get rid of the seeds, and extract enough pulp to be applied to your face. Once the pulp is applied, let it work its magic for 20 minutes after which it can be rinsed with water and a mild face wash.


Tip: You can even add a dash of lemon juice to the pulp for even more benefits.


Q. How often can we use homemade face packs for acne and dark spots?

A. Once a week is recommended for any skincare face pack. Do not overuse face packs that include acidic ingredients like lemon juice as it can also irritate your skin. Once a week is fine.


Q. How to best choose which face pack to use?

A. It depends on your skin type and how it feels in the moment. Acne can occur on the oily, combination, and dry skin types. Some skin types are even sensitive. If you have sensitive skin, always do a patch test. Other than that, for super oily skin, oil-absorbing ingredients like clays and charcoal are ideal. For combination skin, rose water and aloe vera are nourishing and ideal. For dry skin, honey and curd are great.


Q. How long will it take to see results from DIY face packs?

A. It could take anywhere between a few days to a week or more. DIY remedies will help treat acne but a basic skincare routine is essential to keep acne away completely. You cannot solely rely on these home remedies to keep your skin clear.


source: https://www.femina.in


How To Get Rid Of Dark Under-eye Circles In 7 Clever Ways

Dark circles under eyes best skincare beauty products corrector concealers


Dark circles are one of those tricky skin irks that don't have a straightforward remedy. I know this, as I’ve been investigating a solution since I noticed my own ‘under-eye hollowing’ worsening over the past six months.


Like most complexion issues, a poor diet can make the problem appear worse, and it would be disingenuous of me to pretend I haven’t been relying on a glass (or three) of Pinot every other night to soften the blow of multiple lockdowns.

Though lately I have taken a turn in the opposite direction and have been throwing everything at it, from eating leafy greens to reducing coffee and alcohol, which, if nothing else, will aid sleep and improve hydration – two things our skin thrives on.

Dark circles are caused by varying factors, from poor lifestyle to skin tone, genetics, and lack of sleep. Plus, as we age, we gradually lose the deep fat underneath the skin, making shadowing appear worse. 

For those who want immediate results, tear-trough filler – a procedure that involves injecting the under-eye area with hyaluronic acid to plump up the skin there – is an option. Yet due to the delicate nature of the eyes and the fragility of the skin that surrounds them, I’ll be steering clear of the syringe.

Microneedling, a technique that works by creating a controlled injury that encourages cells to produce a fresh batch of cushiony collagen, is on my radar; but, for now, at least, I’m after less invasive methods, as are most of you, I suspect.

As far as topical ingredients go, creams that contain caffeine are good for reducing redness by restricting the blood vessels in the area. Hyaluronic acid serums will plump and moisturize thin skin, and retinol can improve and even out skin texture and color, though it can be irritating.

Peptides are a safe bet to strengthen and firm thin under-eye skin, while vitamin C will reduce inflammation and defend against free radicals – it’s also been known to have a brightening effect. Any, or all, of the above, are worth incorporating into your skincare routine.

However, I have found no better fix for diffusing the intensity of dark circles than a color-correcting under-eye brightener. Nars Radiant Creamy Color Corrector has been a godsend ever since it landed on my desk as if sent from heaven.

Available in four shades, from Light to Deep, the peachy-toned primer knocks back the darkness, not only under the eyes but on areas of pigmentation or dark spots. You will need a concealer on top to fully reap the benefits, followed by a dusting of translucent powder to set if you wish to extend its staying power.

Of course, make-up isn’t permanent, but until such time as you wash it off, you will appear well-rested and a good few years younger – whether your diet is puritanical, or not. Now that’s what I call bang for your buck. Check out, my five other under-eye heroes.


Copyright @ 2013 Krobknea.

Designed by Next Learn | My partner