1. Introduction
In the previous tutorial, I explained a few new features of iOS 7 that let you add subtle animations and greater interactivity with surprisingly little code to simulate real world physics. In this tutorial, I'll show you how to create a hidden form on a search results page.We'll use a gravity behavior and a collision behavior to manage whether the form is currently visible or not. We'll also get a subtle bounce animation for free as the panel falls into view. Let's get started.
2. Create the project
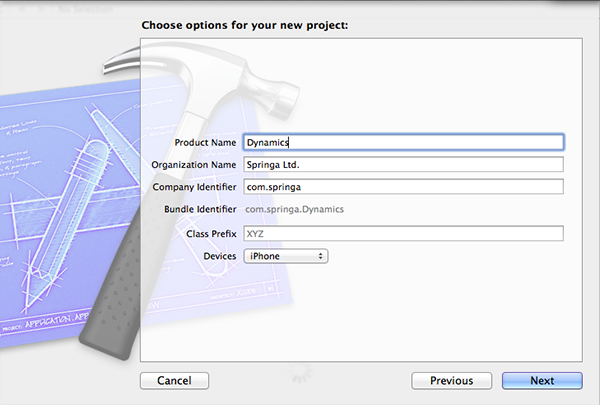
Enter a name for your project, I've called mine Dynamics. Enter your organization's name, company identifier, and class prefix. Choose iPhone from the Devices list, click Next, and choose a location to save the project.
3. Create the Storyboard
Step 1
Open Main.storyboard and delete the view controller that's in there by default.Step 2
Drag out a Navigation Controller from the Object Library. Xcode 5, the navigation controller's root view controller is by default aUITableViewController instance. Select the table view controller and delete it. We'll be creating a custom view controller fro this project.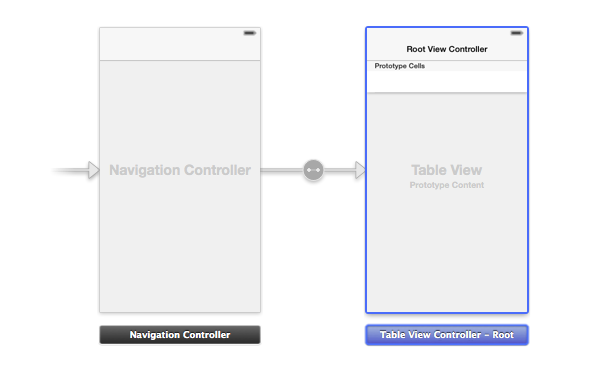
Step 3
Drag a View Controller from the Object Library and position it to the left of the navigation controller. Right-click the navigation controller to show the Connections Inspector. Click the plus on the left of root view controller and choose the view controller you just added.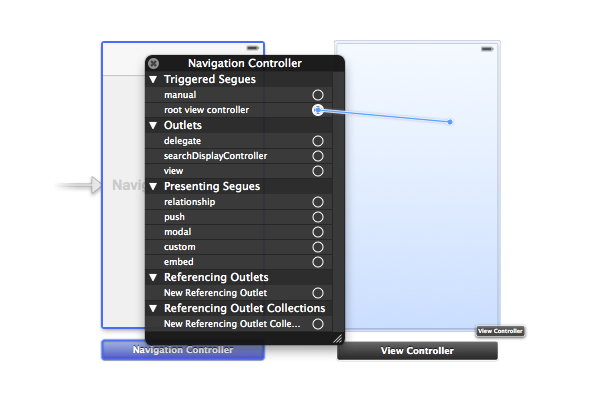
Step 4
Select the navigation item of the view controller and change the title to Search Results in the Attributes Inspector on the right.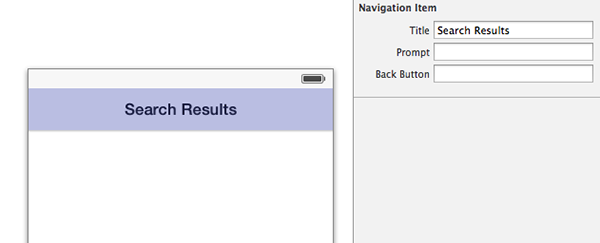
Step 5
Build and run the project to make sure that the views and view controllers are hooked up correctly.
4. Prepare the View Controller
Step 1
Open on the view controller's header file the Project Navigator. Add aUITableView property, a UIView property for the form view, a UIBarButtonItem for the button to show the form, and a UIButton to hide the form. Add an action for the UIBarButtonItem as well as an action for the UIButton.The view controller class also needs to conform to the
UITableViewDataSource and UITableViewDelegate protocols. The view controller's header file should now look like this:
01
02
03
04
05
06
07
08
09
10
11
12
13
| #import <UIKit/UIKit.h>@interface ViewController : UIViewController<UITableViewDataSource, UITableViewDelegate>@property (nonatomic, weak) IBOutlet UITableView *tableView;@property (nonatomic, weak) IBOutlet UIView *filterFormView;@property (nonatomic, weak) IBOutlet UIBarButtonItem *filterButton;@property (nonatomic, weak) IBOutlet UIButton *applyFilterButton;- (IBAction)filterButtonTapped;- (IBAction)applyFilterButtonTapped;@end |
Step 2
In the view controller's implementation file, edit theviewDidLoad method. After [super viewDidLoad], tell the UITableView instance to use the UITableViewCell class to populate itself:
1
| [self.tableView registerClass:[UITableViewCell class] forCellReuseIdentifier:@"Cell"]; |
Step 3
Next, implement theUITableViewDataSource protocol
in the view controller's implementation file. The table should have one
section, 100 rows, and each row should display the cell's row number.
01
02
03
04
05
06
07
08
09
10
11
12
13
14
| - (NSInteger)numberOfSectionsInTableView:(UITableView *)tableView { return 1;}- (NSInteger)tableView:(UITableView *)tableView numberOfRowsInSection:(NSInteger)section { return 100;}- (UITableViewCell *)tableView:(UITableView *)tableView cellForRowAtIndexPath:(NSIndexPath *)indexPath { UITableViewCell *cell = [tableView dequeueReusableCellWithIdentifier:@"Cell"]; cell.textLabel.text = [NSString stringWithFormat:@"%ld", (long)indexPath.row]; return cell;} |
5. Add the Table View
Step 1
Revisit Main.storyboard and select the view controller that we added previously. Change its class toViewController in the Identity Inspector so that we can connect the outlets we created earlier.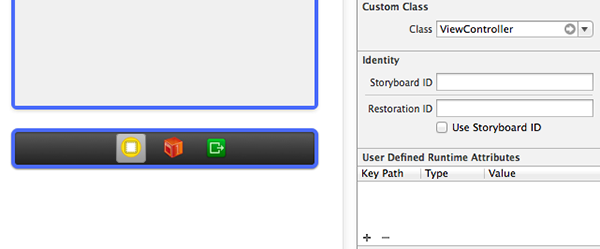
Step 2
Drag aUITableView instance from the Object Library in
the view controller's view. Make sure that the table view sits at the
top of the view controller and covers it completely. Use the Connections Inspector to set the view controller as the table view's data source and delegate.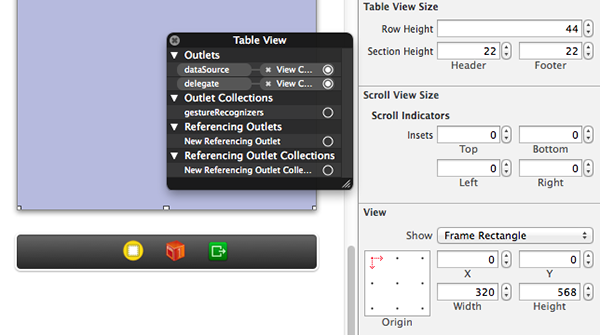
Step 3
Build and run your application. You should see a table with 100 rows containing, each row displaying its row number.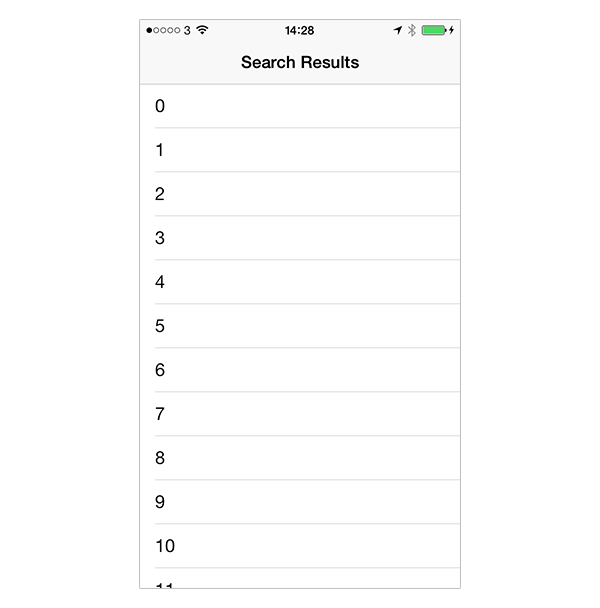
6. Add the Filter Form
Step 1
In Main.storyboard drag aUIView instance
to the view controller. Make sure that the view isn't added as the
table view's header. You can verify this by opening the Document Outline on the left and checking that the view you just added is a peer of the table view, not a subview.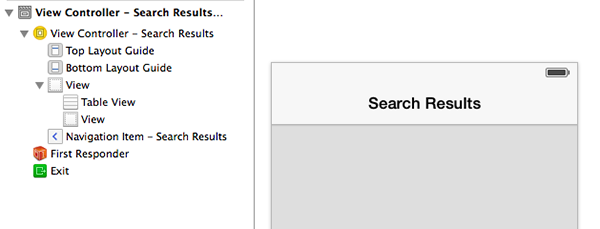
Step 2
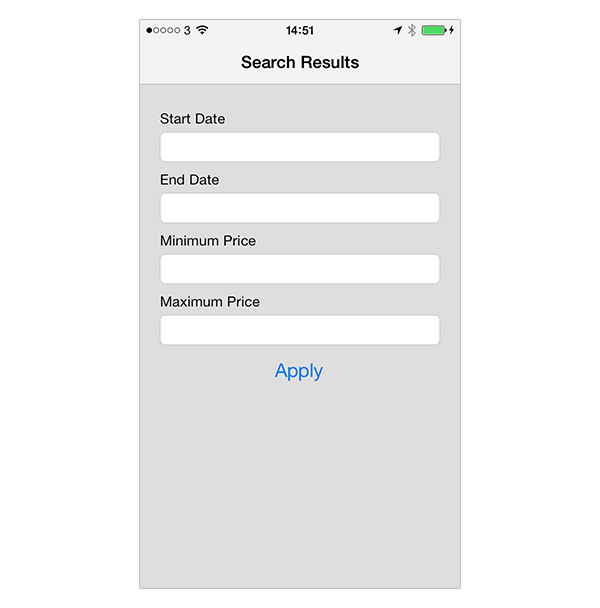
Set the view's background color to a light gray, its origin to(0.0, 0.0), and its size to (320.0, 568.0) so that it fills the entire screen, covering the table view.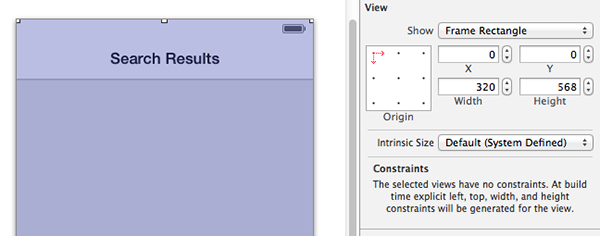
Step 3
Hook up this view to thefilterFormView outlet that we declared in the view controller's header file.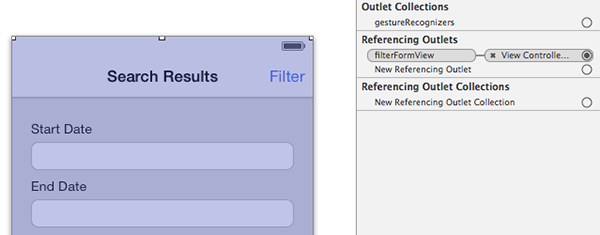
Step 4
Step 5
Connect the Apply button with theapplyFilterButton outlet we declared earlier and connect the Touch Up Inside event to the applyFilterButtonTapped action.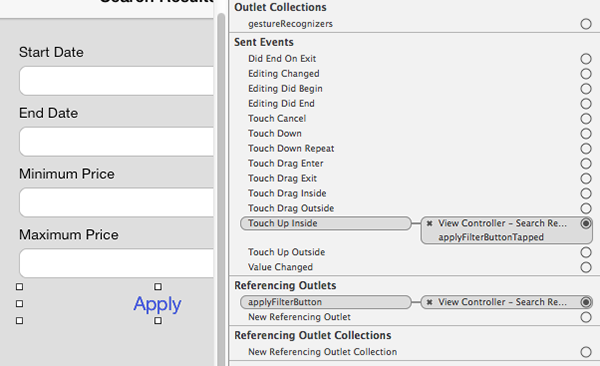
Step 6
Revisit the view controller's implementation file and add an empty method declaration for
applyFilterButtonTapped so that the application doesn't crash if you accidentally tap the button.
1
2
3
| - (void)applyFilterButtonTapped { } |
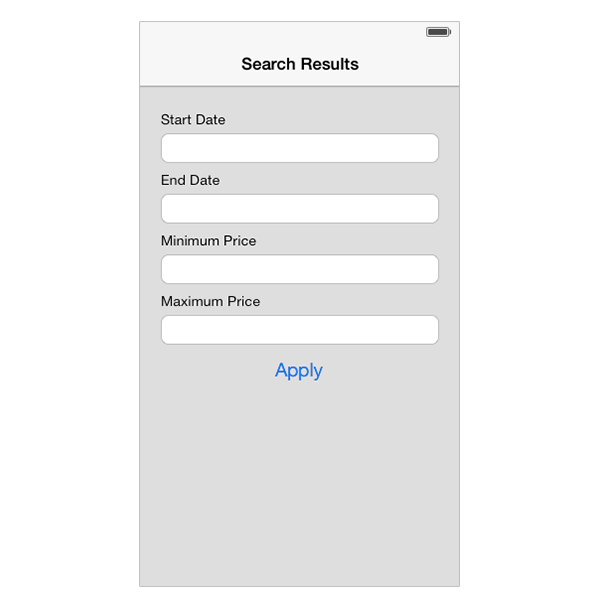
Step 7
Build and run your application. You should see the form covering the table view.
7. Add the Bar Button Item
Step 1
Add aUIBarButtonItem instance to the navigation bar. Change its title to Filter and connect it to the filterButton outlet we declared in the view controller's header file. Connect the filterButtonTapped action to the filterButton bar button item.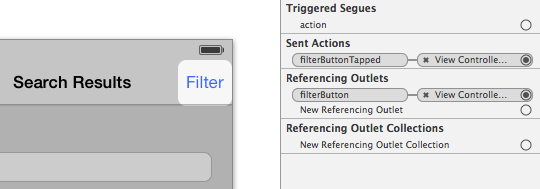
Step 2
Switch back to the view controller's implementation file and add an empty method declaration forfilterButtonTapped so that the application doesn't crash if you tap the bar button item.
1
2
3
| - (void)filterButtonTapped { } |
8. Add Dynamic Behaviors
Step 1
Before we add any dynamic behaviors, it's worth taking a second to think about what we want our behaviors to do, and how we can achieve it.When the filter form isn't visible, it should be off-screen. We can use a
UIGravityBehavior acting upwards to keep it from falling down. When the Filter button is tapped, gravity should begin to act downwards with the form falling into view as a result.We also need a
UICollisionBehavior with
boundaries so that the form will rise to be just off-screen and only
fall as far as the bottom of the screen. The next screenshot shows the
two end states of the form, with the pink lines indicating the collision
boundaries. Let's translate this into code.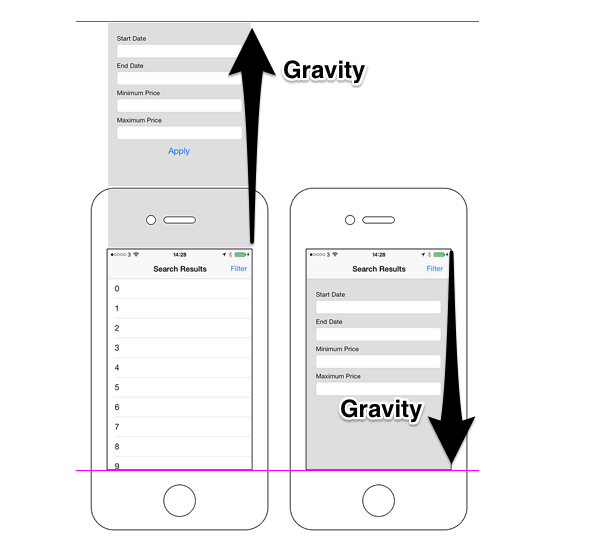
Step 2
In ViewController.h declare aUIDynamicAnimator property. We will pass our behaviors to this animator, which will determine what needs to happen with the form view. Declare a UIGravityBehaviorand a UICollisionBehavior.
1
2
3
| @property (nonatomic, strong) UIDynamicAnimator *animator;@property (nonatomic, strong) UIGravityBehavior *gravity;@property (nonatomic, strong) UICollisionBehavior *collision; |
Step 3
InviewDidLoad, initialize animator as a dynamic animator with the view controller's view as its reference view. Next, initialize gravity and configure it to act in an upwards direction with an angle of -M_PI_2 on the filterForm view.It's now time to initialize the view controller's
collision property by invoking initWithItems: and passing an array with only self.filterForm in
it. We add two boundaries, one at the bottom of the view and one at the
top of the view. This is how the updated implementation of viewDidLoad looks like:
01
02
03
04
05
06
07
08
09
10
11
12
13
14
15
16
17
18
19
20
| - (void)viewDidLoad { [super viewDidLoad]; [self.tableView registerClass:[UITableViewCell class] forCellReuseIdentifier:@"Cell"]; self.animator = [[UIDynamicAnimator alloc] initWithReferenceView:self.view]; self.gravity = [[UIGravityBehavior alloc] initWithItems:@[self.filterFormView]]; self.gravity.angle = -M_PI_2; [self.animator addBehavior:self.gravity]; self.collision = [[UICollisionBehavior alloc] initWithItems:@[self.filterFormView]]; [self.collision addBoundaryWithIdentifier:@"TopOfView" fromPoint:CGPointMake(0., -self.filterFormView.bounds.size.height) toPoint:CGPointMake(self.view.bounds.size.width, -self.filterFormView.bounds.size.height)]; [self.collision addBoundaryWithIdentifier:@"BottomOfView" fromPoint:CGPointMake(0., self.view.bounds.size.height) toPoint:CGPointMake(self.view.bounds.size.width, self.view.bounds.size.height)]; [self.animator addBehavior:self.collision];} |
Step 4
When the filter button is tapped, we want to disable the button to avoid confusing the user and we also want the gravity to begin acting in a downwards direction to make the form fall into view. Update thefilterButtonTapped action as follows:Step 5
When the Apply button in the form view is tapped, we want gravity to begin acting in an upwards direction again to make sure the form slides off-screen. We also enable the Filter button again. Update theapplyFilterButtonTapped action as follows:
1
2
3
4
| - (void)applyFilterButtonTapped { self.gravity.angle = -M_PI_2; self.filterButton.enabled = YES;} |
9. Final Steps
Step 1
Before we build and run the project for the final time, let's move the filter form off-screen so that users don't see the form slide off-screen when the application launches. Set they position for the filter form view to -568.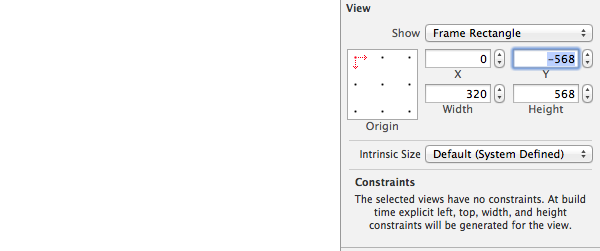
Step 2
Build and run the application. Tap the Filter button and the form should slide into view, falling into place with a gentle bounce. Tap the Apply button and watch the form slide smoothly off-screen again.Conclusion
It took a bit of work to get the user interface set up, but once we'd done that it was a cinch to add a physics-based animation. It only took us a few lines of code.We didn't need to code how the physics—such as the bounce—worked. Thanks to UIKit Dynamics, we only needed to specify what behaviors we wanted and let the
UIDynamicAnimator object do the work for us.

.webp)

