In this tutorial I will take you through the steps to create an animated bouncing ball that you will be proud of!
We are going to create a ball that bounces up and down. Our bouncing ball will be a cycle, which means is that the first frame of our animation is also the last frame of our animation. We can repeat the same bit of animation over and over again, and it can play infinitely.
1. Draw the Ball Poses
In the case of our bouncing ball, the first frame will be pose 1, and the last frame we will call pose 2. When we complete our animation, it will loop when played back.
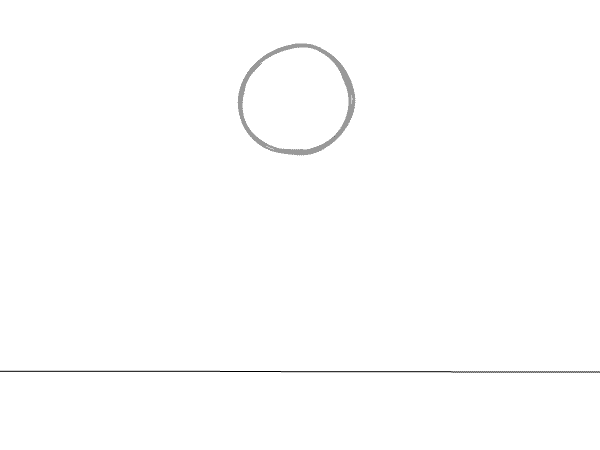
Step 1
Start by drawing a floor line about an inch from the bottom of the page. This will ground our ball.
Step 2
Sketch in your ball—it doesn't have to be a perfect circle. I like to work sketchy and rough when I animate. Let's draw our ball about a centimeter from the top of the page. This is pose 1. The ball is above the floor, ready to fall and bounce!
Step 3
Now let's draw our ball in the second position. This is pose 2. The ball is on the floor ready to bounce back to pose 1! You can see the light image of the previous frame so you will get a sense of placement in relation to the previous frame.
Step 4
Let's go back and add an in-between between pose 1 and pose 2. In-betweens are the animation frames in-between our poses. In-betweens give the illusion that one pose smoothly transitions into the next pose.
The in-between that we are drawing in this step is for the action between pose 1 and pose 2. When I animate, I like to favor the frame that I am drawing toward. So the animation drawing of our ball is not exactly in the middle, but rather a little closer to pose 2 than pose 1.
Step 5
Next, add an in-between between pose 2 and pose 1 to give the appearance that the ball is bouncing back up to its original pose!
Let's take a look at our animation so far. It looks good, but something is missing. It feels flat.
Step 6
To give our bouncy ball a bit of elasticity, we can add a slightly squashed ball frame right after our pose 2 frame. I left in a light image of pose 2 so you can see the squashed frame in relation to pose 2. Make sure you keep the mass of the ball the same—as the ball squashes down slightly it gets a little fatter on the sides, thus keeping the mass of the ball the same.
That's much better! Adding the squashed ball frame gives the ball more bounce.
Step 7
Our ball is looking good, but it's still missing something. Let's add a stretched ball after our squashed ball. In the slide you can see how the stretched ball is positioned in relation to our last drawing. Notice how the mass is kept the same by stretching our ball and making it more elongated, and the ball is thinner on the sides.
Now our ball is looking bouncy and more like an elastic rubber ball. Very good!
Here's a look at our progress. I have labeled pose 1 and pose 2 and highlighted the in-betweens in green.
Step 8
Let's add another in-between to smooth out the action as the ball bounces back up to pose 1. The more in-betweens an animation has, the slower and smoother the action.
Step 9
As the ball nears the top position, add one more in-between to slow and ease out the action. This will make the motion more realistic. As a bouncing ball bounces up and reaches its highest point, it will slow slightly as it fights gravity before the ball starts its fall back to the ground.
I have labeled pose 1 and pose 2 and highlighted the in-betweens in green and our last two in-betweens in blue.
And now let's look at our animation. That is a great-looking bouncing ball! I think we are just about done! But first…
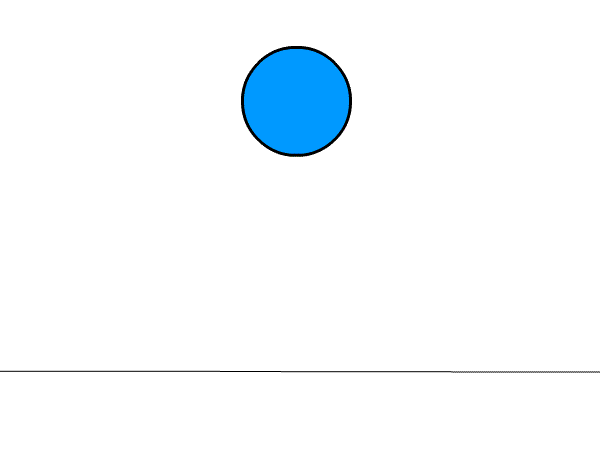
2. Clean Up and Color Our Ball Animation
Step 1
It's time to sweeten our animation and clean it up! I like to work rough when I animate. Now that we are happy with how our animation is looking, let's ink over the top of our rough line and give it a nice, clean black outline.
Nice! Look at all of our frames together. Now that's a nice-looking bunch of cleaned-up frames!
Here's our animation. That looks great! Good job! Only one thing left to do...
Step 2
Let's color our ball! Color all of your ball images. Blue is my favorite color, but you can make your ball any color you want. Go for it!
Very good! Keep going until all the ball frames are colored.
Good job!! Nice Animating!
That's a great bouncing ball! This looks awesome! In just a short time you have created an animated bouncing ball that has weight and mass. A bouncy ball that you can be proud of. Keep animating—the sky's the limit!
Lorem ipsum dolor sit amet, consectetur adipisicing elit, sed do eiusmod tempor incididunt ut labore et dolore magna aliqua. Ut enim ad minim veniam, quis nostrud exercitation.
Medical Disclaimer
The information on this site is not intended or implied to be a substitute for professional medical advice, diagnosis or treatment. All content, including text, graphics, images and information, contained on or available through this web site is for general information purposes only. Krobknea makes no representation and assumes no responsibility for the accuracy of information contained on or available through this web site, and such information is subject to change without notice. You are encouraged to confirm any information obtained from or through this web site with other sources, and review all information regarding any medical condition or treatment with your physician. NEVER DISREGARD PROFESSIONAL MEDICAL ADVICE OR DELAY SEEKING MEDICAL TREATMENT BECAUSE OF SOMETHING YOU HAVE READ ON OR ACCESSED THROUGH THIS WEB SITE.