
1. Draw the Pig Face
Step 1
Start with a New Document approximately 6" x 6", or whatever size you feel most comfortable working with. The main goal is for it to be square.
- Use the Rectangle Tool (M) to draw a peach (
#F9C9BF) square over the Artboard. - Use the Ellipse Tool (L) to draw two small ellipses for eyes in dark purple (
#35253F) to create the eyes. Draw a large, horizontal ellipse in pink (#F57DA0) for the pig's nose. - Two small, dark purple ellipses form the nostrils.
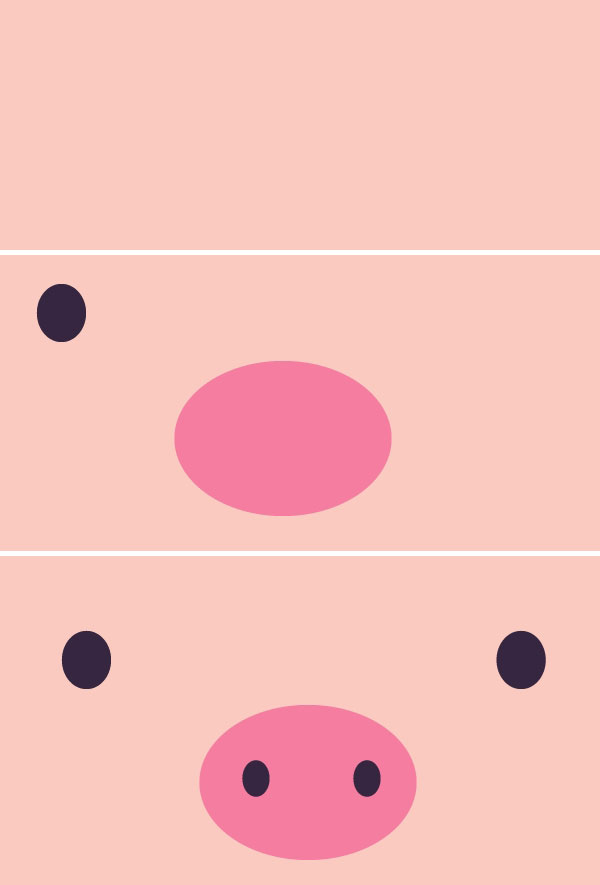
Step 2
For the cheeks, draw a circle with the Ellipse Tool in light pink. Use the Direct Selection Tool (A) to bring up the bottom anchor point so the bottom curves inward and upward. Select the shape with the Mesh Tool (U). Select three lines for the mesh within the cheek shape. I used
#F8D9D1 for the outer edges and #FEEEEB in the upper center. Select each node you'd like to change in the mesh with the Direct Selection Tool and change the color manually.
Step 3
Copy (Control-C) and Paste (Control-V) the left cheek to create the right cheek. The mouth is a Copied and Pasted eye placed underneath the pink nose in the Layerspanel. The highlight under the mouth is a Copied, Pasted, and Scaled Down version of the cheeks that's also been Rotated upside-down. Copy and Paste this shape for the tops of the eyes as well.

2. Render the Face
Step 1
Draw a larger ellipse around the left nostril and reduce its Opacity to 0% in the Transparency panel. Select the left nostril and the new ellipse and use the Blend Tool (W) to create a smooth blend of 20 steps or so.

Step 2
Repeat the process for the right nostril and mouth as was done in Section 2, Step 1.

Step 3
See the image below for the Gradient Mesh applied to the nose. I added two rows of four points and concentrated dark pink (
#c33e6b) along the bottom edge of the mesh.
Step 4
For the shine on the nose, I drew another ellipse and curved the bottom anchor point inward. The color is the same peach as I used for the main face color. I added three points within the mesh and selected each anchor point along the sides and bottom to reduce the Opacity to 0% in the Transparency panel.

Step 5
- The highlights on the nostrils are the same as the main highlight of the nose. Copy, Paste, Rotate, and Scale the highlight shape down so it fits below the nostril.
- The tongue is a pink ellipse that overlaps the dark purple mouth. Select both shapes and use the Shape Builder Tool (Shift-M) to select the non-overlapping portion of the pink ellipse. Deselect and Delete the extraneous shape.
- Finally, for now, draw small pink circles for freckles on the cheeks.

3. Drawing the Pig's Glasses
Step 1
Draw a rectangle using the Rectangle Tool for the left lens. Pull the Live Cornersinward with the Direct Selection Tool (if you're not using Adobe CC, use the Rounded Rectangle Tool and specify your own corner radius) to round out the corners. Draw another rectangle or rounded rectangle inside the first (depending on your shape preference) and Minus Front in the Pathfinder panel in order to cut out the lens of the frames. Repeat for the other side.

Step 2
Draw a rectangle between the two frames. Bend it by going to Effect > Warp > Arc and applying a Horizontal bend at 23%. Expand the shape under Object.

Step 3
Draw two small rectangles on either side of the frames to form the arms of the glasses. Group (Control-G) together all of the glasses components and go to Effect > Stylize > Drop Shadow. Apply the following attributes:
- Mode: Multiply
- Opacity: 33%
- X Offset: 0.05 in
- Y Offset: 0.03 in
- Blur: 0.03 in
- Color: Dark Purple

Step 4
Underneath the glasses group in the Layers panel, draw a bright magenta rectangle. Set the Blending Mode to Overlay and the Opacity to 21% in the Transparency panel. Repeat on the other side.

Step 5
For the highlights on the glasses, draw thin rectangles on the top and bottom of the frames with Linear Gradients (applied using the Gradient Tool (G)) that go from dark purple to bright purple to dark purple.

Step 6
For the drop shadow on the nose, apply the following attributes with a Drop Shadoweffect:
- Mode: Multiply
- Opacity: 29%
- X Offset: 0.03 in
- Y Offset: 0.04 in
- Blur: 0.02 in
- Color: Dark Magenta

4. Hair and Hooves
Step 1
Use the Pen Tool (P) to draw the hair in sections. I've also applied the same Drop Shadow effect as in Section 3, Step 6, to each section. I drew three sections of hair in total. Each section can be made of merged shapes using Unite in the Pathfinderpanel. Group the three hair sections together.

Step 2
Copy and Paste the hair group and set the color to magenta, Blend Mode to Overlay, and Opacity to 21% (as done in Section 3, Step 4).

Step 3
- Draw the hooves with the Pen Tool in the same peach as used for the face. Once again, apply a Drop Shadow (the same as in Section 3, Step 6) to the main hoof shape.
- Trace the top 2/3 of the hoof and apply a Linear Gradient that goes from dark purple to bright purple to dark purple (the same one used for the highlights on the glasses). With the Gradient Tool, angle the gradient so that the highlight runs in the center of the hoof.
- Trace the top edges of the hoof with the Pen Tool with a fill color of dark purple to add depth to the shape.
- Group the hoof components together.

Step 4
Copy and Paste the left hoof and Reflect it over a Vertical Axis in order to create the right one. Place both of them below the cheeks on either side of the face.

5. Render the Hair
Step 1
We'll be using the same Linear Gradient from the glasses and hooves. Copyand Paste two instances of each hair section. You can Delete the Drop Shadow effect from these copied versions in the Appearance panel. Offset one slightly from the other and hit Minus Front in the Pathfinder panel. Apply the linear gradient used previously and place them on the hair. This technique allows you to create simple highlights whose contour matches the main shape perfectly.

Step 2
Repeat the process of the previous step on the other two sections of hair. How they overlap affects the look of the highlight shapes. Feel free to play around with the shape combinations in order to get the best highlights for your design.

Well Done, You!
It's over! Your little pig friend icon is ready to go. Mine has some decidedly Clark Kent styled hair. Show us what your pig face icon looks like in the comment section below. Push your designs further by rendering more details with gradient mesh shapes or creating a whole set of animal icons.


