The following tutorial assumes you are familiar with the Pen Tool (P), Pencil Tool (N), and Gradient Tool (G), and stresses technique and style over exact replication. Let's fire up Adobe Illustrator and get on with it!
1. Drawing the Letters
Step 1
We'll start with the most descriptive word in the final design: golden.- Using the Pencil Tool (N) with the stroke set to 1 pt Weight in the Stroke panel, I drew a large, loopy letter "G". If it makes you feel more comfortable, you can base your script letters on a preexisting font and simply trace the letter forms.
- For the "OL" of "Golden", I want to make sure the letters loop into each other as though created with a single golden wire. Draw two-thirds of an ellipse, starting at the bottom.
- In the last third of the "O", loop down to the left and back up to the right.
- Then complete the "L" by creating another half loop shape.

Step 2
Not all of my letters are joined together. The "D" simply overlaps the other letters, while the "E" and "N" connect.
Step 3
We're going to focus on the word "Gold" for most of the rendering section of this tutorial. Group (Control-G) together your single line of text. Copy (Control-C) and Paste (Control-V) the text so that the copied group is offset from the first.Group together both sets of text and lock the group in the Layers panel. I found it easiest to use the Pen Tool (P) to trace the ribbon-like shapes formed by doubling up the line art I drew for my text. Alternatively, you could choose a loopy script font that you like, and skip this entire section.
Whatever you choose to do, set the fill color to
#ddbb4f because it is a wonderful soft gold color that sets the stage for our final design perfectly.
2. Rendering the G
Step 1
If you opted to skip the previous section and used a ready-made font, make sure to Expand your text under Object before continuing.Let's start with the top loop. Using the Pen Tool, draw a shape that overlaps the underside of the loop and accentuates the ribbon-like quality of the text (see below). Select your letter and the newly drawn shape. Use the Shape Builder Tool (Shift-M) to select the non-intersecting portion of the newly drawn object. Deselect and Delete this extraneous component.
Use the Gradient Tool (G) to apply a Linear Gradient to this shape consisting of the following colors, from left to right:
#e3b76c#412927#c3ae3b#f0eb87#d29255

Step 2
The next shape begins at the top of the "G" and ends before the second loop in the letter begins. Use the Shape Builder Tool, as in the previous step, to fit a new object perfectly to the contour of the letter. The Linear Gradient applied has nine colors; here they are from left to right:#653d3b#eeb570#f9e99c#f5e283#ce9440#f1e67c#fffcb3#e0bd61#cd8f52
For small highlight shapes, use the Shape Builder Tool once more to follow the letter's contour and apply a Linear Gradient going from
#fffbbb at 100% to 0% Opacity. Place highlights like these right above darker colors in the golden gradient.
Step 3
Continue using the gradients from the previous two steps to create shadow and highlight shapes on the letter G.- Note how lighter colors don't appear in portions of the letters that are overlapped by others.
- The gradient shape being drawn here will accentuate the shine of the text. Make sure you manipulate the handles of the anchor points enough for the curve of the top of the highlight shape.
- Once more (and something you'll do often in this tutorial), use the Shape Builder Tool to delete extraneous portions of shapes from the main text group.
- The gradient of this highlight shape goes from
#f1a46bat 100% to 0% Opacity. Use the same gradient from the previous step on all three shapes that now make up the lower loop of the "G".

Step 4
Use the Pen Tool to trace the outer edge of the letter. Set the fill color to null and the stroke to a Linear Gradient with the following colors:#f2e182#fcf4d4#f7e79f#f2e182

Step 5
To complete the "G" I made some of the following small changes:- Make sure the strokes that line the edges of your lettering don't extend past the rest of the letter shape. Use the Shape Builder Tool to trim them down.
- I drew a small rectangle on the bottom of the "G"'s tail (it was done at the end of the top loop too) to give the letter more dimension and make it look as if it's been made out of a flat golden wire.
- Again, the edge was trimmed here so the weight of the path didn't extend past the shape of the letter itself.

3. Putting the Gold in Golden
Step 1
Moving on to the next letter, let's check out the subtler gradient used for each section of the looping "O". As before, I used the Shape Builder Tool to draw a shape that follows the contour of the letter and accentuates its ever-changing planes.The Linear Gradient used on the top of the "O" contains the following colors:
#672e25#d2a142#fcf4d4#d2a142#884729
#672e25#d2a142#d2a142#884729

Step 2
Continue on to the "L". Note how the first and largest shape connects completely with the second loop of the "O". Use the same gradient from the previous step, with the colors repeating so that there are two areas of highlights.Four shapes complete the letter "L" at this point in the design. There's more to do on both the "O" and the "L", but I found it easier to break everything down into sections rather than rendering each letter separately and to completion.

Step 3
Next up we have the letter "D".- I started with a singular shape for the entire letter, using the same gradient as on the "G".
- After adjusting the gradient in the Gradient panel (spreading the colors out and adjusting the angle), I drew two shapes to define the twists and curves within the letter. For this I used the same gradient as we used for the undersides of the loops of the "O".
- Finally, I repeated the process we used on the "G" to create the edges on the letters "OLD". There are four expanded paths in total.

4. Adding Letters
Step 1
As you've got most of the technique that I've used here, the following sections will concern themselves with showing alternate methods, streamlining the process, or creating different letter forms.For starters, I had initially only created the word "gold" rather than the entire phrase seen in the final piece. As such, adding into the design was crucial to fill up space. When adding letters, use parallel lines along the top and bottom of each letter in order to make sure they're at the same angle as the ones that came before.
This also helps you visualize what the ribbon-like ends, curves, and angles of the letters are before you've filled in these spaces.

Step 2
Let's focus on the process of the "E", as it appears three times in the final design.- Using the same gradients as I used on the "D" for highlighted areas and shadows, I've created three shapes on the left side of the "E". Make sure the angles of the gradients are perpendicular to the edges of their objects.
- Replicate the technique used throughout Section 3 (drawing gradient shapes to highlight, shade in, and drawing paths to create edges). Note how the edge path in the center of the "E" had to be cut into two pieces for the curve to be just right. Do not be afraid to draw edges in steps if it's a particularly difficult curve.
- Concentrate darker colors within your gradient in the bottom side of curving shapes and especially if another letter or shape overlaps them (note the darker color behind the stem of the "N").

Step 3
This is the completed version of my word "Golden". Almost all of the highlights received additional gradient shapes like those we used to create shadow and highlight shapes on the letter "G". Using additional shades of brown, orange, and creamy yellow keeps the tone of this gold from being too cold.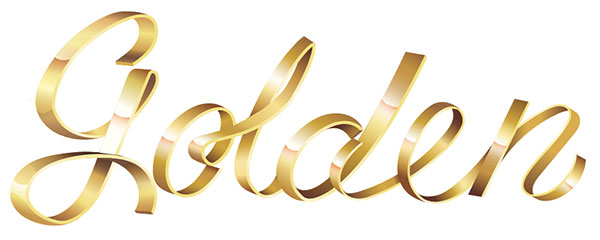
5. Rendering Letters Without a Base Shape
Step 1
An alternative method in rendering gold text is to draw each gradient shape with the Pen Tool, without using the Shape Builder Tool method outlined in this tutorial.- Start with your basic lettering. In this case, it's the rest of the final design, "We Are".
- Copy, Paste, and place the copied text to the right of the original text. Use the Pen Tool to draw horizontal lines between open edges on the top and bottom of the design. Group together your components for each word and Lock them in the Layers panel.
- Starting with the "W", trace the end of the first curve. Use the same gradient as we initially used for the "G".
- Draw in the next part of the first curve in the "W". Use the same gradient as we used for the "D". Make sure the angle of the gradient is parallel with the horizontal ends and edges of the letters (note the end of the curl).

Step 2
Continuing on with the letter "W", I've already added the next curve and the corresponding edge shape.- The second diagonal of the letter is a large, curving shape.
- The shape beneath the second diagonal (the end of the first diagonal) uses the same gradient as for the undersides of the loops of the "O". Angle the gradient so the darker portion is in the upper left of the shape (this was -51.7° for my piece).
- Trace the edge of both of these shapes. I found it easiest if the edge was a singular path.

Step 3
Let's look closely at the meeting point of the first and second diagonal of the "W". I used the Direct Selection Tool (A) to adjust the anchor points of the overlapping shape so it didn't kick out past the path of the yellow edge.Then, using the Pen Tool, I drew a simple rectangle that served as an end point for the two diagonals. This allows the shape of the letters to look as if they were bent by pliers in order to get that severe bend.
Adjust the anchor points of your shapes so that they connect to the rectangle at the end of your letter.

Step 4
The third diagonal overlaps the second at the top, and the fourth diagonal overlaps the third at the bottom. The letter is constantly loops through itself. Once again, the bottom of the fourth diagonal has another rectangle allowing the sharp curve in the design seem more plausible.
6. Handling Other Letter Shapes
Step 1
Two more instances of the letter "E" appear in my design. I found it easiest to just Copy, Paste, and Scale the letter as needed throughout the rest of the design. If your "E" connects with your "N", you'll have to carefully delete anchor points and extraneous components.
Step 2
The "A" has a lot of overlapping shapes.- As with previous letters, start with the curving tail on the left.
- Adjust the angles of the Linear Gradients used in the stem and its curving tail.
- Make sure the gradient used on the tail is brighter than what's nearest it in the stem of the "A", since that part of the design is curving outward.
- The second stem overlaps the first at the top, but it's overlapped by the curling bar of the "A".
- Note how the curling bar was separated into two shapes so it has dimension in its design. Five shapes in total make up the "A" at this point.

Step 3
The edge of the bar of the "A" was drawn in one shape, but after I expanded the path, I drew two small gradient shapes on either side of the overlapping bar that go from#5e322a at 100% to 0% Opacity in order to separate the sections and add a shadow. I also drew a small shape filled with #874e2e to break up the end of the bar with the shape below it.
Step 4
Finally, the letter "R" is broken down into three shapes (see below). Note the light yellow edges appearing on both side of the letter since they're curving in toward the center of the letter.
Step 5
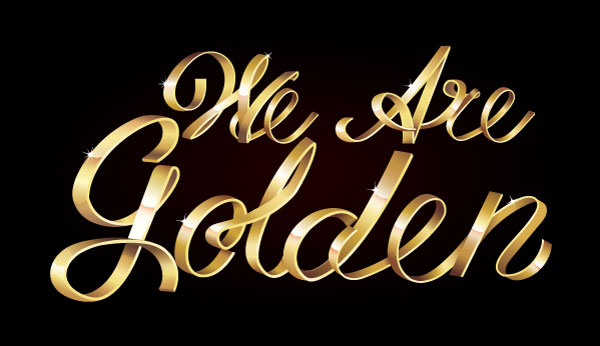
Finally, create some simple sparkles by drawing small white circles with the Ellipse Tool (L) and applying a Pucker effect (Effect > Distort & Transform > Pucker & Bloat). I slid the slider to -93%, but the amount will vary depending on the size of your circle and the shape you want to create. Expand the new shape under Object, and Rotate or overlap sparkles as needed. Place them around your shiny gold text.
Great Job, You're Done!
Give yourself a gold star! You've completed the tutorial and are ready to take on the world with shiny, golden text. I hope the techniques outlined above inspire you to create banners, posters, and more with glorious golden letter forms that glisten off the page.


