Create a UAE National Day Poster Design in Adobe Illustrator


Final product image
What You'll Be Creating
In the United Arab Emirates (UAE), National Day is celebrated each year on December 2, with amazing fireworks, festive shows, concerts, heritage displays, and a no-work holiday for everyone!
The day marks the UAE's formal nationalization, which was when the seven emirates were united under one flag to form the United Arab Emirates. The seven emirates (Abu Dhabi, Dubai, Sharjah, Ajman, Umm Al Qaiwain, Ras Al Khaimah, and Fujairah) are headed by Sheikh Khalifa bin Zayed Al Nahyan, the federation's president. Dubai being the largest and most popular Emirate, I’ve decided to create a National Day poster showcasing the city’s iconic landmark and the world’s tallest tower, Burj Khalifa.

In this tutorial, we will use some new Adobe Illustrator features and enhancements, as well as the more traditional tools, to create a festive graphic style poster for the UAE National Day holiday.
Let the celebrations begin!                              
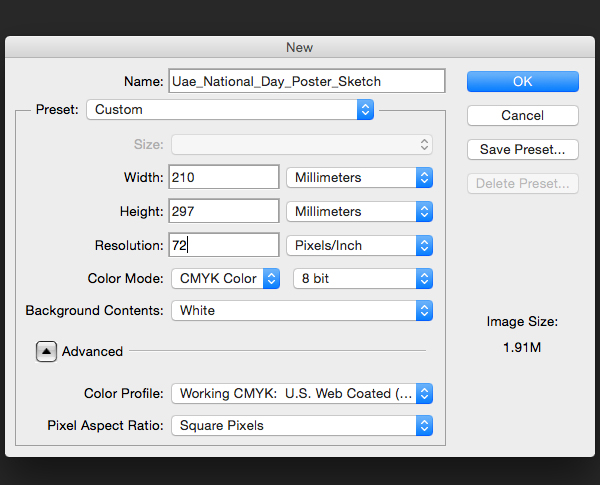
We start by sketching out the idea for our design. I suggest you browse online for images of the UAE, Dubai, and Burj Khalifa tower, to help you visualize the elements for your creation. When I sketch, I normally use Photoshop CS6, and my Wacom Intuos Pro Pen tablet.
In Photoshop CS6, open a new file: File > New (Command-N).
Name the file: Uae_National_Day_Poster_Sketch.
Select Preset: International Paper, Size: A4, Color Mode: CMYK, set a Resolution of 72 Pixels/inchand Background Contents: White. When the resolution is modified, you will see the Preset will change to Custom.
In case you are wondering why I sketched at 72 pixels, it is because I just wanted to roughly place in the outline of the artwork and not initially add in any details to the piece.

Abu Dhabi- Dubai- Sharjah - Ajman - Umm Al Qaiwain Ras Al Khaimah Fujairah Sheikh Khalifa bin Zayed Al Nahyan UAE National Day Poster Photoshop sketch Burj Khalifa Layer Design Color Wacom Intuos Color Mode Size Format Milimeter Pixels Custom Resolution

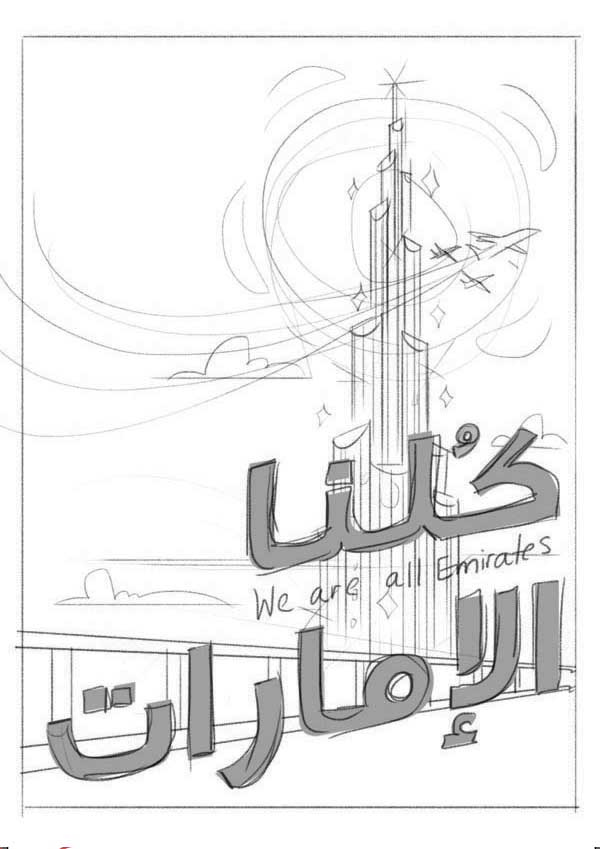
Select the Brush Tool (B), with a greyish foreground color for your brush, and draw your basic concept on the artboard. Sketching with the grey brush helps you trace the sketch easily in Illustrator.
I was visualizing the poster as being bright, edgy, and retro-inspired, with an architectural space theme. On the sketch I have added hand-drawn lettering of the Arabic translation of “We are all Emirates”.
With a wide round brush preset selected, color in the text area to give it a visual pop. Fill in the text area with the brush Mode set at Multiply.
Once your sketch is complete File > Save (Command-S) using the JPEG format, and move on to Illustrator CC.

Sketch  UAE National Day Poster Arabic English Save Brush Mode JPEG Multiply

In Illustrator CC, create a new file: File > New (Command-N). Name it as UAE_National_Day_Poster, set the Size to be A4, and click OK.

UAE National Day Poster Name Artboard Size Color Mode Pixel
Open the Layers panel: Windows > Layers. Name the first layer Sketch so we can place in our sketch image.
File > Place (Command-Shift-P), select the file Uae_National_Day_Poster_Sketch.jpg, and click OK. You will notice a graphics pointer appear, with a tiny preview of your selected image. Drag the pointer, and click it on the upper left corner of your artboard, to place your sketch on the artboard. Then double-click the Sketch layer, which will open the Layers Options panel. Select Lock & Dim Images to 50%. Click OK.

UAE National Day Poster Layer Sketch Name Color
To add a new layer above the selected layer, click the Create New Layer button in the Layers panel, and create a new layer called Burj Khalifa, as we will start tracing the tower’s first section.
File > Save (Command-S), and save the file as UAE_National_Day_Poster.ai.
Let’s start drawing our tower. Select the Rectangle Tool (M), and with a black Stroke, and Fill set to None, draw a rectangle to measure up to the dimensions of one of the tower’s sections. Then with the Direct Selection Tool (A), drag the left upper corner downwards in order to slant the top, while holding down the Shift key to constrain the anchor vertically.

Tracing Sketch Direction Rectangle Tool Direct UAE National Day Poster Sketch
Select the Pen Tool (P) and free-draw a curve to create the top face of the building. Open your Pathfinder panel: Window > Pathfinder. Select both of the shapes we just created with the Selection Tool (V) and from the Pathfinder panel click the Divide button.
Just as the name implies, it divides all overlapping shapes into distinct, non‑overlapping shapes. It also groups the shapes together. Select the shape, Ungroup (Command-Shift G) and delete the excess shapes.

Pen tool P Window Pathfinder UnGroup Shift Command Panel Selection Tool UAE National Day Poster
With the Line Segment Tool (\), draw a line from one side of the rectangle to the other, to connect the ends. Then you need to curve the line segment slightly upwards to give the impression of a curved form on the tower. So select the Anchor Point Tool (Shift-C), which is under the Pen Tool bin, and give the line a slight pull up.

Line segment Tool Achor Point Shift Selection UAE National Day Poster Sketch Burj Khalifa
Now duplicate the curved line segment to create the rest of the tower floors. So select the line segment we curved, hold down the Option and Shift keys, and drag downwards to copy and constrain your selected line segment. You will now have your first copy. All you have to do after that is fill in the rest of the floors by pressing Command-D to Duplicate the line. Continue to click Command-D, until the tower section is filled.

duplicate Command Shift Selection UAE National Day Poster Sketch Burj Khalifa Line Arc Curve
Take the Line Segment Tool (\) again, and draw vertical lines from top to bottom of our rectangle. Hold down the Option and Shift keys and drag downwards to copy and constrain your selected line and fill the floors in. Some of your lines will be shorter than the full height of the rectangle. So select the Direct Selection Tool (A) to manually extend the ends. Hold down the Shift key to constrain the lines vertically. File > Save (Command-S).

direct Selection tool Line Segment Tool Vertical Shift Selection UAE National Day Poster Sketch Burj Khalifa Sketch

Let's start coloring in our tower section.
Select the rectangle, and here’s a nice little trick to copy and paste an object in place. The keyboard shortcut for this is Command-C for Copy, and Command-F for Paste in Front and Command-B for Paste to Back. Make sure you Paste to Back. You won’t see the action, but if you drag the selection to the side you will notice the pasted copy right behind. Once you’ve duplicated the rectangle, do the same with the top half circle.

copy paste front back Duplicate Rectangle Selection UAE National Day Poster Sketch Burj Khalifa Sketch Layers
Open Window > Gradient, the Stroke panel, and the Swatches panel.
In the Gradient panel, select Type: Linear, Angle: -90°, and give the gradient sliders a red tone from light red to a darker shade, Stroke (X) to None. Then drag the gradient swatch from the Gradient panel onto the Swatches panel to save it, in case we need to use the same gradient at a later stage.
Select both half circles, and Object > Arrange > Bring to Front (Command-Shift-]), so we can cover the line segments. Give the lower half circle a flat pink-red color, and keep the one on top with a black stroke.
With one of the black stroke lines selected, Select > Same > Stroke Color, and you will find that this action selects all shapes with black strokes. Deselect the borderlines, by just holding down the Shift key. Group (Command-G) the inner lines together, and give them an orange-red stroke of 0.3 pt weight.
Windows > Transparency, and give the strokes a Screen: Blending Mode.

Window transparency Arrange Bring to Front Command Shift Linear angle Stroke Gradient Blending Mode Stroke Color copy paste front back Duplicate Rectangle Selection UAE National Day Poster Sketch Burj Khalifa Sketch Layers
Then select the borderlines of the rectangle, Group (Command-G), and give them a white stroke, Rounded Caps & Corners with 1 pt weight.
You will notice while browsing images of the Burj Khalifa that some of the towers' floors are highlighted, so we need to mimic that effect. Select All (Command-A), and Lock Selection (Command-2). Take the Pen Tool (P) and freehand draw a curved rectangular shape to fill at least three or four floors. Fill in with red and a Blending Mode: Screen. Object > Unlock all (Command-Option-2), and arrange the screened highlights to be behind the white borderlines.

Select all Lock Selection Group Pen Tool Window transparency Arrange Bring to Front Command Shift Linear angle Stroke Gradient Blending Mode Stroke Color copy paste front back Duplicate Rectangle Selection UAE National Day Poster Sketch Burj Khalifa Sketch Layer Screen Unlock All
Select all the tower elements and Group (Command-G) them together. We now have one section of the tower. All you have to do now to complete the render of the tower is to follow the same steps we did for the first tower section.
I wanted to give the tower the colors of the UAE flag: Red, Green, White and Black. However, black is too aggressive, and white won’t showcase clearly, so I worked on red, green, and white-bluish gradients.
Note: Each time you create a section, modify the arrangement to be behind the other section.
When you reach the top of the tower, it’s best you downsize the stroke weight of your lines, and for the head of the tower, just draw in vertical rectangles, with the Rectangle Tool (M).  
Once you are done, Select All (Command-A) and Group (Command-G) all the tower elements together. File > Save (Command-S).

File Save Rectangle tool File Color Group Window transparency Arrange Bring to Front Command Shift Linear angle Stroke Gradient Blending Mode Stroke Color copy paste front back Duplicate Rectangle Selection UAE National Day Poster Sketch Burj Khalifa Sketch Layer

Lock the Burj Khalifa layer, create a new layer, and name it Text.
Select the Type Tool (T), with a font size of about 43 pt, and type in the English text, We are all Emirates, with the desired font. I worked with Nova font, which you can download free.
Next, I notice some of the letters need space between them, so I use the Touch Type Tool (Shift-T) and select the I, S and L in the sentence to add in some breathing space between each letter.

touch type Tool Dafont Nova Arabic English Font Size Window transparency Arrange Bring to Front Command Shift Linear angle Stroke Gradient Blending Mode Stroke Color copy paste front back Duplicate Rectangle Selection UAE National Day Poster Sketch Burj Khalifa Sketch Layer
To type in the Arabic, you need the Adobe-ME (Middle Eastern) edition for full Arabic support, which you can get from the Adobe website. For Arabic fonts you can download the desired type free from Fonts2U.
Take the Type Tool (T), and type in the Arabic text, set at 50 pt font weight. Make sure Paragraph Direction is set to Right-to-Left Direction, because Arabic reads from right to left.

arabic Weight Right Left Arabic Direction Adobe Me edition Window transparency Arrange Bring to Front Command Shift Linear angle Stroke Gradient Blending Mode Stroke Color copy paste front back Duplicate Rectangle Selection UAE National Day Poster Sketch Burj Khalifa Sketch Layer Paragraph point
We need to slant the text, so select the Shear Tool, which you can find under the Scale Tool bin. To shear along the text’s vertical axis, drag anywhere in the document window in a down direction. Hold down Shift to constrain the object to its original width.

Shear type tool Arabic Slide Vertical Window transparency Arrange Bring to Front Command Shift Linear angle Stroke Gradient Blending Mode Stroke Color copy paste front back Duplicate Rectangle Selection UAE National Day Poster Sketch Burj Khalifa Sketch Layer
Then you need to expand your type to turn them into shapes, because we will give them effects at a later stage. Object > Expand. The Expand Options panel will open; make sure Object and Fill are checked, and click OK. Move the text into the placement you want.
Lock and hide the Text layer, and create a new layer above Sketch. Name it Background.
In our background layer, we need to trace the remaining elements. So select the Pen Tool (P) and start tracing all the other elements.
For the bridge, draw a long rectangle using the Rectangle Tool (M), then hold down Shift and AltWith both rectangles selected, click the Free Transform Tool (E). The free transform widget will appear with the button options to constrain, free transform, perspective distort, and free distort. Select Perspective Distort.
You will notice Perspective Distort is constrained, so there's no need to hold the Shift key when moving the anchors. To help you align the results the way you want, click Free Distort, and align accordingly.

Rectangle Tool E Vertical Distort Results Pen Window transparency Arrange Bring to Front Command Shift Linear angle Stroke Gradient Blending Mode Stroke Color copy paste front back Duplicate Rectangle Selection UAE National Day Poster Sketch Burj Khalifa Sketch Layer
Take the Rectangle Tool (M), and draw a rail on each end of the parallel lines. Object > Blend > Blend Options, and a Blend Options panel will appear. You can blend objects to create and distribute shapes evenly between two objects, so to capture that we select Specified Steps as 6, and click OK. Then Blend > Make (Command-Option-B), and rails will appear.

Rectangle Tool Blend Make Command Option Window transparency Arrange Bring to Front Command Shift Linear angle Stroke Gradient Blending Mode Stroke Color copy paste front back Duplicate Rectangle Selection UAE National Day Poster Sketch Burj Khalifa Sketch Layer
Object > Blend > Expand the blended object, so we can form the shapes. Select the rails and parallel lines and in the Pathfinder panel, click Shape Modes: Unite, to create a compound shape. Then finish off tracing the rest of the sketch, toggle visibility on the Text layer, and delete the Sketch layer.
Unlock the Burj Khalifa layer. Select the rail and the bridge ground and drag them to the Burj Khalifa layer to cover the tower's lower section. File > Save (Command‑S).
Now we need to color the rest of the poster, so we can start visualizing it better.

File Save Sketch layer Cover tower Blend Expand Window transparency Arrange Bring to Front Command Shift Linear angle Stroke Gradient Blending Mode Stroke Color copy paste front back Duplicate Rectangle Selection UAE National Day Poster Sketch Burj Khalifa Sketch Layer

Dubai has sun all year long, so we need to work with a bright color palette for the background, yet we need it to blend with the flag’s palette. For the background sky color, I chose a yellowish gradient, and the other shapes were either white, yellow, or in accordance with the UAE flag color hues.

Window transparency Arrange Bring to Front Command Shift Linear angle Stroke Gradient Blending Mode Stroke Color copy paste front back Duplicate Rectangle Selection UAE National Day Poster Sketch Burj Khalifa Sketch Layer colro Flag palette shapes form
While coloring, I began to notice some shapes were the wrong color tone. For example the tower section tops, with the pink-red color, were altered to white fills. Also the head of the tower wasn’t matching in hue so it was given a flat sky blue tone. For the smoky plane trails, I gave them a fading swatch fill. Move and rescale the cloud behind the smoke trails. For the white bridge, you need to transform it by slightly extending it. Also move the tower slightly to align it properly in the layout.
Now the illustration is starting to come to life.

Swatch color palette feel Design illustration sky blue tone Window transparency Arrange Bring to Front Command Shift Linear angle Stroke Gradient Blending Mode Stroke Color copy paste front back Duplicate Rectangle Selection UAE National Day Poster Sketch Burj Khalifa Sketch Layer
Lock the Background and Burj Khalifa layers, and unlock the Text layer.
When we expanded the Arabic text, all the elements were grouped together. So, Ungroup (Command-Shift-G) and then select each word’s letters and create a compound shape by selecting the Pathfinder panel: Unite. In the Pathfinder Panel Options, you will find in the drop-down menu the Make Compound Shape option. Select this option, and then hit the Expand button on the Pathfinder panel, so the shape is unified.
For the English text, Unite the whole sentence together.

English unite Compound Path Command Shift Panel Arabic Text Unite Option
Now you start noticing there is too much going on on one side of the poster, and the text doesn’t read properly, so unlock the Burj Khalifa layer and move the tower to the left, then scale down the size of the text slightly. That way it will give it some breathing space. Unlock the Background layer, and move the clouds and any other elements around to un-clutter the scene. Then lock the two layers again and leave the Text unlocked.
The English text looks squeezed in between the Arabic, so I decided to drag it below the Arabic, and I brought the Arabic text closer. With the Arabic text selected, Object > Path > Offset path at 2.2 mm, Round, and OK, to give it a border.

Offset Path Arabic Font Clouds Unlock Round Window transparency Arrange Bring to Front Command Shift Linear angle Stroke Gradient Blending Mode Stroke Color copy paste front back Duplicate Rectangle Selection UAE National Day Poster Sketch Burj Khalifa Sketch Layer
From the Pathfinder panel, click Unite, and then delete any holes that may appear in the new shape. You will also notice some gaps like the ones I have circled.

Pathfinder Panel Unite Window transparency Arrange Bring to Front Command Shift Linear angle Stroke Gradient Blending Mode Stroke Color copy paste front back Duplicate Rectangle Selection UAE National Day Poster Sketch Burj Khalifa Sketch Layer gap
Connect the gaps by adding in some new shapes with your Pen Tool (P). Select the new shapes you created plus the border created, and Unite in Pathfinder. In the Pathfinder Panel Options > Make Compound Shape and click Expand. Give the new shape a white fill and Send to Back (Command-[).

Send to Back Expand Pen Tool Options Command Window transparency Arrange Bring to Front Command Shift Linear angle Stroke Gradient Blending Mode Stroke Color copy paste front back Duplicate Rectangle Selection UAE National Day Poster Sketch Burj Khalifa Sketch Layer

Let’s add some effects to the text.
Draw two ovals with the Ellipse Tool (L) to mimic the curve of a light flare. Copy (Command-C), and Command-F to Paste in Front. From the Pathfinder panel, select Shape Mode: Intersect to create a compound shape from the two intersecting forms. Delete the extra oval. Give the new shape a black to grey gradient with an Angle: -90°.
Render the same effect for the lower text.

Ellipse Tool PAste Front Back Copy Angle Grey Window transparency Arrange Bring to Front Command Shift Linear angle Stroke Gradient Blending Mode Stroke Color copy paste front back Duplicate Rectangle Selection UAE National Day Poster Sketch Burj Khalifa Sketch Layer

Lock the Text layer, and unlock the Background and Burj Khalifa layers.
You may need to tweak some of your elements on the Background layer, so that they look in harmony. I thickened the borderlines of my tower, sheared my bridge form, gave the clouds a white fading gradient, adjusted the color and shape of the sun, and modified the jet planes. Once you are satisfied with the overall image, you can move on to add some sparkle to the scene.
Lock your Background layer and move onto the Burj Khalifa layer.
Hold and click your Rectangle Tool button, and select the Star Tool from the bin.
Click once on your artboard and the Star Option window will appear.
Fill in Radius 1: 0.5 mm, Radius 2: 7 mm, and Points: 8. Click OK.

Radius Star Tool  Rectangle Points Ok Window transparency Arrange Bring to Front Command Shift Linear angle Stroke Gradient Blending Mode Stroke Color copy paste front back Duplicate Rectangle Selection UAE National Day Poster Sketch Burj Khalifa Sketch Layer
Fill the star with the Radial gradient from white to black, and then apply a Screen Blending Mode from the Transparency panel.

Draw another sparkle, with the Ellipse Tool (L). Create a white fill circle, Effect > Distort & Transform > Pucker and Bloat. Give it a Pucker of -155%, and a Screen Blending Mode.

Transparency Effect Distort Pucker Bloat Panel Window transparency Arrange Bring to Front Command Shift Linear angle Stroke Gradient Blending Mode Stroke Color copy paste front back Duplicate Rectangle Selection UAE National Day Poster Sketch Burj Khalifa Sketch Layer

Draw a few more circles of different shapes around, give them gradients and Screen blending modes.

Open Windows > Symbols.
Drag the batch of stars and circles onto the Symbols panel to create a new symbol. Keep the settings in your Symbol Options, name the symbol Sparkle and click OK.

Symbols options Ok sparkle Panel Window transparency Arrange Bring to Front Command Shift Linear angle Stroke Gradient Blending Mode Stroke Color copy paste front back Duplicate Rectangle Selection UAE National Day Poster Sketch Burj Khalifa Sketch Layer
Select the Symbol Sprayer Tool (Shift-S), and with the Sparkle symbol selected, spray a number of copies of the symbol on the tower shape. Try to keep within the bounds of the shape, and not overdo it. The Symbol Sprayer Tools are a cool bunch of tools to test and have fun with. You can use the symbolism tools to modify your instances, disperse, enlarge, shrink, rotate or gradually tint the color of instances to make them look more realistic.

Symbol Sprayer Tool shift S Disperse Window transparency Arrange Bring to Front Command Shift Linear angle Stroke Gradient Blending Mode Stroke Color copy paste front back Duplicate Rectangle Selection UAE National Day Poster Sketch Burj Khalifa Sketch Layer

We are almost done.
Unlock all the layers, Select All (Command-A) and Group (Command-G) all the artwork and text together. Everything will move into the Text layer.
Delete the empty layers.

With the Rectangle Tool (M), draw a rectangle in the middle of the artboard, so that we can mask the artwork.

You may have to move or scale the grouped artwork, in order to capture everything inside the rectangle.

Select the rectangle and the grouped artwork, Object > Clipping Mask > Make (Command-7). Now the artwork looks as if it’s framed.
Voila, the festive National Day Poster is done! Let’s celebrate.
File > Print (Command-P), and paste it around your neighborhood.

Clipping Mask Object Select All Rectangle Tool Layer Print Window transparency Arrange Bring to Front Command Shift Linear angle Stroke Gradient Blending Mode Stroke Color copy paste front back Duplicate Rectangle Selection UAE National Day Poster Sketch Burj Khalifa Sketch Layer celebrate paste
Working with Illustrator CC helps you work on your designs faster and more effectively, if you know your tools and memorize the shortcuts. Hopefully you enjoyed this tutorial, and you’re on your way to creating your own festive national day artwork. Let’s showcase that patriotism!!

TDasany

Lorem ipsum dolor sit amet, consectetur adipisicing elit, sed do eiusmod tempor incididunt ut labore et dolore magna aliqua. Ut enim ad minim veniam, quis nostrud exercitation.


Copyright @ 2013 KrobKnea.

Designed by Next Learn | My partner