One of the great advantages of a vector graphic is that it is not only easy to edit and scale to any size, but you can also make it move! Sound like magic? Follow this tutorial and learn how to make your cute vector bicycle ride on an infinite loop in Adobe After Effects!
1. Prepare Your Image in Adobe Illustrator & Import It Into Adobe After Effects
Step 1
We’ll be using the image from our Cute Flat Bicycle Adobe Illustrator tutorial. First of all, we need to prepare our image in Adobe Illustrator. You can add more details to the bicycle, such as shadows or highlights or some accessories—anything that makes your bicycle more intricate. And make sure that you add the second pedal to the bicycle (the one in the back), as we’ll make the pedals spin. I’ve changed the size of the background to 800 x 600 px to make it less square.
Further, we need to place every part that will be moving on a separate layer. However, you can leave the static parts grouped together: for example, the tubes, handlebar and the seat of our bicycle.
Save the ground spots and the clouds each in a new file. We’ll be animating them too. Keep every spot and every cloud on a separate layer in Adobe Illustrator.
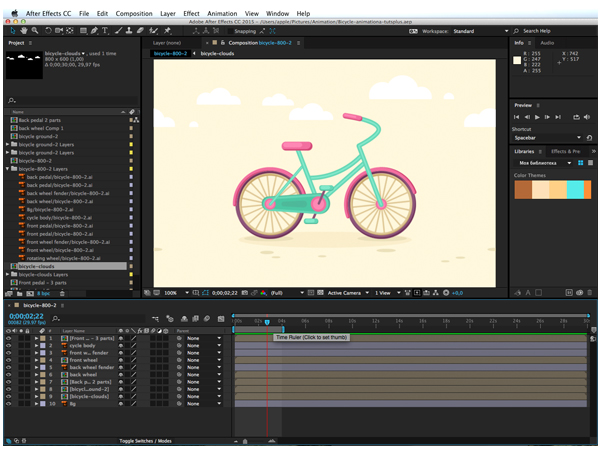
Now we have three Adobe Illustrator files: one for the bicycle, one for the ground and one for the clouds. Check out the Layers panels in the screenshot below in order to keep everything organized.

Step 2
Now let’s launch Adobe After Effects and start making a new project! Go to File > Import > File and select the *.ai bicycle image that we’ve created in Adobe Illustrator.

Step 3
Select the Composition Import Kind and click OK to start working. Now you can find your file in the Project window on the left and double-click it to open it in theComposition window in the center. In this tutorial we’re using the Standard Workspace, so if you want to have the same panels in the same places, you can switch to Standard Workspace in Window > Workspace.

2. Make the "Rotating Wheels" Animation
Step 1
Let’s start animating from the simplest part of the bicycle: the wheels. Find yourTimeline panel at the bottom. In the left area of the Timeline panel you can see all the parts of the bicycle, which were placed on separate layers in Adobe Illustrator. This is why we did it at the very beginning, so now we can work with every part independently.
If we want to unite several parts into one group, making our work more organized, we can use the following method. Select the back wheel of our bicycle together with its fender in the left area of the Timeline panel (here we have these parts as two separate layers), right mouse click and select Pre-compose from the fly-out menu. Now we can double-click the precomposed group to isolate it.
Otherwise, if the number of elements doesn't bother you, just skip this step and double-click the needed object (in our case, it is the back wheel) to open it in a separate Composition window.

Step 2
Now that we’ve isolated the back wheel, head to the Timeline panel and open the drop-down menu of the wheel by clicking the small triangle icon next to the Label.Here we have the Transform functions, hidden in another drop-down menu. To make our wheel rotate, we need to work with Rotation. Click the tiny stopwatch icon next to Rotation, thus setting our first keyframe, and let’s start animating!

Step 3
Take a look at the main area of our Timeline panel. It has a Time Indicator, which is now set at the very beginning of the Timeline and indicates our first keyframe, the initial position of the object. We’ll be creating a simple two-framed animation for our wheel.
Grab the Time Indicator and move it to 04 s position of the Time Ruler, defining the end of the frame. You can click the rhombus icon (it is next to Rotation) in the left part of the Timeline panel to set the second keyframe; however, it will be set automatically if you change any parameter of the object at this point.
At the bottom of the Timeline panel you can find the scale slider (the mountains icon), which helps you to Zoom in and Zoom out on the Timeline, setting the appropriate quantity of seconds on the Time Ruler.

Step 4
Keeping the Time Indicator at its end point (04 s, our second keyframe), click on the blue Rotation values and set the degree value to 360. Now we have a newRotation value in the second keyframe, which looks like this:
1x+0,0°.
If you move the Time Indicator back and forward, you will see the wheel rotating. You can also push Play in the Preview box in the right area of the Workspace to see the rotation in action.

Step 5
Let's do the same two-frame animation for the front wheel of our bicycle. To make things fast and easy, select Rotation of the back wheel, which we’ve just animated, and copy (Control-C) the settings. Then head to the front wheel, double-click to isolate it, select Rotation and paste (Control-V) the settings. Now we have exactly the same animation for the front wheel!

You can return to the main Composition window by clicking the tabs on top of theTimeline panel and check the animation of both wheels in action.
In order to make an infinite animation loop, head to the Timeline panel and find theWork Area End slider, right under the Time Ruler. Pull the slider back to 04 s, putting it at the same spot as the Time Indicator. Now if you push Play in thePreview panel, you will have your animation seamlessly repeating again and again.

Let’s move on to the pedals!
3. Make the Pedals Spin
Step 1
Firstly, let’s animate the front pedal. It consists of three parts, so we can select all of them and Pre-compose. Double-click the precomposed group and zoom in a bit, if needed, by pressing Control-+ or simply by scrolling the mouse-wheel (your vector object might look a bit pixelated at this step, but that’s how Magnification actually works in AAE).
Let’s start animating from the pink circle, which we’ve placed at the bottom. Open itsTransform menu in the Timeline panel.

Step 2
We need to do the same thing as we did for the wheels. Click on the Time-Vary stop watch next to Rotation, creating our first keyframe at the very beginning of theTimeline. Move the Time Indicator to 04 s and set the Rotation value to 360 degrees, creating a second keyframe.

Step 3
Let’s parent the pedal arm to the pink circle. First, we need to make sure that thepivot point of the pedal arm is in the center of the pink circle. Keeping the pedal arm selected, press Y and drag the pivot point to the center of the pink wheel.
Now use the Pick Whip (a swirl icon in the Timeline panel, next to the layers) to link the pedal arm to the pink wheel simply by clicking the Pick Whip and dragging it onto the wheel layer. You see a connecting blue line, like in the screenshot below.
You can also select the Parent object manually from a small drop-down menu next to the pedal arm layer by selecting “3. Rotating wheel” instead of “None”.

Great! Now if we move the Time Indicator, we’ll see that the pedal arm is moving together with the pink wheel. However, the green pedal part remained in its place. Let’s fix this and make the whole construction move.

Step 4
Select the green pedal, and let’s try linking it to the pedal arm with the Pick Whip.Now if we move the Time Indicator, we’ll see that everything moves all together, but the pedal also spins around its own axis. That's not what we actually wanted. To avoid this, let’s use a simple and useful trick!

Step 5
Open the Transform menu of the green pedal and Alt-click the stopwatch next toRotation to add an expression. You will see a new sub-menu appear. Now select the Pick Whip next to Expression: Rotation and link it to the Rotation value of the pink wheel.
After doing so, you’ll notice a string of text in your Timeline panel, referring to theExpression: Rotation of the green pedal. What we need to do here is to place our mouse cursor at the end of the text and add the following value:
*-1 (multiply by minus one). Now if you check your animation, you will see that the pedal moves together with the whole construction as it should.
Step 6
We also have the back pedal. The only difference with the front pedal is that it doesn’t have the pink wheel. We don’t actually need it, as we can place the pivot point of the pedal arm at its tip (as we did with the previous pedal) and apply the same two-frame Rotation animation to the pedal arm as we had for the pink wheel.
Then select the green pedal and link its Expression: Rotation value to theRotation value of the pedal arm, using the Pick Whip. Add
*-1 to the text string in the Timeline panel.
4. Animate the Ground Spots
Step 1
We have the ground spots in a separate Adobe Illustrator file. Lets File > Import > File it into our project. Select the Composition Import Kind and drag the ground file from the Project window on the left to the Timeline layers area in the bottom, placing it between the background and the bicycle parts.

Step 2
Double-click to isolate the ground group. Let’s start from the biggest ellipse, which is at the bottom. Find it in your Timeline layers area and open the drop-downTransform menu. We’ll make it change its size, and for this purpose we’ll be changing the Scale values. Click on the stopwatch next to the Scale function, setting our first keyframe at the beginning of the timeline.

Step 3
Let’s create the second keyframe at 04 s by placing the Time Indicator on 04 s of the Time Ruler and clicking the small icon next to Scale. Do not change the Scaleparameters at this stage, as we want the shape to preserve its initial form at its first and last keyframes.

Step 4
Let’s add another keyframe between the first two, making a three-frame animation. Place the Time Indicator at 02 s of the Time Ruler and at this point change theScale horizontal value (the width of the object) to 80% (uncheck the Constrain proportions checkbox next to the values to make the values change independently from each other).
This way we squash our shape a bit, making it narrower in the middle of the animation. If we Play our animation, we’ll see that our spot shortens and then goes back to its initial shape, restoring its width.

Step 5
Let’s make the same three-frame animation for two smaller spots on top of the big one. These two depict the shadows under the wheels of the bicycle. This time set the Scale width to 70% in the middle keyframe, leaving all other settings exactly the same as for the big spot.

Step 6
Now we have a bunch of small spots left. We want them to move all together along the horizontal axis, imitating the movement of the ground. In order to make things easy without selecting the spots one by one and applying effects to every of them, we’ll use a simple trick and create a Null Object.
Null Objects are great when you’re working with a bunch of objects, all requiring the same settings. A Null Object is an non-existent object, which can serve as a transport for the settings and properties that you want to apply to other objects. In other words, it saves you a lot of time. Let’s see how it works!
Click the right mouse button in the layers area of the Timeline panel and selectNew > Null Object. It will appear on top of the layers list. Now just select all the small spots and use the Pick Whip to parent the spots to the Null Object (you need to link only one of them, and the others will link automatically).

Step 7
Keeping the spots selected, duplicate (Control-D) them. In the Timeline panel, put the duplicate layers on top by dragging them, so that you have two groups of spots, one on top of the other.

Step 8
Now, keeping the duplicated spots selected, head to the Composition window, take the Selection Tool (V) and drag the spots to the right, holding down the Shift key. Place the spots outside the canvas, close its right edge.
Check out the screenshot below to see how it should look. Use the Hand Tool (H) or just hold Spacebar to move around the artboard.

Step 9
Select the spots on the artboard and move them to the opposite side, so that the first spot on the left is at the edge of the artboard.

Step 10
Now let’s animate the ground with the help of the Null Object! This time we’ll be working with the Position values. Open the Transform menu of the Null Object and click on the Position stopwatch to create the first frame.
Move the Time Indicator to 04 s, making a second keyframe. And at this point, click and hold your left mouse key on the horizontal Position value and start dragging your mouse cursor to the left. You will see that the value changes and the scene in your Composition window moves to the left as well.
We need to move it so that the second group of the spots (the duplicates) takes the place of the first group. And the first group should move outside the left edge of the canvas.
Check out the screenshot below. The red square depicts the movement of the objects to the left.

This is the final position of the objects at 04 s, in the second keyframe.

5. Animate the Clouds
Step 1
We have the last element of our composition left: the clouds! And we’ll be animating them exactly the same way as we did with the spots on the ground.
We have the clouds in a separate Adobe Illustrator file, so firstly we need to Import it into Adobe After Affects, selecting the Composition Import Kind. Then drag the precomposed clouds group from the Project window on the right to the Timelinepanel at the bottom.

Step 2
Double-click to isolate the clouds group. Select all the clouds in the Timeline panel and duplicate (Control-D) them. Head to the Composition window and move the copies to the right, outside the canvas, placing the left part of the group closer to the edge, as shown in the screenshot below.

Step 3
Create a Null Object and link all the clouds to it, using the Pick Whip.

Step 4
Finally, create a simple two-framed animation for the Null Object, which will make our clouds move from right to left during four seconds.

6. Check Your Animation and Export It as a GIF in Adobe Photoshop
Step 1
Great, now we have all the needed parts of our image moving, spinning and rotating! We can return to the main Composition window containing all the elements, and push Play in the Preview panel to see how it works.
If you happen to find any jerking movement in the clouds or on the ground, isolate the problem group and try to change the position of the objects, for example by moving the duplicated group of clouds closer to the edge or, on the contrary, farther from the edge, adjusting the distance of the objects to the speed of their movement.
All in all, we have a four-second animation cycle for all the elements, so all the movement starts and ends at the same time.
Step 2
Let’s move to the final stage of our tutorial and export our animation, so that we can post it on the Internet and show it to the world! We’ll be using Adobe Photoshop to make a moving GIF image.
First of all, in Adobe After Effects, go to Export > Add to Render Queue. This will open a new Render Queue tab in your Timeline panel.

Make sure that you have the Best Render Settings selected. You can click on it to open the pop-up menu and check your Render Settings. The Best Quality and Full Resolution options should be set by default. Click OK to close the window.

Step 3
Now find the Output Module under the Render Settings and click Lossless. SelectJPEG Sequence in the Format dropdown menu and click OK. This way we make multiple JPEG images, one for each moment of our animation. When we combine these images together, we get a moving image.

Step 4
Click Output To, open the drop-down menu and choose a destination. Create a new folder for your set of JPEGs. And click Render.

Step 5
Now launch Adobe Photoshop and let’s Open (Control-O) the folder with our multiple JPEGs. Select the first one and check the Image Sequence box at the bottom of the Open dialog box. Click OK.
Leave the Frame Rate as 30 frames per second in the pop-up window, and click OK.
Now we’ve created a video file from our image.

Step 6
Let’s move on and go to Export > Save for Web (Alt-Shift-Control-S). In the Save for Web dialog box, select GIF format in the top right part of the window. Set theLooping Options to Forever at the very bottom of the window, so that we have the animation repeating again and again. Leave all the other options as default, and click Save to export our GIF image to the desired destination.

Step 7
And a final quick tip here. If you wish to save your animation as a video instead of GIF, then you don't actually need to use Adobe Photoshop at all!
In this case, in Adobe After Effects, Export > Add to Render Queue and then move to the Output Module under the Render Settings and click Lossless. Select QuickTime in the Format dropdown menu and click OK to save your file as *.mov. That's it! Now you can upload it to Youtube or Vimeo.

When in Doubt, Pedal It Out!
Voila! Our animated bicycle is ready! We could watch this infinite motion for the whole of eternity, but let’s get back to the real world and continue making new creative stuff! I hope these tips and tricks are useful and will help you create and animate fancy spinning and rotating things. Have fun!


