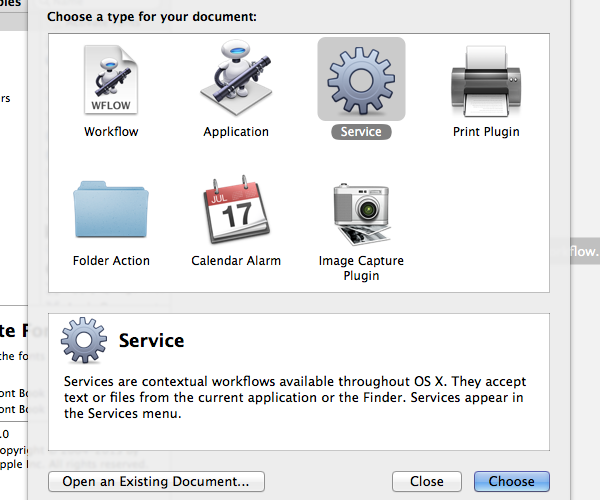
About Automator Services
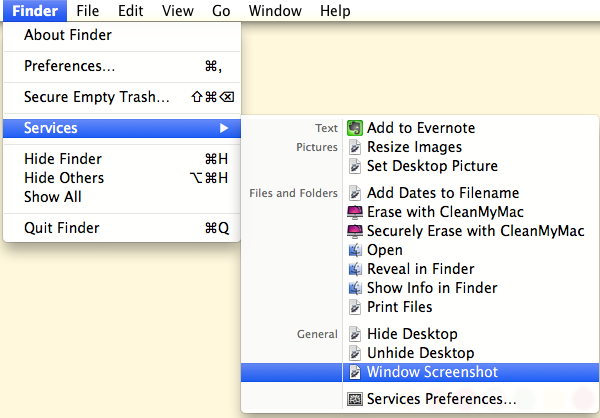
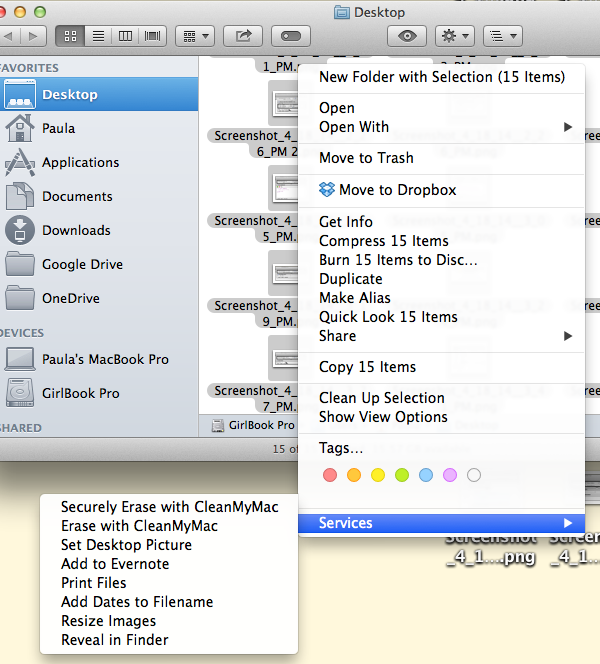
I’ve previously written about how to automate your Mac to do almost anything using Automator calendar alarms and how to use Services to clear up your Desktop. Services are workflows accessed from contextual menus.Contextual menus can be found by Secondary-click > Services on a file, text, or in an application or in the application menu via Application > Services. Services are always available in any relevant application, including Finder; Automator doesn’t have to be running for services to work.
While it’s possible to create workflows, applications, and folder actions to accomplish many of the same tasks, the always on nature of Services makes them convenient for small or repeated tasks without breaking up your workflow.
1. Create a Service to Rename Files and Folders
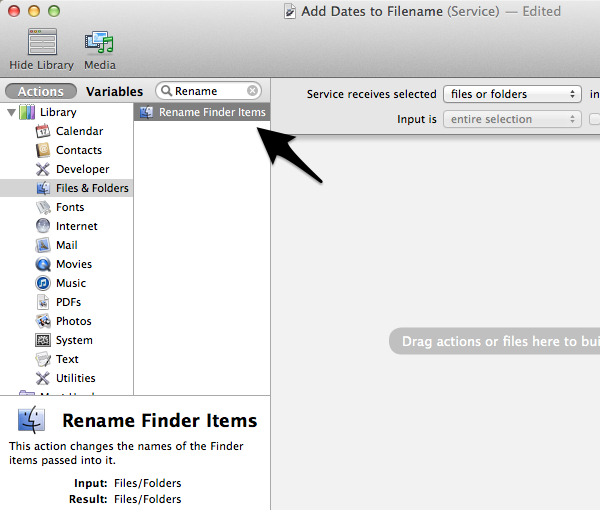
In a previous tutorial, I explained how to use Automator to batch rename files and folders with a user-created Automator application. I’ll show you the process of creating an Automator service to perform the same function. The service will be different than the application, in that it will always be available in the Services contextual menu.Open Applications > Automator and choose Service when prompted to create a new Automator document. In the Actions sidebar, select Files and Folders and then Rename Finder Items.
Drag the Rename Finder Items action to the main workflow pane.

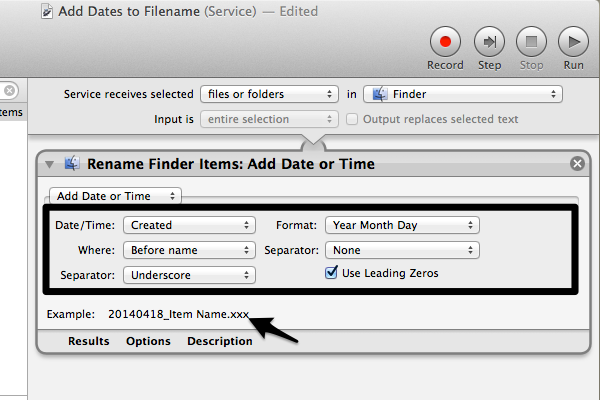
I want to add a date to my files, but you can also choose to makes filenames sequential, change the filename from uppercase to lowercase, and more. If any of your changes will create identical filenames, consider adding another Rename Finder Items action to your workflow to number your files.

2. Create an Automator Service to Resize Images (Without Opening an Image Editor)
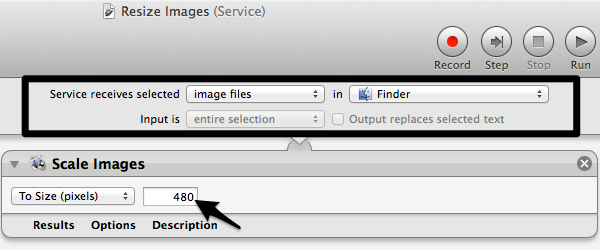
This service can really speed up image editing and is useful if you need a lot of images with the same dimensions, for instance in app or web development, or if you just want to shrink your images before uploading them to social media.Open Automator and choose Service when prompted to create a new Automator document, just as before. In the Actions sidebar, select Photos and then Scale Images.

Whether you want to preserve the original images depends on how you’re using your images. If you’d like to keep the originals, click Add.

Next decide how you would like your images scaled and to what size. Automator allows the creation of similar workflows, so you won’t be tied to just one size.For example, if you commonly scale images to three sizes create three separate services.
3. Create an Automator Service to Take a Screenshot of a Finder or Application Window
This is a service I use a lot, because I often need screenshots of just the active window. I used to rely on third-party applications to get the job done, but Automator can handle this, too.Open Automator and again choose Service when prompted to create a new Automator document. In the Actions sidebar, select Utilities and then Take Screenshot.
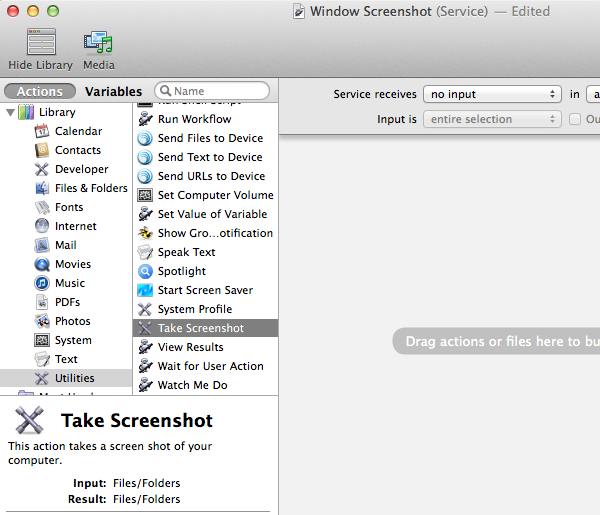
Set the type of screenshot to Interactive, and select Choose Window under options. Set the destination folder for the new screenshot. If the destination folder isn’t present when the service runs, it will create a new folder in the location you specified.
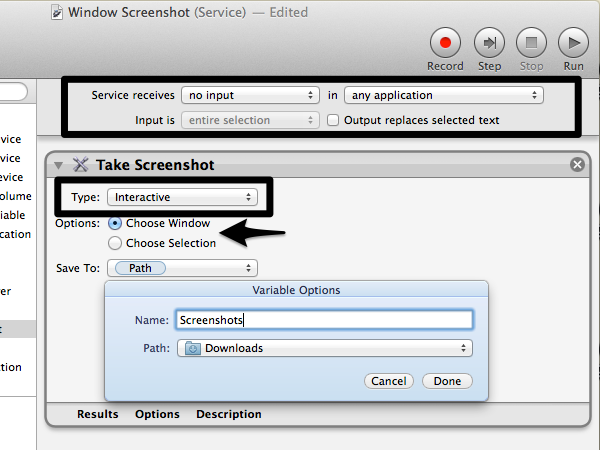
Unlike the two services above, it isn’t necessary to select a file before activating the service. Instead, when the Take Screenshot service runs, you will be prompted to select a window for the screenshot. The cursor will become a small camera, and the selected window will be grayed-out on hover. Click the window to grab a screenshot of just that window.
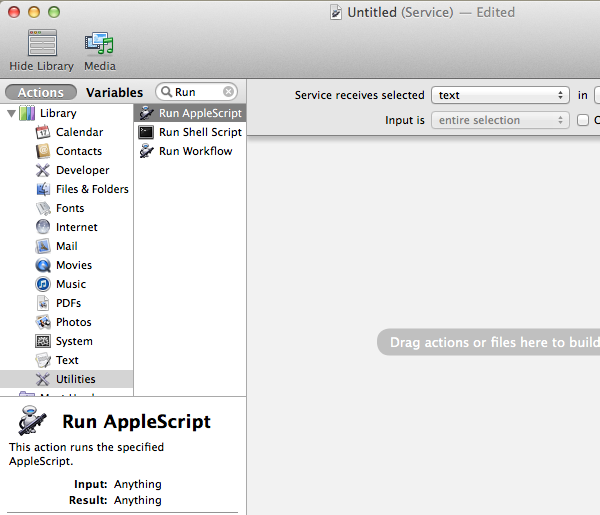
4. Create an Automator Service to Count Characters, Words, and Paragraphs
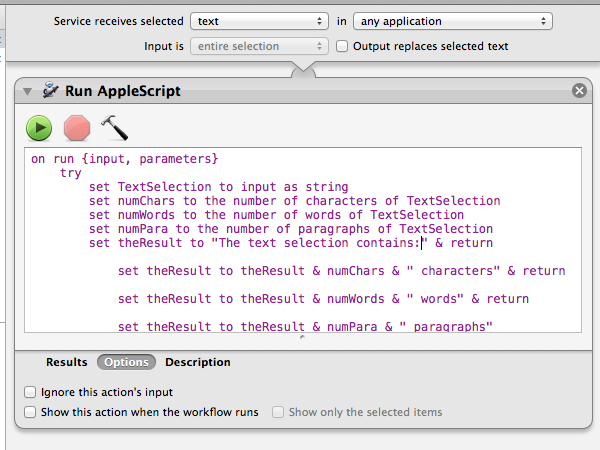
This service take a bit more effort than the others, but it’s useful for quickly learning how many characters and words are in a block of text. It will also count paragraphs, but I’ve found that the service has trouble nailing down an exact number of paragraphs for web-formatted text.Open Automator and choose Service when prompted to create a new Automator document. In the Actions sidebar, select Utilities and then Run AppleScript.
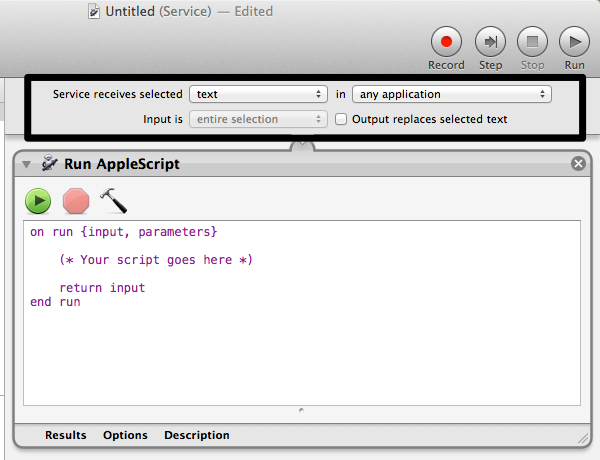
In the Run AppleScript action, paste the following into the text field:
01
02
03
04
05
06
07
08
09
10
11
12
13
14
15
16
| on run {input, parameters}tryset TextSelection to input as stringset numChars to the number of characters of TextSelectionset numWords to the number of words of TextSelectionset numPara to the number of paragraphs of TextSelectionset theResult to "The text selection contains:" & return set theResult to theResult & numChars & " characters" & returnset theResult to theResult & numWords & " words" & returnset theResult to theResult & numPara & " paragraphs"display dialog theResult buttons {"OK"} default button 1 with icon noteon error errmsg number errnumdisplay dialog errmsg & " [" & errnum & "]" buttons {"OK"} default button 1 with icon stopend tryreturn inputend run |
Conclusion
Though intimidating at first sight, Automator is a simple tool for automating and customizing small, recurring tasks.Stacking actions allows you to create general to specific services, and with AppleScript, the sky’s the limit with Automator.

.webp)


