Everything but the Camera: More Essential Night Photography Gear

Night photography requires more than just a simple camera and lens setup. To get great results you will need to invest in a range of other equipment that will allow you to shoot in a range of common low-light conditions. This article will give the insights you need to put together a complete camera system designed to cover any night photography situation you may encounter.
One of the most important components for the budding night photographer is equipment to stabilize your camera. If the camera is not placed on a stable platform image quality will be compromised by shake and vibration.
More often than not you will be taking photos in lighting conditions that require the use of slow shutter speeds making hand held camera operation difficult. By using a tripod, monopod or some other device such as a clamp you can prevent camera motion blur from ruining your shot.
Shooting from a stable platform also allows you to adjust the ISO setting to the camera's base ISO value. This keeps noise at a minimum and also increases dynamic range and improves colour fidelity.
Tsing Ma Bridge at dusk
By mounting the camera on a tripod you can increase image quality considerably. The only motion blur captured while the shutter is open is limited to objects that are moving through the frame - such as the clouds, boats and car light trails in this photo of Tsing Ma Bridge.
My personal preference when selecting a tripod is to use one with carbon fibre legs paired with a quality ball head that is rated to carry at a least a 25 kilogram payload. Carbon fibre legs combine good stability and low weight but are a more expensive option.
I prefer carbon fibre tripods with only three or four leg sections as this improves rigidity and therefore makes the camera less prone to vibration from wind and other sources of camera shake.
If you can't afford carbon fibre legs a set of aluminum tripod legs will do the job.  Aluminum tripods are generally heavier. This is actually a good thing for night photography as it helps to improve stability, It does mean you have to carry extra weight around with you.
If you want to lug around two separate camera and tripod setups, which I frequently do for night photography, then carbon fibre is a better option. Your back will thank you!
One way to help stabilize a lighter tripod is to tether it to the ground. This has the added benefit of helping to prevent the camera being blown over by a sudden wind gust. On several occasions I have had cameras hit the deck due to wind.
Lightning
Lightning crashes. Just before I took this photo near Kulgera in the deserts of central Australia I had my D7000 camera knocked over by wind shear emanating from the front of this thunderstorm. I had setup the camera on a hill and begun taking shots - conditions were perfect with not a breath of wind. I went back to my car only a short distance away to retrieve a second camera and in that brief time a wind gust of at least 80 kph struck. I rushed back to the camera but it was too late and it was lying on the ground. Luckily it wasn't damaged other than a few scratches.
I use a combination of an occy strap (for non-Australian readers: a bungee cord) and large tent peg to tether my tripods to the ground. This is especially useful if you need to leave the camera unattended, such as when photographing lightning. It is much safer if you can leave the camera running and sit inside the shelter of a car or building.
You can secure the tripod by attaching one end of the occy strap using the hook or hole located on the main central column of the tripod. You then attach the other end of the tether to a tent peg which has been securely banged into the ground.
Tripod secured to the ground by elastic strap
By securing the tripod to the ground you reduce the risks of having your camera damaged from being blown over by wind. It also helps to reduce vibration meaning your photos will be sharper. You can use a rock or some other heavy object for tethering if a tent peg can't be used such as on concrete or pavement.
Another good option for stabilizing the camera is to place a tripod head on a clamp system. This allows you to attach the camera to a solid platform such as a fence post, tree, pole or any other stable object.
Tripod on a clamp
A good alternative to a tripod is a clamping system. They are also very light and a good option if you don't want to carry a second tripod. Keep in mind that clamps will limit your composition options as you can't always place the camera where you want to.
A monopod can also be used if a tripod or clamp is not available. By securing it to a fence, tree, pole or any stable platform with rope, an occy strap or a cable tie you can keep the camera still during exposure.
If you find yourself in a situation where you don't have access to a tripod or some other device to stabilize the camera then a fence or a rock may prove suitable to prevent the camera from moving. Put a towel or piece of clothing under the camera to allow for levelling and composing your shot. Placing the camera on a sandbag (or a sock full of sand, in a pinch) is also a solid option for camera stabilization.
After you have purchased your tripod legs your next step is to buy a good quality tripod head.
You should think long term and invest in a product that will go the distance. Many of the cheaper versions out there use inferior materials that aren't made to last. Do your research and read reviews on any gear you intend to purchase.
I prefer to use a ball head system like those made by Markins or Photo Clam. Ball heads allow you to make quick adjustments of the camera in all three dimensions. They also  make changing from vertical to horizontal aspect shooting an easy task.
Sydney Opera House at night
The ability to go from vertical to horizontal aspect shooting quickly is why I like to use a ball head system.
These heads use an Arca-Swiss quick release system so you can remove the camera from the ball head quickly. You will need to purchase a plate for each camera and for any lens with a tripod mount that you wish to place on these heads.
A good quality tripod head is a long term investment. Don't skimp - buy a quality brand and it will service your needs for a long time to come.
Once you have the camera locked off and stabilized and you have composed your shot its time to activate the shutter and take your photo.
We want to try to minimise camera movement during the period when the shutter is open so rather than physically pressing the shutter release button on the camera it is preferable  to use a cable release or remote control to trigger the camera.
You can get a wired cable release that physically attaches to the camera allowing you to activate the shutter mechanism. These are usually a simple press button style release with a locking mechanism to keep the shutter in the pressed or activated state indefinitely until you release the lock.
There are a variety of cable releases available for digital and film cameras. Adding one to your kit will help to make your photos sharper. 
You can also get more sophisticated versions that allow you to program a specific shutter speed in hours, minutes or seconds. They can be programmed to trigger the shutter at a specific time and some of these devices also have an intervalometer allowing you to shoot time lapse.
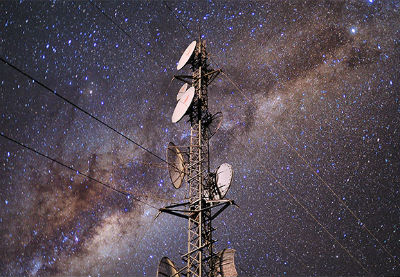
You can program a specific time into the more advanced cable release timers. I used one in this photo of the stars above a radio transmission tower near the Flinders Ranges township of Parachilna.
There are also wireless versions that avoid having to attach the camera via a cable. These allow you to activate the shutter from a distance and you can place the camera where it would otherwise be very difficult to shot from.
You can also tether the camera to a computer, tablet or smartphone. The camera connects via a USB cable or uses infrared, bluetooth or wi-fi connections to wirelessly interface with the device. This not only allows remote control of the shutter release but also monitoring of the live view image coming from the cameras imaging sensor. Very handy for composing shots in areas that are confined or difficult to access. Using a setup like this also allows you to control other settings within the camera such as focus, aperture control, ISO settings, exposure compensation and many other camera control parameters.
If you don't have a cable release system handy you can use the self timer function of your camera to activate the shutter. This will help to minimise camera shake.
As night photography often requires extended shutter duration you are likely to go through plenty of batteries. Carrying spares is a very good idea. You should carry at least two batteries for each camera.
If you intend to do extremely long exposures or shoot time lapse then you may need to power the camera with an external battery pack or AC power supply as the batteries that come standard with your camera may only power it for one or two hours at a time.
I will look at external battery packs and AC/DC power solutions and other specialist equipment in my next article. I'll also include schematics and wiring diagrams for the construction of your own long duration battery systems.
As well as power you need to think about storage. You should carry spare memory cards. I would advise on having at least 32 Gigabytes of storage per camera.
A good-quality camera bag is another item worth having. You are best off looking for one that is the correct legal size for use as carry on luggage at airports. That way you wont have any problems if you want to take it on the plane with you.
My next article will be the last on night photography equipment and I will focus on specialist camera equipment that you need for advanced night photography.
After that I will turn my attention to shooting and post production techniques designed to get the most from your night photography ventures.
Until then, keep on shooting!

Zoom Versus Prime Lenses for Night Photography

Of all the many parts of your kit, the lens is your most powerful creative tool. Lenses, more than any other part of the camera, create the look and feel of your photographs. And it's not just about focal-length and aperture, either: the character of the glass and construction of your lens creates a certain visual quality. Some lenses are tack sharp, others silky smooth. Some lenses are warm and bright, while others are cool and moody. Photographers go to great lengths to seek out coveted lenses for the special way they draw an image.

In this tutorial we'll look at different kinds of lenses - zooms versus primes - for night photography. We'll consider the features and drawbacks of each, and how to choose your lenses for photographing at night.
Before we launch into choosing zooms versus fixed focal length lenses for night photography, we had better set some baselines. Any discussion about lenses, focal length, and aperture begins with terms of reference.
The 135 format is also referred to as "full frame," the modern term for digital sensors with the same image area as 35mm film. When the focal length for a lens and camera combination is given it is usually described in terms of a 35mm-format "focal length equivalent."

The focal length of a lens is normally given in millimetres, with shorter focal lengths providing wider angles of view. This angle of view can be split into three distinct categories: wide angle, normal and telephoto.

The "normal" lens for a camera and lens combination is equivalent to the image diagonal of the camera format. The image area dimensions for the 135 format are 24mm x 36mm: a diagonal of the image area of about 43mm.

Therefore a 50mm lens on a full frame camera approximately matches the diagonal of 43mm and is considered "normal." A normal lens gives approximately the same perspective as the human eye. Focal lengths for lenses of less than 40mm are referred to as wide angle and focal lengths above 60mm are called telephoto.
Cameras with a different size sensor to full frame use a "crop factor" to express the 135mm counterparts to a given focal length. This gives you the full frame "focal length equivalent" for any lens and camera combination. APS-C cameras have a crop factor about 1.5 times that of full frame cameras. For Micro Four Thirds you need to multiply focal length by a factor of two. This means that on a Micro Four Thirds camera a 50mm normal lens now becomes a 100mm telephoto lens once you multiply by the two times crop factor.
Full-frame (far left), APS-C (middle) and Micro Four Thirds (far right) camera formats. A crop factor for camera systems other than 135 format needs to be applied to give the full frame equivalent camera and lens combination.
Crop factor also helps to determine the depth-of-field or zone of focus at any given aperture. As film format or sensor size decreases depth of field at the same aperture increases. You gain about an extra f-stop-worth of apparent depth-of-field for APS-C cameras and two stops worth for Micro Four Thirds systems.
This 17mm f2.8 Olympus Micro Four Thirds prime lens mounted on a Panasonic GH2 body gives approximately the same viewing angle as a 35mm focal length lens on a full frame camera due to the two times crop factor (17mm X 2 crop = 34mm). However, depth of field at its maximum aperture of f2.8 is equivalent to f5.6 on a full frame system.
For night photography, crop-sensor cameras can produce just as good results as full frame cameras. They don't have the same image quality at very high ISOs, but used in the 200 ISO to 1600 ISO range many APS-C and Micro Four Thirds cameras are very capable of holding their own when making night exposures. These cameras also have the advantage of being smaller, using smaller lenses, and requiring less power. The also typically cost less than their larger counterparts.
Aperture refers to the diameter of the opening through which light enters the lens. It has a numerical scale measured in f-stops. Fast lenses have a large aperture and allow more light into the camera and onto the film plane or image sensor.

By adjusting this aperture the amount of light entering the camera can be controlled in the same way our pupils control the light entering our eyes. When a bright light source is present the pupil contracts allowing less light into the eye. This has the effect of increasing the depth of field meaning more of the scene will be in focus.

The same rule applies when you decrease (stop down) or increase (open up) the aperture of a lens. As aperture size increases more light enters the camera and depth of field decreases and vice versa: as aperture size decreases less light enters the camera and depth of field increases.

Understanding the role of focal length and aperture is critical for controlling the "zone of focus" in your images. You can use this focus control to isolate a specific subject within the frame or to ensure the whole scene is in sharp focus.
Lens choice also influences another important composition tool: perspective.
Subjects shot with a 50mm lens exhibit no discernible geometric distortion and appear... normal. Funny about that! However, If you substitute the 50mm lens for a 20mm extreme wide angle lens a completely different picture emerges.
Objects appear to be smaller and further away from the camera as the viewing angle increases. The distance between separate objects also seems to increase. Straight lines may seem to curve especially towards the edges of the frame and objects can appear distorted.
The extreme distortion of an 8mm fisheye lens has warped the straight lines of these buildings making them appear curved. The perspective in this shot implies a feeling of confinement as the buildings tower over the viewer.
If you again substitute the 20mm wide angle lens for a 100mm telephoto lens it has the effect of zooming in on your subject by making the viewing angle narrower. Telephoto lenses also compress the distance between subjects making them appear closer together.
Normal or telephoto focal lengths are good for lightning photography as you need to keep your distance from the subject due to the inherent danger. This shot was taken with a Nikkor 80-200mm f2.8 zoom lens set to 90mm and was taken on a Nikon D200 APS-C format camera making the focal length equivalent to a 135mm lens on a full frame camera.
You can also increase or decrease subject size within the frame by moving the camera closer to or further away from your subject. Moving the camera changes perspective and you can control the scale of objects in the scene with the placement of the camera.

Controlling perspective is an important tool in every photographer's arsenal. It can be used in a variety of creative ways to compose your scenes.
Very few lenses perform optimally at the extremes of aperture. In other words, you should avoid shooting at maximum and minimum apertures if possible. At their wide-open and closed-down settings lenses exhibit a number of optical flaws. This can degrade image quality considerably.

At maximum aperture with the lens fully open you will get a softening of the image due to coma, also known as astigmatism. You may also observe more vignetting and colour fringing along with a loss of contrast when the lens is fully open.

When a lens is stopped down to its minimum aperture you will also observe a decrease in image quality from the effects of diffraction. Diffraction causes a loss of resolution, making images appear soft. This is more obvious on larger-sensor cameras.

So, image quality is best at middle apertures. When you combine these apertures with low ISO values and a stable camera platform you can increase the quality of your night photography images considerably.

As a rule of thumb you should use apertures at least two stops up from the maximum and two stops down from the minimum. I generally shoot using apertures between f/5.6 and f/11. Rules are made to be broken and with experience you will know when you can bend or break these rules.
This chart shows aperture in full increment f-stops starting at a maximum aperture of f1.4. As you move away from maximum and minimum apertures a lenses image quality will generally improve. This "sweet spot" is seen here marked in red .
Having a large maximum aperture - say f/1.4 or f/2 - makes the image in the viewfinder brighter. This assists in ensuring critical focus in low light conditions. It also means these lenses are performing optimally at apertures around f2.8 to f/4, which happens to be the max aperture of most professional-grade zoom lenses. Those fancy zooms still require stopping down to f4 or f5.6 before maximum image quality is assured.
Lenses come in two distinct categories: zooms and primes.
Prime lenses have a fixed focal length. This means that the design of the lens is optimized. Prime lenses also generally have a faster maximum aperture. This allows more light into the viewfinder making it brighter and easier to focus, which is handy in low light scenarios.

My personal preference is to use full-frame, fast-aperture, manual-focus primes: a set of Nikon AI-S lenses, older now, but with wonderful optical qualities. For my style of night photography these lenses offer several advantages, including calibrated infinity stops, wider apertures, and versatility.

Prime lenses, especially older, manual-focus ones, have an infinity stop. An infinity stop is a calibrated physical limit on focus. This ensures focus on distant objects in low light. Subjects I like to shoot, like lightning and astrophotography, benefit greatly from having this feature and I use it all the time.

Older primes also have marked hyperfocal ranges. Knowing you can set focus and gain maximum depth of field without even looking through the viewfinder can come in very handy at times.

My prime lenses work on the three camera formats I shoot with. They are equally at home on an APS-C or Micro four thirds camera as they are on a full frame body. This versatility makes them a good long term investment and I can use them for video, time lapse and photography work.

On the other hand, depending on the subjects you primarily photograph, prime lenses can be less versatile than zooms because they may need to be changed frequently. This leaves you susceptible to getting dust in the camera or onto the digital sensor.
Zoom lenses have a variable focal length, making them more versatile then prime lenses. A general purpose zoom lens can fulfill a variety of roles.
Zooms can be used in a range of photographic situations. This full frame 28-105mm Nikkor zoom lens ranges from wide angle through to telephoto focal lengths and has limited macro capabilities too.
Most entry level cameras come with a zoom lens that allows you to vary the viewing angle from wide angle through to telephoto. Some modern "superzooms" cover a very large range of focal lengths. They can replace a whole suite of prime lenses, meaning you could leave one lens attached to your camera indefinitely.

This versatility does have a cost. Zoom lenses generally have compromises in their optical design and image quality is usually - but not always - inferior. Due to design limitations they are also generally slower, allowing less light in through the viewfinder making it more challenging to gain critical focus in low light.

Zoom lenses have further disadvantages for night photography. Most zooms, and especially recent ones, do not have infinity stops or marked hyperfocal distance ranges. They're often also more optically bland and clinical, lacking the attractive character that older lenses can have. Beware that many zoom lenses today have an image circle that does not cover full frame sensors. When considering a zoom, double check to make sure it will fit your camera.

Recent advancements in design and manufacturing technology, however, have shrunk the quality gap between primes and zooms. I have added several zooms to my lens collection for added versatility and for when I don't want or need to carry a suite of prime lenses.

The new Sigma 18-35mm f/1.8 zoom, for example, could replace several of my prime lenses and its fast too! Add a fast 50mm prime and a 70-200mm f/2.8 zoom and with these three lenses you would be covered for most night photography situations.
F8 and be there....It works for me and it should work for you too.
Now that you have some background information on lenses you can begin to make informed decisions about the type of lenses you might like to have for the type of work you wish to do.

Is the focal range versatility of a zoom more important to you than the ultimate image quality of a prime lens? Do you really need full frame lenses if you only intend to shoot on APS-C camera bodies? Only you can answer these questions. From my perspective prime lenses are generally a better investment for night photography: contrast and resolution is sharper, and they have fewer defects from spherical and chromatic aberrations. I encourage you to come to conclusions of your own.

Knowing what equipment will serve you best and understanding how to get the most from your gear takes time. Research your options. If you are curious about a certain lens, try renting it before you buy. Experiment with different lenses and observe how changing aperture and focal length effect image quality, field of view, perspective and depth of field.

See you next time where I will look at some of the basic equipment you will need for night photography and make suggestions regarding what gear to buy on specific budgets.

Manual Versus Autofocus Lenses for Night Photography

Lenses are for life. An old cliché but it still holds true, especially in this era of digital technology. The relentless cycles of digital upgrades sees new cameras constantly released and quickly outdated. And you probably will upgrade your camera bodies in quick succession, but for lenses the choices are more complicated and it pays to think longer term. So, what lenses should you choose for night photography?
The first link in the imaging chain, and the most important part of the camera system, is the lens. Lenses are the critical component affecting the image quality of your pictures.
Lenses are a long term investment. A camera body can't fulfill its potential if the optics in front of the sensor or film are below standard. 
Make it a priority to invest in good glass. Once you purchase a high quality lens it should last you a lifetime if looked after properly. You don't necessarily need the most expensive optics money can buy, either, but getting the best lens you can afford is the most economical way: lenses can generally be used on successive generations of camera bodies (even from other manufactures, via adapters) as you upgrade.
You don't have to rob a bank to purchase good glass. The Nikkor 28-200mm G lens used in this shot is a versatile and inexpensive lens. At middle apertures it can compete with the best and has fantastic image quality if used in its "sweet spot".  
Top of the line premium grade glass can be exhorbitantly priced, but if you do some research and invest wisely you can minimise your expense. The first step is to evaluate your needs. What it is that you wish to photograph? Make your purchase decisions based on the characteristics you need, not the fancy faux-gold markings on the barrel.
Also consider the format you are shooting with. If you choose a full frame system you will need to invest in full frame lenses to cover the image area. If you then change to a system like APS-C or Micro Four-Thirds you can probably still use these same full frame lenses.
The reverse, however, may not be true - an APS-C format lens wont cover the image area of a full frame sensor and this will result in severe vignetting. However, many full frame cameras have a "crop mode" allowing the use of these lenses on full frame cameras, but only in a-lower resolution mode.
My own preference is to use large-aperture, manual focus prime lenses. This style of lens has a number of advantages over auto-focus lenses for the type of work that I like to do. This is a personal choice, based on the image characteristics and creative possibilities I'm looking for in a lens.
Manual focus lenses are suitable for use in both still photography and digital cinematography, and they also work well for filming time lapse sequences. The smooth focus action of these type of lenses, particularly the Nikkor AIS lenses I own, is very enjoyable to use. I have a set of these lenses covering various focal lengths.
Large-aperture, or "fast," prime lenses allow in a lot more light than a standard zoom lens. Most primes, especially older ones, are designed for full frame sensors or 35mm film cameras. I can also use my older lenses with few limitations on both my Nikon APS-C camera bodies and, with a Nikon to Micro Four-Thirds lens adapter, on the Panasonic GH series cameras which I use for video work.
They don't make them like they used to - the Nikkor AIS 85mm f 1.4 Lens is a classic and still amongst the best lenses Nikon has made. 
The inclusion of an aperture ring is another reason why I like these lenses. The ring is very useful for certain applications, like digital cinematography. I have found having an aperture ring also helps to minimise luminance flicker in time lapse sequences.
Many of the manual focus lenses I own have hyperfocal markings on them, which is another reason why I prefer these lenses. This feature helps you to maximize the depth of field or "zone of focus" in your photos.
You can see the hyperfocal markings on the barrel of this Nikkor 28mm f2.8 AIS lens shown above. These markings are colour coded with orange for f22, blue for f16 and yellow for f11
This is an important consideration, particularly in low light situations such as shooting landscapes under moonlight or starlight. When there is very little light around to illuminate your subject you often can't see what you are trying to focus on.
It isn't always practical to use this technique, as it generally only works at apertures of f8 and above, but it can be very useful at times to have this hyperfocal ability to help achieve critical focus.
To maximise depth of field using this method you need to align the infinity symbol to the corresponding aperture number that you have selected. Once this is set you have maximised your depth of field for that particular aperture setting.

Aperture in this case is set to f16 with the equivalent colour coded aperture markings for f16 seen here marked in blue on the lens barrel. The infinity symbol on the left is aligned with this hyperfocal mark and presto....instant maximum depth of field for f16 extending from about 0.5m to infinity.
The majority of manual focus lenses also have a hard infinity stop. This feature makes focusing at infinity in the dark much easier than with auto-focus lenses—which generally lack this capability.
Not all manual focus lenses are created equal though. Some of the Samyang brand lenses I own don't have an accurately calibrated infinity mark. You will need to do some research about this feature for any lenses you wish to purchase, especially budget lenses.
Most auto-focus lenses can actually focus past infinity due to inherent design limitations. This isn't a good thing. They also have a hard time focusing in low light with subjects that lack distinct high contrast edges, like those found in astrophotography. Having a hard infinity stop can come in very handy in these situations.
Set and forget. A hard infinity stop can make your life easier such as in this photo of the Milky Way.
Most modern digital cameras also have some form of "live view," a manual focus assist mode, or a range finder of some description. A live view image on the camera's LCD can help you achieve critical focus with any lens and gives you the ability to zoom into a specific area of the image to set focus. Very handy.
Live view or other forms of focus assist are also good for using auto-focus lenses in manual focus mode. However, these lenses usually lack the feel and smooth focus action present in manual focus lenses.
Auto-focus lenses do have some distinct advantages - one of them being they are much more suited to fast moving subjects. A modern auto-focus system is far quicker and more accurate at focusing on fast moving subjects than a human could ever hope to be.
Newer auto-focus lenses also usually have technically superior optical designs and use modern lens coatings and specialised glass, like fluorite and aspherical elements, with low dispersion properties. These features help to increase sharpness and contrast and reduce image artifacts such as chromatic and spherical aberrations like coma or lens flares which can degrade image quality considerably.
Modern lenses such as the Nikkor 10.5mm DX fisheye lens used here have optical designs that help reduce image artifacts.  
Many auto-focus lenses also have an optical image stabilising system built into their design. This feature can help when you are hand holding the camera. They incorporate a gyroscopic system that can give you up to 3 or 4 stops of "extra light," meaning you can reduce your shutter speed and still get sharp pictures.
For night photography this isn't such an issue though as in most situations you are better off using a stable camera platform like a tripod to prevent camera shake. This should also allow you to keep the ISO setting at a minimum increasing image quality.
Investing in lenses is an important consideration for all photographers. Lenses are the most essential part of your kit. If you know what style of photography you wish to pursue it will allow you to narrow down the choices considerably. I recommend manual lenses for most night photography applications.
Do some research and stay away from gear you don't really need. Keep an eye out for second hand bargains at flea markets and internet sources like Ebay. You never know, that hidden gem you're after might be just around the corner for cheaper than you think.
And stay tuned for next time, where I'll dig in a little deeper into lenses for night photography and take a look at the advantages of zooms versus prime lenses. I will also discuss the role of focal length and aperture in controlling perspective and depth of field in your images.

Film vs. Digital Cameras for Night Photography

Photographers have traditionally relied on film for image acquisition, but all that has changed with the advent of digital imaging technology. So does film still have a place for the modern photographer in today's brave new world of binary realms and digital frontiers? In this tutorial we'll look at the pros and cons of digital and film cameras for night photographers.
When I first began my career as a cameraman, film was the only available option. These days film has been largely replaced with digital technology, but there are still some situations where it might offer certain advantages to the night photographer.
There are basically two types of film: colour reversal film (often called a negative) and slide film. The latter generally offers superior image quality, and you can choose either colour or black and white varieties.
There are many different film emulsions to choose from, ranging in speed from ISO 25 up to ISO 6400. This ISO rating refers to the sensitivity of the film, with lower numerical values equating to slower speeds that require more light.
Image taken with Fujichrome Velvia film emulsion
Fujichrome Velvia, used in this photo. is a favourite film emulsion for landscape photographers. Its saturated colour and fine grain are legendary.
A film rated at ISO 100 requires twice as much light as a film rated at ISO 200. To get the same exposure you have to double the shutter speed or open up the lens one full f-stop. The benefit of using slower speed rated films is that they have a finer grain structure, equating to an increase in resolution.
As digital technology continues its relentless march forward, film has been left behind, and there are far fewer film stocks available now than there were around the turn of the century. The venerable Kodachrome slide film is a case in point—it was withdrawn from sale a few years ago, and parent company Kodak filed for bankruptcy.
So what can film offer that digital does not?
One of the considerations with any digital device is that they require electricity to function. These new camera technologies are driven by power-hungry image sensors and integrated circuits, and without power they simply can't take pictures.
With an old mechanical film camera, you don't need batteries or an AC power supply for the camera to function. The only battery these cameras require is used by the exposure meter, and even if it goes flat you can still operate the shutter and take a photo.
By using a film camera with a cable release, you can set exposure times of several hours' duration. This is very useful if you wish to do star trails, or take photos where there is very little available light and ultra-long shutter speeds are required
Night skies over Lake Eyre
This photograph of the night skies over Lake Eyre in South Australia's remote outback is an example of a long exposure of several hours' duration, and was taken with a film camera. The green colour cast is due to the effects of reciprocity failure—a magenta colour correction filter would help to alleviate this problem. 
Another advantage of using film is that you don't have to worry about digital file storage requirements. Again, this can be important if you are in a remote location where you don't have access to mains power.
If your camera's storage card begins to fill up, you will need to archive those files to a device such as a hard drive, computer, or tablet, and these will require AC power or DC batteries to operate. However, storage cards are becoming cheaper and larger capacities more common, so carrying many extra cards with you is a viable option.
Film also has some disadvantages, the primary one being cost. It is expensive to shoot film: not only do you have the expense of paying for the film to begin with, but you also have to pay the processing costs to have your pictures developed afterwards.
If you wish to have your images available for the web or for computer displays, you will also need to "digitise" the film to transfer it from the analog to the digital realm, and this is yet another expense that you will incur.
There is also a much longer learning curve when shooting film, as you don't have the instant feedback you get with digital cameras. You won't know the results of shooting on film until after you have your work processed, and you cannot review your work at the time of shooting as you can with digital.
You may also come across a problem inherent in film called reciprocity failure. Because most films are designed for shutter speeds between one second and one 10,000th of a second, any shutter speed outside of these parameters may require exposure compensation or colour correction to negate the effects of reciprocity.
In the case of exposure compensation, you may need to double the length of time the shutter is open, or open up the lens aperture by one stop to get correct exposure. Film may also exhibit a colour shift due to reciprocity, and this will require a colour correction filter on the lens to restore accurate colour balance.
So now that we have covered film, it is time to move into the 21st century and talk about digital cameras. This newer technology offers so many advantages that digital acquisition has almost entirely replaced film as the medium of choice for today's photographer.
When digital cameras first arrived on the scene they were fairly primitive in their capabilities. Resolution was typically only a few megapixels, as sensor technology and digital signal processing were in their infancy.
Image quality was inferior, and there were many shortcomings such as poor low light capabilities and a lack of dynamic range, especially when compared to medium or large format film images.
The first digital camera I owned was a Nikon D50 with a 6 megapixel CCD image sensor. I bought this camera simply to experiment with this new technology, but it soon became quite apparent to me that digital image acquisition was a game changer.
The ability to review photos instantly to check focus, exposure, composition and colour balance made the job of a photographer far easier. It helped to accelerate the learning curve, leading to less guesswork and fewer mistakes.
This new technology also opened up creative possibilities that were not possible or were far more difficult with film cameras. The ability to shoot time lapse sequences, create multiple exposure compositions, and use high dynamic range imaging made digital cameras a very exciting proposition.
Example of high dynamic range processing
Digital allows you to use advanced image processing techniques to enhance contrast and colour, adding impact to your photos like the high dynamic range processing I used in this picture.  
At the heart of a digital camera is its image sensor, and it is this sensor that captures the light coming through the camera's lens. Digital sensors come in a variety of different types, including CCD, CMOS, and NMOS. Resolution ranges from a few megapixels up to the gigapixel capabilities of sensors found in scientific imaging devices such as telescopes.
The resolution of the image sensor is dependent on the number of pixels present, but as the pixel count increases, other image quality factors like the sensor's low light capabilities are compromised.
One way camera manufacturers have negated this effect is to maintain the same number of pixels but increase the physical size of the sensor, thereby increasing its light-gathering ability.
When choosing a digital camera for night photography, it is important to consider the quality of the image sensor, as low light conditions are common. It is therefore a good idea to consider one of the larger-sized image sensors, such as those found in full frame cameras.
A full frame sensor is equivalent in size to a 35 millimetre film frame, and will give you amazing low light capabilities. However, full frame cameras can be quite expensive and are less forgiving of the lenses' optical quality, so your investment will generally be higher for both the camera body and the lenses you wish to use.
Image taken with a full frame camera
A full frame camera is the best option for low light images, and the benefits of high dynamic range and low sensor noise are two of the advantages of this type of camera.  
If your budget won't allow for the the purchase of a camera with a full frame sensor, then I would recommend you look at cameras with either an APS-C or Micro Four Thirds size image sensor, as even these cameras are more than capable of creating images with very high resolution, good low light performance, and excellent dynamic range.
Previous generations of digital camera had certain limitations when being used in low light conditions, such as high levels of digital noise, but modern digital cameras have addressed these problems. Performance now is far superior to that of cameras available even a few years ago.
These days we are absolutely spoilt for choice, and today's low-cost entry-level models have image quality that rivals or exceeds previous generations of expensive professional cameras. All you need is the talent and knowledge to exploit their capabilities.
I rarely shoot film these days, but I am glad to have had experience in this type of photography, because I learnt not to waste exposures due to the expense involved, and I believe it helped to sharpen my skills considerably.
Composite image using both film and digital
The best of both worlds. Digital was used to shoot the cityscape image of Hong Kong, and the star trail exposure was shot using film, with the two exposures then combined in software to create this composite image. Cityscape Image—Camera: Nikon D200;  Lens: Nikkor 10.5 mm f2.8 ED Fisheye;  Exposure: ISO 100 - f11.0 - 15 Seconds. Sky Image—Camera: Nikon FM2;  Lens: Nikkor 50 mm f1.4;   Film: Fujichrome Velvia;  Exposure: ISO 50 - f5.6 - 1 Hour
In the next part of this series, I'll cover equipment for night photography and what I think is the most important investment you will make in your camera system: your lenses.


Copyright @ 2013 Krobknea.

Designed by Next Learn | My partner