Why You Should Drink Peppermint Tea After Dinner

You certainly have heard about mint, but did you know there is another kind of mint?  


Peppermint, whose scientific name is Mentha piperita, is a plant that can be used in natural medicine, besides being a great aromatic herb.  


Just like its cousin, mint, peppermint can be used to treat pains and stomach issues, muscle inflammations, headaches, and morning sickness.  


Easily found, it has antibacterial and antiviral properties, and is also anti-inflammatory, antioxidant, and analgesic. 


Besides all that, peppermint can also be used for:  


1. Digestive issues, nausea, and vomit 

Peppermint soothes the stomach, helping treat digestive issues, and also easing nausea and vomiting. 


2. Helps with cases of gas and irritable bowel 

Peppermint can also be used to calm down the intestine, thus helping reduce gas production and naturally contributing to treat irritable bowel.  


3. Muscular and nerve pains and inflammations 

Did you know that using peppermint essential oil helps alleviate the pain and inflammation of muscles? The same goes for headaches or migraines.


4. Swelling 

Besides being helpful with pain, peppermint oil also helps with swelling on your body since it calms down, refreshes and stimulates blood circulation.  


5. Cough and the common cold 

Using this herb will clean your lungs, calm down throat inflammation, reduce coughing and also unclog your nose. 


6. Oral issues and bad breath  

Did you know that peppermint tea can help reduce the pain and inflammation of mouth sores? 


7. Skin issues, itching, and urticaria  

Peppermint is great for treating skin issues thanks to its anti-inflammatory and soothing actions. 


Do you still want to learn how to make peppermint tea?


Avoid drinking this tea in excess since some of the side-effects of peppermint can include allergic reactions on the skin, such as itching, burning sensation, redness, or urticaria, and also irritation of the stomach mucosa, causing stomach pain, nausea, vomiting, bloating, or bad digestion.  


Peppermint tea is also not recommended during pregnancy or lactation since it can pass into breast milk and alter its smell and taste, which might hinder breastfeeding.  


Now, tell us, did you know the benefits of this herb already?


Is Itching Really a Sign of Wound Healing?

Did your grandma ever say to you,  that, "If it is itching, it is healing"?  


Putting a bandage over an open wound helps it heal by preventing dirt and other particles from hurting the wound even more.


 It is a fact that leaving your wounds alone helps the healing process. And many people also say that healing improves when we remove the bandages after some time. 


However, the healing process can cause a lot of itching. 


The itch can end up irritating, even more, a skin that is already sensitive, and sometimes the growing tissues might be removed when we accidentally scratch the itching scabs, which ends up slowing the recovery and causes a scar.

But do you know why your healing wounds itch?


If that's your case, learn some cautions you must take during the healing process and with your scars: 

It is necessary to be careful with the exposure of your wound so it doesn't rupture;

Remember to not scratch the scars in their initial phase. 


Did you know that rubbing your hand over the healing area increases the sensation of itchiness? So, keep your nails always clean and well-trimmed. 


Do not expose the healing area to sunlight while the scar hasn't reached a color close to your skin tone, and use sunscreen to protect the scar since the area will be more sensitive. 


And, last, but not least, if the itching becomes too intense, seek a doctor or dermatologist, who will prescribe you an antihistamine or a low-potency corticoid.


Mix Honey, Lemon Juice and Olive Oil for These Incredible Benefits

If someone asks what are the healthiest foods that can be found in a kitchen, there is a good chance that at least one, if not all, of these ingredients, are mentioned: olive oil, honey, and lemon.
All of them can indeed bring great benefits to health, mostly because of their nutrients and medicinal properties.


Olive oil is one of the main ingredients of a health-oriented diet. It is an essential part of the Mediterranean diet, which has been proven by many studies to be one of the best diets to treat health issues, such as inflammation, chronic diseases, etc.
Honey is rich in antioxidants and has antibacterial properties, which makes it good for treating sore throats and respiratory diseases. Lemon, besides supplying energy and being good for the mood, also stimulates the immune system, detoxifies, treats anemia, constipation, and prevents some types of cancer.
Tell us, do you know any of the many benefits that the combination of olive oil, honey, and lemon can bring us? Some of the benefits of this combo that we can talk about are:
It gives energy, improves digestion, helps with weight loss, protects against infections and inflammations, improves oral and skin health, and many others. And that's why this combination with extra virgin olive oil, honey, and lemon has been used in Tibetan culture to improve health and rejuvenate. That's amazing, isn't it?
Besides that, this combo also helps to strengthen the immune system, cleanse the blood vessels, improves liver functioning, improves the appearance, and reduces wrinkles.
Learn how to make this recipe!


How To Make Coffee Scrub At Home For Gorgeous Skin

Have you ever heard that exfoliating is an excellent way to eliminate dead skin cells and blackheads and also to facilitate the penetration of your moisturizing creams, besides many other benefits? 


An easy and cheap way of exfoliating your skin at home is using coffee. Have you ever heard of coffee scrubs? 

In today's video, you will learn 3 coffee scrubs to make at home and exfoliate your skin. 


Exfoliating your face and body with coffee will give amazing results since, besides softening the skin, it will also help remove all the dirt and make your skin smoother. 


Write down the ingredients! 

All the recipes are prepared in the same way: just mix the ingredients well until it becomes a smooth paste. 


Using these scrubs is easy too. 

For even better results, try exfoliating after your shower since your pores will be open by the heat and steam, allowing the scrub to clean even the deepest layers of the skin. 


It is recommended to apply some moisturizing cream after the exfoliation, to make your skin even softer. You can use the coffee scrub up to 2 times a week.


Besides all the benefits we mentioned above, exfoliating also helps to soften the skin, improve blood circulation, lessen red stretch marks, and stimulate the growth of new skin cells. 


Do it and share your experience with us!


Cupping Therapy An Ancient Technique With Many Health Benefits (Hijama Therapy)

Have you ever heard about cupping therapy?


In 2016, Olympic swimmer Michael Phelps’ back showed many bruises and red "spots". Do you remember it?  


Many people don't know, but those spots were caused by cupping therapy. 


This Chinese medicinal therapy, created more than two thousand years ago, is a type of natural treatment in which vacuum is created by the suction of skin (by cups). 

The vacuum created stimulates blood circulation and it is believed that the toxins in the blood are released through this process. 


When the blood circulation is activated by the cups, the increase of blood in the area favors the nutrition of muscles, alleviating tensions, and muscle and joint aches.

Watch the video to learn the main benefits of cupping therapy.


But, how does cupping therapy work?

You put fire on a piece of cotton and pass the flame inside a special cup and put it over the body, creating a vacuum. This process is completely painless, and you will feel just a soft suction on your skin. 


Usually, one does not feel any heat or discomfort, and the sessions can be even relaxing. 

The benefits of cupping are very satisfactory and are worth the slight discomfort. If you have done cupping therapy before, share your opinions with us.


How to Gain Weight Naturally In Less Than a Month

Are you having trouble putting on weight? 


It may sound weird, but many people have trouble gaining weight. 

We can't forget that total body weight is a thing, and lean body weight is another thing. 


Besides that, being thin is not a free pass for eating whatever you want to. You may even gain weight, but it will result in malnourishment, which may even cause health issues. 


It is important to have a diet high in nutrients to gain weight healthily and sustainably. 

So, in today's video, we will talk about how to gain weight quickly. 


Do you want to learn the techniques and tips to make the numbers go up on your scale? 

Training

Muscle training spends calories and many people think that the more they train, the less they will weight. But that's not exactly how things work! If your objective is to gain muscle mass (and weight gain as a consequence), you must do hypertrophy training to increase your muscular volume. 


Eating
Some nutrients are essential for the functioning of our body and, obviously, for building muscles, since it is from them that we take the necessary energy for metabolic processes. These nutrients can be classified as macro or micronutrients. Have you ever heard about them? 


Supplementing 
There is no need to supplement macro or micronutrients, but it can be helpful for people who have trouble hitting their caloric intake.  


Besides that, you can use creatine, which has been shown to be very efficient for hypertrophy, helping also with muscle recovery, and also use a multivitamin to increase your micronutrient intake. 


In a weight-gain diet, the consumption of salads and vegetables must be reduced, since they contain fewer calories and lots of fiber, that will make you feel satiated for longer and hinder your gains.


How to Make Ghee at Home (Clarified Butter)

Have you ever heard about ghee? Do you want to learn how to make clarified butter at home?
With an ever-growing search for healthier foods, a different kind of butter has been gaining fame: ghee butter. Did you know that to make ghee you remove all lactose and water, leaving only the fats of butter?


That's why ghee is almost imperative for lactose intolerant people, or for those who follow a balanced diet. It is also used in Ayurvedic medicine and in Indian culture as a healing and rejuvenating food.
Are you enjoying the video so far? Then, give us your opinion to help us know how we are contributing to you and your health. Also, leave a thumbs up and share the video with your friends! If you like butter, ghee goes perfectly well with everything that takes butter.
Do you want to learn the recipe? Watch the video to learn how!


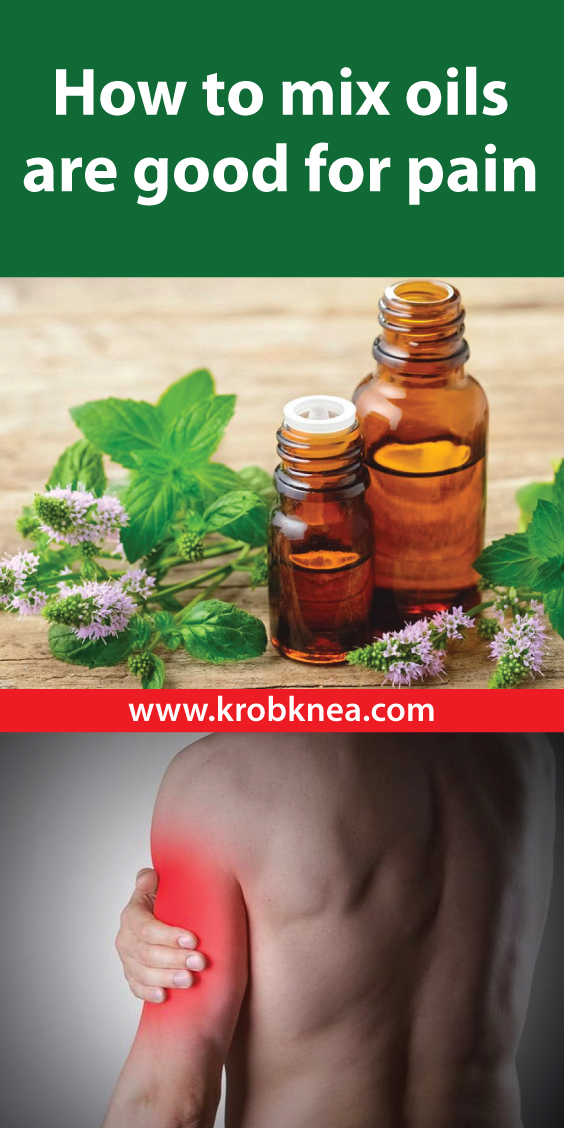
How to mix oils are good for pain

Recently, we made a video about the benefits of peppermint. Have you watched it yet?  


Did you know that the essential oil of peppermint  can clear your nasal passages, gives energy, is good for your hair, and has many other amazing benefits?  


Besides that, this oil can also be used to fight bacterial infections, alleviate back pains, muscle aches, and joint pains (associated with fibromyalgia and myofascial pain syndrome).  


So, in today's video, you will learn how to make a homemade body oil to treat these pains: 


Ingredients: 


4 tablespoons grapeseed oil; 

5 drops lavender essential oil; 

4 drops peppermint essential oil; 

1 amber glass bottle (1.35 oz.)  


Directions:


Combine the oils in the glass bottle. Close the lid, shake it well, and let the mixture rest. 


To reap all the benefits from this recipe, apply some drops of the oil over a sore muscle, massaging it with circular motions.  


While you massage, inhale the aroma and enjoy the therapeutic properties of the formula. 


Lavender will calm you, while peppermint relaxes and refreshes the hurt area. We suggest using the oil right after a shower.  


After that, store your bottle in a place away from heat and sunlight for up to 3 months (but it is necessary to check the shelf life of the oils you used).


These 10 Foot Exercises Can Relieve Uncomfortable Back Hip & Knee Pain In Minutes

Your feet carry you everywhere you go. They balance your body, regulate your posture, and control pain. But, most people pick the wrong footwear and affect their normal function.
Improper footwear leads to walking issues and deformations. Did you know that improper footwear increases the risk of falling? This was more common in the 80s and 90s.

Your feet bear the pressure of your body and balance it. Pain disrupts this balance, and you can’t walk normally.


Be more active, and work on your muscles. This will also provide optimal blood flow and prevent balance issues.

This balance plays a major part in your body posture and aligns your bones and muscles. Women are more likely to suffer from lower back pain as they wear heels more often.


Try the following foot exercises, and relieve your pain instantly:

  1. Toe pressing

First, warm up your toes. Toe-pressing stimulates the flow of blood in your feet while relaxing them. All you have to do is stand up, and support your total body weight on your toes. Stand in this position for 3 seconds, and do 10 repetitions three times a day.

  1. Toe-walking


It strengthens your muscles, ligaments, and toes. You will literally become a ballerina in 20 seconds. Do five repetitions, and make a short break in between. Do 2 sessions throughout the day. if your balance is not perfect, use the help of your nearest wall. You won’t have any problems once you master the movement.

  1. Ankle-circles


Do it to relieve the pain in your knees, hips, and ankles. This pain is a result of improper body posture, and your lower body suffers while walking. Lie on your back, and bend your legs. Extend one of your legs above the body. Rotate the ankle for 10 seconds in each direction. Switch legs. Do your ankle circles twice a day.

  1. Resistance band

The muscles in your feet may be tiny, but they support your total body weight. This exercise will ease your walking, so make sure you find a high-quality resistance band.

Sit on the floor, and extend your legs to the front. Wrap one end of your band around a chair, and secure the other end on the top of your feet. Slide back, and you will notice the tension in the band. Flex the foot backward, and hold it in this position for 5 seconds. Release it, and do 10 more repetitions.


  1. Toe-Pencil-Grasp

All you have to do is hold a pencil with your toes for 10 seconds. This will strengthen your toes, and you can do it anywhere. Do this 2-3 times a week, and go for 5 repetitions in each foot.

  1. Foot massage


Place a tennis ball under your second toe, and move your foot slowly. Do this for 1-3 minutes, and switch legs.

  1. Stretch the heel tendons with your knee

Stand against a wall, and bend your right knee. Move your hips towards the wall, and make sure your heels are flat on the floor. Hold your body in this position for 30 seconds, and make a 30-second break. Switch legs.

  1. Toe stretching


Sit on a chair, and keep your left leg on your right thigh. Grab your toes with your right hand, and do a “handshake.” Stretch your toes to the side for 10 more seconds. Do 3 repetitions, and switch feet.

  1. Heels


Sit, and stretch your right leg to the front, while keeping your left leg under your thigh. Bend forward, and grab your toes. Press hem in the opposite directions. Do this for half a minute, and do 2 repetitions with each leg.

  1. Upward stretching of legs and toes

Lie on your back, and extend your legs. Use a towel to elevate one of your legs while keeping your knee straight. Pull carefully, and make sure you don’t pull too hard. Do this for 20-30 seconds, and repeat. Switch legs.


Caution: If you deal with constant pain in your knees, back, and hip, or if you suffer from severe posture and balance issues, consult your doctor before you do any exercise. If this program is too hard for you, adjust it to your condition.

Your feet have an important role, so take care of them in every way possible.


source: http://admirablebuilding.org

Miraculous Old German Remedy For Getting Your Arteries Super Clean

This old German remedy has the power to detoxify your body and cleaning up your arteries if you take it regularly for a few days!


These potent, pungent foods have many culinary uses and health improving qualities. One way in which this TRIO of garlic, lemon, and ginger may be effective in cleaning your arteries.


The level of bad cholesterol can dramatically increase and build up in your arteries thereby decreasing blood flow. Definitely, there are medications that can be used to decrease the level of bad cholesterol but taking this trio of garlic, lemon, and ginger may be helpful as well.

It has been proved that lemon, ginger, and garlic are not just for flavoring food, they are SUPERFOOD.

GINGER


  • Dried ginger powder not only reduces the risk of atheroma (degeneration of the arterial walls caused by fat deposits) but also prevents cardiovascular diseases by preventing the biosynthesis of cholesterol and accumulation of platelets.
  • Also, it does not have any side effects.

GARLIC


  • Traditionally, garlic is used to prevent heart disease and the hardening of the arteries.
  • It also treats high blood pressure, high cholesterol, and boosts your body’s immune system.
  • According to one study, those who took 900mg of garlic powder lowered the development of atherosclerosis.
  • It also has antioxidants that can prevent cancer and Alzheimer's disease.

LEMON


  • Daily lemon intake not only lowers your blood pressure but also helps to clear excess cholesterol and detox the liver.

INGREDIENTS

If you want to try out this effective German remedy you’ll need the following ingredients


  • 2 liters of filtered water.
  • 4cm of ginger root.
  • 4 unpeeled lemons.
  • 4 big garlic bulbs.

PREPARATION METHOD


  • Wash the lemons and cut them into pieces. Next, peel the ginger root and clean the garlic cloves.
  • Put all of them in a blender and then blend them until they are totally mixed.
  • Put this solution in a pot on a hot plate and add water. Slowly stir it until it boils and then allows it to cool down at room temperature.
  • Keep the solution in a refrigerator in an airtight glass bottle if you want to use it for later use.

HOW TO USE IT


  • Drink a glass of the solution every morning empty stomach.
  • You can also take a glass some 2 hours before going to bed.
  • Drink 1 glass every day for 3 weeks to see the results.
  • You can repeat this process every 12 months or anytime you feel that you need the treatment.


source: https://www.naturalplanners.com


Copyright @ 2013 Krobknea.

Designed by Next Learn | My partner