In this tutorial, I'll show you everything you need to know to add audio to your PowerPoint presentations on your Mac or PC, and get it to work exactly the way you want.
Screencast
You can follow along with this tutorial using your own PowerPoint presentation, if you'd like. It should have a handful of slides, and it’s best if there are no transitions or animations applied. You should also have some short sound effects files to use, along with some background music that lasts a few minutes.
Or if you prefer, download the zip file included for this tutorial, which contains a sample presentation called PowerPoint Audio.pptx and some sample audio files.
Playing Sound During a Slide Transition
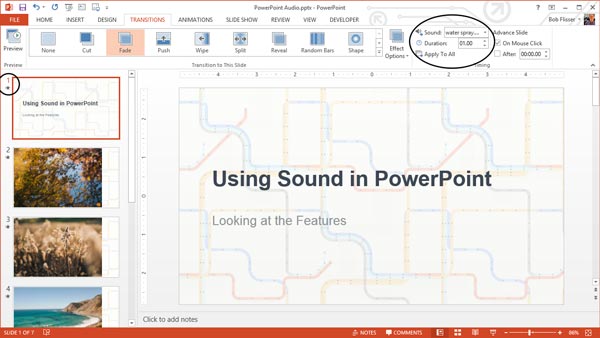
Playing a sound during a transition takes only a few clicks, but please: use this feature sparingly because it can be distracting and annoying to your audience. With that said, let's get started.To add sound to your slide transitions in either PowerPoint for Windows or Mac, go to the Transitions tab on the ribbon, and apply a transition. On the right side of the ribbon, click the drop-down for Sound, and choose one from the list. Or instead of choosing one of the built-in sounds, click Other Sound at the bottom of the list, and choose Water Spray. If you use your own sound file, it has to be in WAV format.
Click Apply to All to apply the transition and sound effect to all slides in the presentation. Note the shooting stars below the slide numbers in the thumbnails on the left side, which indicate that we've added a transition—in this case, a transition with a sound.
If you decide you don’t want a sound to play on transition, click the Sound drop-down again, and choose No Sound. Again click Apply to All.
Playing Sound During an Animation
First, we’ll apply an animation, then we’ll attach a sound to it. Go to Slide 2, which contains a title and a bullet list. Click the Animations tab on the ribbon, then click the slide title and choose one of the animations that’s listed. Do the same for the bullet text. Note that each line of text has a number next to it, indicating its animation order.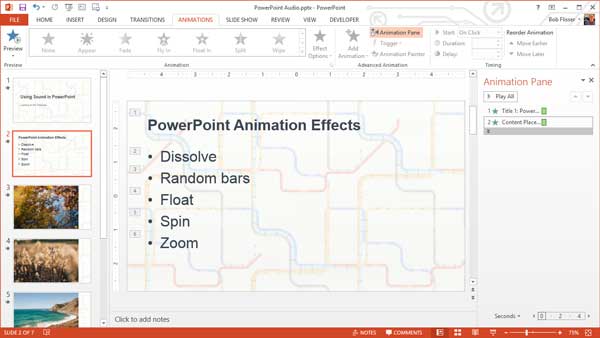
Adding a Sound In Windows
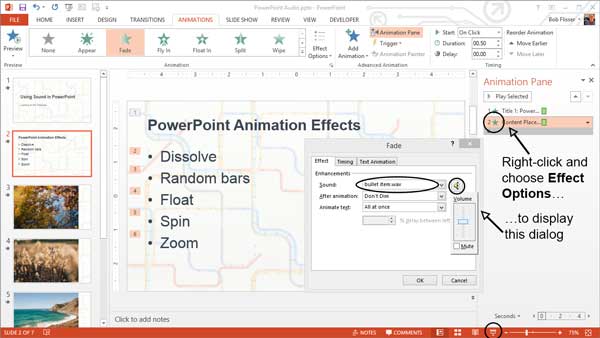
If you’re using Windows, click the Animation Pane button on the ribbon to display the animation pane. The numbers in the pane correspond to the numbers on the slide (click the small Down Arrow to see them all).In the Animation pane, right-click Content Placeholder, then select Effect Options from the pop-up menu. Click the Sound drop-down list and select a sound from the list, or select Other Sound at the bottom, and choose Bullet Item Sound that’s included with this tutorial.
If you want to adjust the volume, click the Speaker icon. Click OK when finished.
Adding a Sound on the Mac
If you’re using a Mac, click the Reorder button on the right side of the ribbon to display the Custom Animation tool box. In the box, twirl open the Effect Options section. Then it’s just like in Windows: click the Sound drop-down and select a sound, or select Other Sound and choose Bullet Item sound that’s included with this tutorial.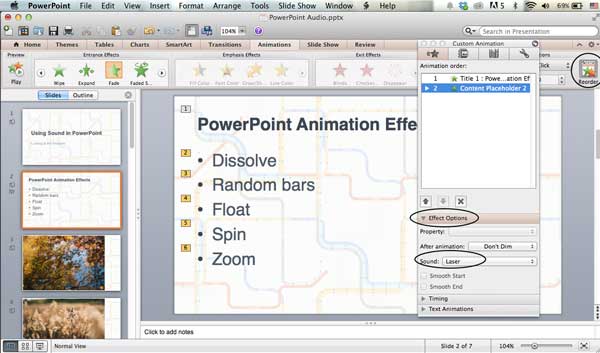
Attaching a Sound to an Action Button
PowerPoint has Action Buttons that you can place on slides, and these buttons can play sounds. The buttons can perform actions like linking to a slide or web page, navigating through a presentation, running a macro and starting a program. Although the buttons have different icons, they can all do the same tasks.Let’s put navigation buttons on the slides of this presentation, and give each button a sound effect. If you still have the Animation Pane or Custom Animation toolbox open, you can close it to get it out of your way.
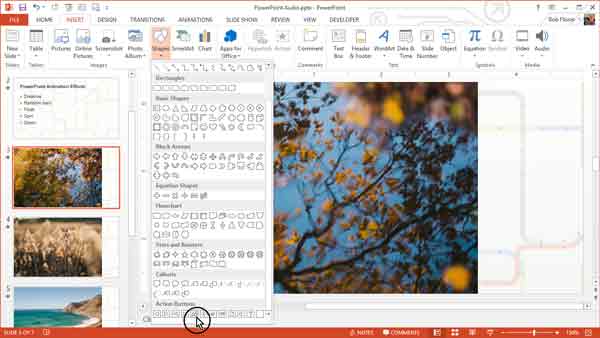
Go to Slide 3, and we’ll insert a shape:
- In Windows, click the Home tab on the ribbon bar, then click the Down Arrow on the box that has the shapes in it, OR go to the Insert tab, then click the Down Arrow on the Shapes icon.
- On the Mac, go to the Insert tab, then click the Down Arrow on the Shapes icon.
When you release the mouse button, a dialog box appears. By default, it hyperlinks to the first slide, which is what we want. At the bottom, click the Play Sound check box, and select a sound from the list, or select Other Sound at the bottom, and choose Home Button sound that’s included with this tutorial. Click OK.
Repeat the process for inserting the Left Arrow and Right Arrow buttons. The Left Arrow automatically links to the previous slide and you can attach the Previous Slide sound, and the Right Arrow automatically links to the next slide, and you can attach the Next Slide sound.
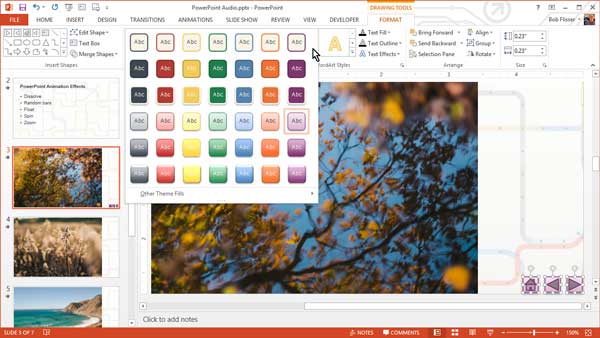
If you want to change the buttons’ color and formatting, select them all, and in the Format tab of the ribbon bar, click the Shape Styles drop-down (Windows) or Quick Styles button (Mac) and make a selection.
Your slide should now look like this:
On the first slide, deselect the buttons, then delete the Home and Left Arrow buttons. On the last slide, deselect all the buttons, then delete the Right Arrow button.
Run the presentation from the first slide, and try out the buttons.
Playing Audio in the Background
PowerPoint also lets you play audio in the background of a single slide, or across slides. The process is similar in all versions. Let’s start on the first slide.Inserting Audio in Windows
Audio is something we insert, so go to the Insert tab on the ribbon and click the Audio button. In the 2007 and 2010 versions, you’ll immediately get a dialog box to insert the clip. In the 2013 version, you have other options. Choosing Online Audio will let you search clip media on Office.com. Another option is to record sound on your computer. I’m going to click Audio on My PC, and choose my own background music.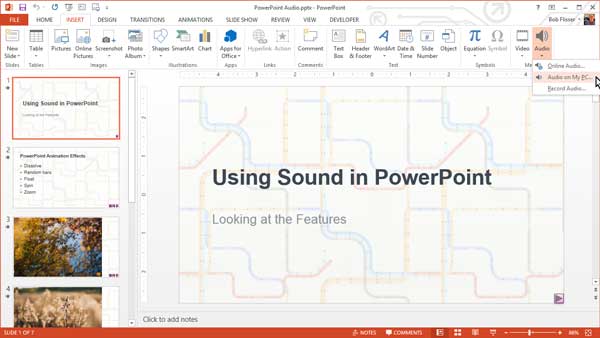
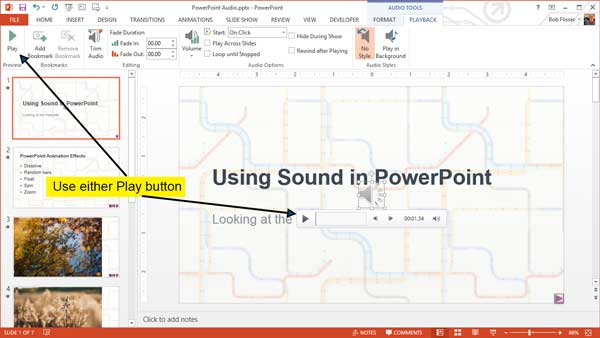
That places an audio icon on the screen. Test it with either of the Play buttons:
Inserting Audio on the Mac
The method of inserting audio in the Mac version is similar. On the Home tab of the ribbon bar, click the Media button to display a drop-down. The Audio Browser will let you choose a file from iTunes, and you also have choices to insert a file from your hard drive or to record your own.As with Windows, choose Audio From File, and choose any MP3, WAV or M4A file. If you downloaded the zip file for this tutorial, you can choose Mountain Lake.mp3 (courtesy of Steve Jacobus at www.SteveJacobus.com).
That places an audio icon on the screen. Test it with either of the Play buttons (see Windows screen capture, above).
Setting Playback Options
In both Windows and Mac, make sure the audio clip’s icon is selected. In Windows, go to the Playback tab on the ribbon bar, and on the Mac, go to the Format Audio tab. Choose options to play the clip automatically and to hide the icon when the slide show plays: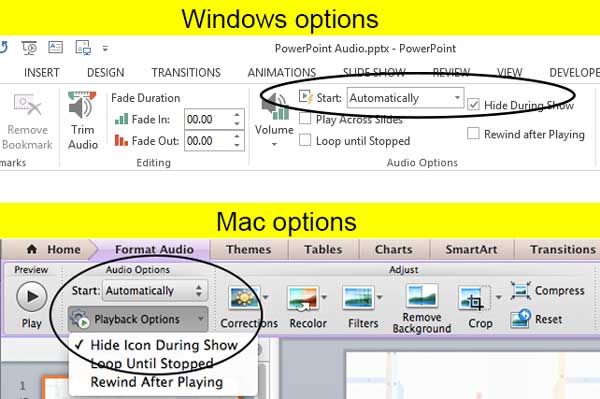
Run the show again, and this time, the music continues playing as you advance the slides. It also plays over the sound effects of the Action buttons.
Windows-Only Playback Options
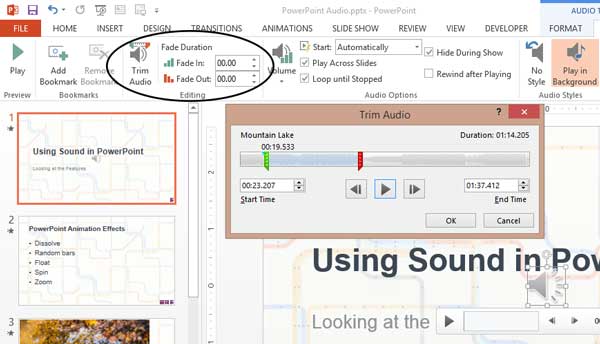
The ribbon bar has two great options in the Windows version that the Mac doesn’t have (keep the audio icon selected and stay on the Playback tab of the ribbon):- Trim: if you want to play only a portion of the sound file, click the Trim Audio button, and in the dialog that appears, drag the green bar to the right to set a later start time, and drag the red bar to the left to set an earlier end time. Or instead of dragging the bars, you can set the numbers directly.
- Fade In and Fade Out: if the audio clip doesn’t have fades already in it, or if you trimmed the clip, you can apply fades.
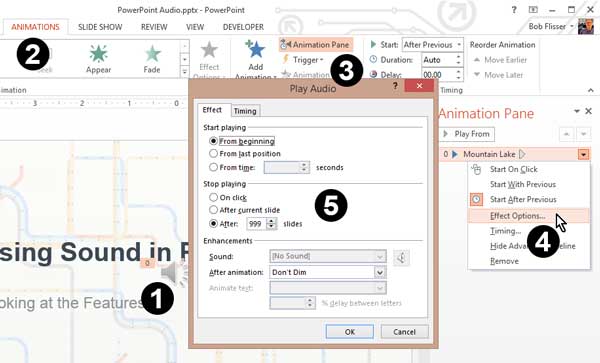
How to find additional settings in Windows that aren’t immediately obvious:
- Make sure the audio clip is selected
- Click the Animations tab on the ribbon bar
- Click the Animation Pane button to display the pane
- Right-click the item in the Animation Pane and select Effect Options from the pop-up menu
- Set options in the Play Audio dialog box
Conclusion
PowerPoint has very good options for playing audio of different types and from different locations. It has so many options and abilities, it might be tempting to use all of them, so be careful not to over-use them as we did in this tutorial. Your audience will appreciate it!But what’s great about these features is that whether you use Windows or Mac, the options work almost identically, and the options are clearly labeled. The trickiest part is knowing where to find the features. Remember to keep the sound file selected, so you can find the context-sensitive ones.

.webp)


