We will use the popular low-polygonal style, and give our cover a unique grungy look with the help of Adobe Illustrator artistic brushes. Together, these elements will help our CD cover have a modern look and stand out among the crowd of other albums.
Let’s start!
1. Create a Low-Polygonal Base for the Elephant’s Head
Step 1
For this tutorial, I’ve used one of my old pictures (which you can download directly below by right-clicking on the image) that I File > Place on the Artboard as a reference. Lock the layer with your reference image and create a New Layer above the locked one.
Step 2
I make the reference image a bit brighter, and started drawing small triangles above it using the Pen Tool (P).
Step 3
Continue covering the reference image with triangles of various sizes. You don’t have to be very precise here. Don’t waste your time trying to make the triangles match, because later we’ll do an easy trick in a few clicks.
Step 4
If your image is more or less symmetrical, try using the Reflect Tool (O) to mirror some repeating parts to the other side of your image. Here, for example, I select a group of triangles around the eye-area and reflect it over the vertical axis. Use the Copy button to make a reflected copy of the selected area.

Step 5
Finish up with the elephant’s trunk by covering it with a set of varying triangles.
Step 6
Move on to the ears by putting some triangles over the left ear. Make the sides of the triangles longer to indicate that the shapes here are more extended and protruded.

Step 7
The base for our low-poly illustration is ready! I’ve changed the Stroke Color of the triangles to bright red, to see them more clearly.
Step 8
Now the fun part! Find a group of triangles which you need to merge, so that they would fit nicely to each other. Select the corners of these triangles by dragging the Direct Selection Tool (A) over the anchor points or by using the Lasso Tool (Q). Focus on the Align Panel (Window > Align) and choose the Align to Selection option. Finally, click on the middle positions in Align Anchor Points and Distribute Anchor Points fields in order to combine the triangle corners.
Step 9
Move on to the next group of corners which you need to combine.
Step 10
If it happens so that your triangle don’t combine, like in the example below, just go ahead and add an additional triangle by dividing the big one into two separate shapes, and align the anchor points in the same way.

2. Color the Elephant Using the Live Paint Bucket
Step 1
When all the triangles are aligned nicely to each other, select everything and go to Object > Live Paint > Make.
Step 2
Use the Eyedropper Tool (I) to pick the color from the reference image and then fill the shape with the selected color, using the Live Paint Bucket (K). Use the Alt key to switch between these two tools, thus speeding up your work.
Step 3
Here is how the fully colored image looks at this stage. Some triangles are made much darker than the others to emphasize the shadows and to make our illustration more dimensional. The brightest shapes mark the highlights on the most protruded and bulged shapes.
Step 4
Remove your reference image and set the Stroke Color to None after you’ve finished coloring all the shapes. Fill in the blank missing parts if there are any.

Step 5
As long as you are satisfied with the result, select several random shapes with Direct Selection Tool (A) and change their color to lighter and darker gray in order to make our image more intricate and stylish.
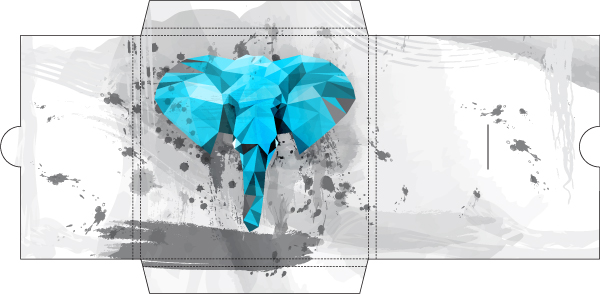
3. Design the Front Part of Your CD Cover
Step 1
Create a New Layer below the layer with the elephant’s head. Place the completed head over the blank CD-cover template. Keep the elephant’s head on a separate layer, so that you are able to add new objects behind it.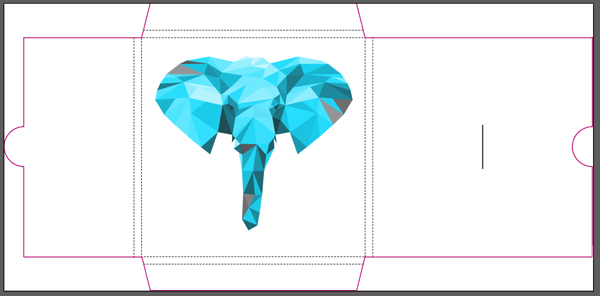
Step 2
Let’s create a nice grungy background. We don't want it to be too distracting, but at the same time still want it to highlight the main object, making the cover look trendy and minimalistic. Stick to gray monochromatic tones, so that the elephant’s head will remain the only bright and eye-catching object of our composition.We’ll use some default Adobe Illustrator brushes, which you can find in the Brush Libraries Menu > Artistic > Artistic Watercolor and other from the same section. See the list of the brushes which I’ve used on the screenshot below.


Step 3
If some of the lines are off your drawing area, you can always hide the unneeded parts by duplicating the basic cover shape, placing it above the brush strokes and making a Clipping Mask.
Continue filling up the background by using various ink splash and splatter brushes, varying their darkness.

Step 5
Move from the center of the cover to the edges, adding smaller details and filling up blank spaces.
Step 6
I added a thick charcoal stroke at the bottom of the cover, assuming it as a good spot for some text.
Step 7
Add more details by using other brushes from the list. Choose lighter shades of gray in order to make the overall composition airy and light.
Step 8
Create a New Layer above the layer containing the elephant’s head. Make a few strokes with artistic brushes and switch the Blending Mode to Color Burn to add a nice touch of blue to our elephant.
Step 8
Inspired by Indian and military facial warpaint, I decided to add a big stroke across the elephant’s eyes. Object > Expand Appearance, converting your stroke into a separate object, and switch it to Multiply Mode, lowering the Opacity down to 20%.
The last but not the least thing to do here is to add a gentle shadow under the elephant’s head in order to make it more dimensional and to separate it from the background. Go to Effect > Stylize > Drop Shadow and play with the settings to your liking. You can find my settings on the screenshot below.

Fantastic Job!
Congratulations, you’ve just completed designing the front part of our CD cover! I hope it was a useful experience for you. Good luck with making your own unique CD cover design!


.webp)


