
1. Create the Pot
Step 1
First, we are going to create the pot. Using the Rectangle Tool (M) draw a rectangle. Fill the resulting shape with color R=115 G=202 B=192. Then, go to Effect > Stylize > Round Corners and set the Radius to 30 px. Expand this shape by Object > Expand Appearance.
Step 2
Create another rectangle with any color that overlaps our blue rectangle on the top. Select two shapes together and go to the Pathfinder panel, and press Minus Front button.
Step 3
Now take the Rounded Rectangle Tool and draw a small rounded rectangle. This will become the handles of the pot. Put it on the left side of the pot. Now, holding the Alt and Shift keys together, move the handle to the right side of the pot to create another copy of the handle.
Step 4
Let’s create the lid. Using the Ellipse Tool (L), draw an ellipse in the same color. Then, draw a rectangle with any color that overlaps the oval on the bottom. Keep the two shapes selected and press Minus Front button in the Pathfinder panel.
Step 5
Using the Rounded Rectangle Tool create two more rounded rectangles at the top and at the bottom. That's becomes the lid of the pot.
Step 6
Place the pot and the lid together.
2. Create the Mushroom
Step 1
Take the Ellipse Tool (L) and draw a gray oval (color R=191 G=182 B=173). Using the Direct Selection Tool (A), select the left and right anchor points and shift them a little bit down.
Step 2
Draw a horizontal ellipse and set its color at R=216 G=207 B=198. Using the Direct Selection Tool (A), shift the left and right anchor point a little bit down.
Step 3
Duplicate the created shape and make it smaller and darker (color R=154 G=139 B=125).
Step 4
Put all parts together. To put the stem over the hat you need to select the stem and press Control-X, Control-F keys.
3. Create the Olive
This is the easiest object to create — olive. Simply create an oval (color R=159 G=166 B=23) and a smaller ellipse (color R=129 G=124 B=0).
4. Create the Tomato
Step 1
Create an ellipse and set its color to R=234 G=50 B=79.
Step 2
Make a very thin oval (color R=143 G=210 B=202). Next, take the Convert Anchor Point Tool (Shift-C) and simply click on the top anchor point of the oval and the bottom. Create three copies (Copy-Paste), and then lay them like a snowflake.
Step 3
Place the leaves on the tomato.
5. Create the Carrot
Step 1
Take the Ellipse Tool (L) and draw an oval (color R=241, G=93, B=94). With the Direct Selection Tool (A) select the left and right anchor points; shift them up. Then add three thin ovals to make the carrot leaves. Set the color to R=96, G=197, B=186.
6. Create the Beet
Step 1
Start with a red ellipse (R=234, G=50, B=79). Then, using the Direct Selection Tool (A), shift up the left and right anchor point little bit. Now, take the Convert Anchor Point Tool (Shift-C) and click on the bottom anchor point of the ellipse to make it sharp.
Step 2
On to the beet. Click on the Polygon Tool and then click on your work space. A new dialogue window will ask you how many corners and what radius you want. You need to make 3 corners with any radius you want. Then click OK. So, you have a triangle, which you fill with color R=231, G=25, B=57. Copy-paste this triangle to make two and make them narrow.
Step 3
Place the stems on the beet.
Step 4
The leaves. Draw two blue ovals - light blue (R=143 G=210 B=202) and darker blue (R=96 G=197 B=186). Then go to Effect > Distort and Transform > Roughen. In the dialogue window, enter Options Size 10 px Absolute, Detail 3/in, and in the Points section, check Smooth. Press OK. Make the same options for two leaves.
Step 5
Put the leaves in place, behind the stems (Control-X, Control-B).
7. Create the Ladle
Step 1
Cut off the unnecessary part from the green (R=159 G=166 B=23) ellipse.
Step 2
Create a narrow rectangle with the same color and slightly rotate it to the right. Go to Effect > Warp > Wave. In the new dialogue window, enter the following: Style Wave Horizontal, Bend 60%, Distortion Horizontal 0%, Vertical 0%. Press OK. You just created the handle for the ladle!
Step 3
Put two parts together to create the ladle.
8. Create the Onion
Step 1
After you created an oval (R=216 G=207 B=198), shift the left and right anchor points little up and make the top and bottom anchor points pointy.
Step 2
Add three green narrow ovals (R=159 G=166 B=23) to create the leaves of the onion.
9. Mix the Vegetables
To make it easier to maneuver, group every vegetable separately. For example, you need to select the whole beet, right-click the mouse and press Group. After you have grouped everything, place the vegetables in the pot as shown in the image below.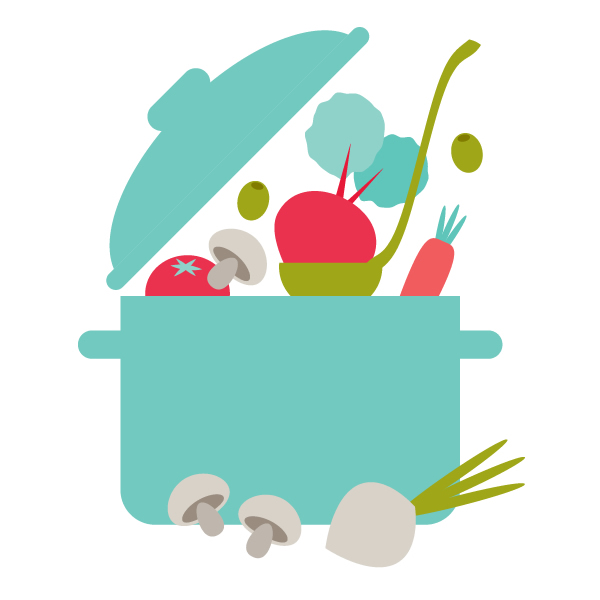
10. Create the Background
Step 1
Draw a circle with the fill color R=0, G=142, B=127. Send it to the back (Control-X, Control-B). Then add a square with the fill color R=216, G=207, B=198 and at size 600 px in the width and height. Send it to the back (Control-X, Control-B).Step 2
To finish off the design, create few small circles and on the Transparency panel make theirtransparency Soft Light. Voila! We finally have one complete illustration of the cooking card.

Conclusion
You made it! Now you can create any vegetable you want using just simple forms! Have fun creating your own cooking pot of vegetables and please share your creations in the comments.


