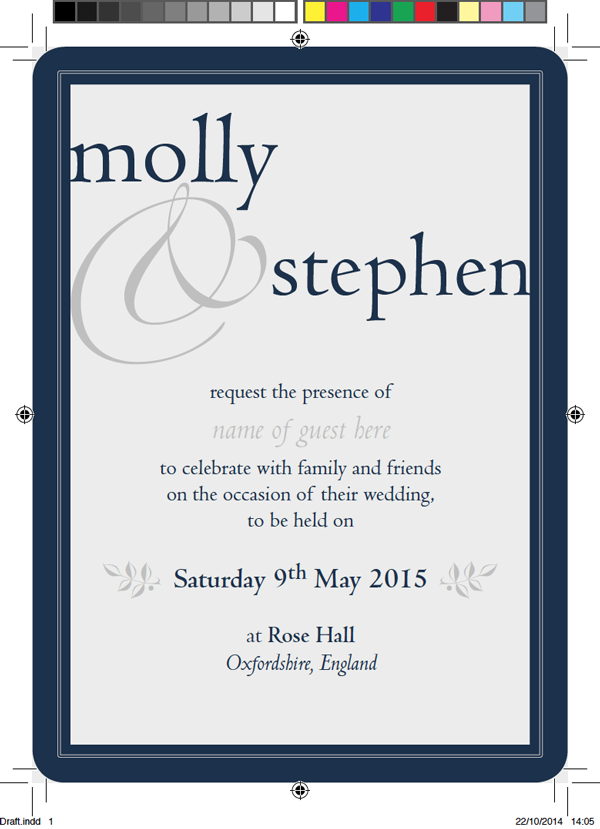
In this tutorial you’ll learn how to create a small ornate wedding invitation step-by-step (below), and use some of the most stunning typefaces at your fingertips in CC and Typekit.

1. Set Up Three New Custom Page Sizes
Wedding invitations come in three standard sizes:- Large: 6 3/8 in x 8 7/8 in (162 mm x 226 mm)
- Medium: 5 1/2 in x 7 1/2 in (140 mm x 191 mm)
- Small: 4 1/2 in x 6 1/4 in (114 mm x 159 mm)
Let’s start by creating these custom sizes in InDesign. You can create all these sizes in InDesign to save for future use.
Step 1
Open InDesign. In the welcome window select New Document, or go to File > New > Document. Set the Intent to Print, keep No. of Pages as 1, and uncheck Facing Pages.From the Page Size drop-down menu select Custom... and type
Wedding Invitation - Small under Name. Set the Width to 114 mm and Height to 159 mm. Click Add.Type again into the Name text box, this time
Wedding Invitation - Medium. Set the Width to 140 mm and Height to 191 mm. Click Add.Create a third and final Custom Page Size by typing
Wedding Invitation - Large under Name and setting the Width to 162 mm and Height to 226 mm. Click Add.Click OK.

Step 2
We’ll first create an example of a small-size wedding invitation. So, back in the New Document window, select Wedding Invitation - Small from the Page Size drop-down menu, and keep the page orientation as Portrait. Set the Margins on all sides to 7 mm and set the Bleed on all sides to 3 mm.Click OK.

2. Create a Small Invitation with a Classic, Elegant Look
In this tutorial, we’ll create a small-size invitation step-by-step. Jump to the end of the tutorial to see some font and style recommendations for a medium- and large-size invitation too.Step 1
Open the Layers panel (Window > Layers) and double-click on the default Layer 1 name to open the Layer Options window.Rename the layer
Background and click OK.
Border. Click OK.
Typography. Click OK. 
Step 2
Open the Swatches panel by going to Window > Color > Swatches. We’re going to create a new set of swatches for use on our invitation design.Select New Color Swatch from the drop-down menu, accessible from the top-right corner of the Swatches panel.


- Navy: C=92 M=77 Y=42 K=44
- Silver: C=25 M=20 Y=20 K=0


Step 3
Remaining on the Background layer, select the Rectangle Tool (M) and drag to create a frame that extends to the edges of the bleed on all sides of the page. From the top control panel, set the Stroke Color to [None] and the Fill to Light Cream.
Step 4
Unlock the Border layer.Select the Rectangle Tool (M), as before, and drag to create a frame 120 mm in Width and 165 mm in Height. Center it on the page.
From the top control panel or the Stroke panel (Window > Stroke) set the Weight to 24 pt. Set the Fill Color to [None] and the Stroke to Navy.
Hop up to the top menu and select Object > Corner Options and set the Size to 3 mm and Shape to Rounded on all sides. Click OK.


Step 5
Remaining on the Border layer, select the Rectangle Tool (M) and drag to create a frame 109 mm in Width and 154 mm in Height. Place centrally on the page.Set the Fill to [None], Stroke to Silver, Weight to 2 pt and Type to Thin - Thin. Go to Object > Corner Options and set the Size to 0.3 mm and Shape to Rounded on all sides.

Step 6
Select the Type Tool (T) and navigate up to the top left corner of the screen. Click on the drop-down menu next to the default Font name in the Character Formatting Controls panel. You’ll see that InDesign CC offers you the option to Add Font to Typekit.If you click this it will take you to the online Typekit Library. Here you can browse from the hundreds of fonts available and choose to sync them to your Creative Cloud. When creating formal, ornamental invitations, you want to set the search criteria to Decorative (for Classification) and Desktop Use (under Available For).

Here are some of my recommended Typekit picks for wedding invitations:
Sail by LatinoType


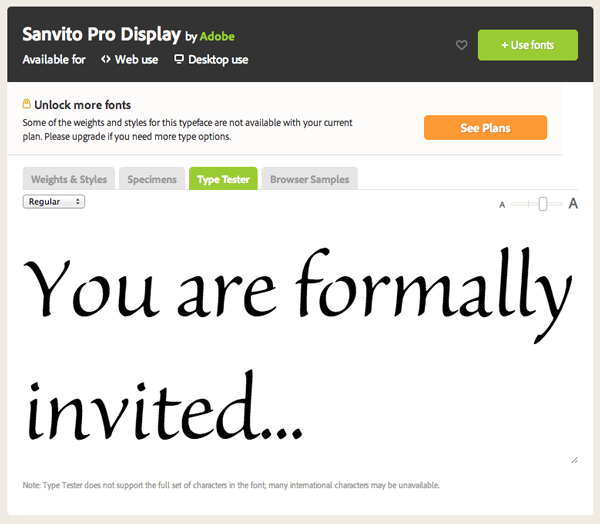
Sanvito Pro Display by Adobe

Step 7
In this example, we’re going to use two fonts already available to us in InDesign CC, Zapfino and Centaur MT Std.Back in your InDesign document, unlock the Typography layer in the Layers panel.
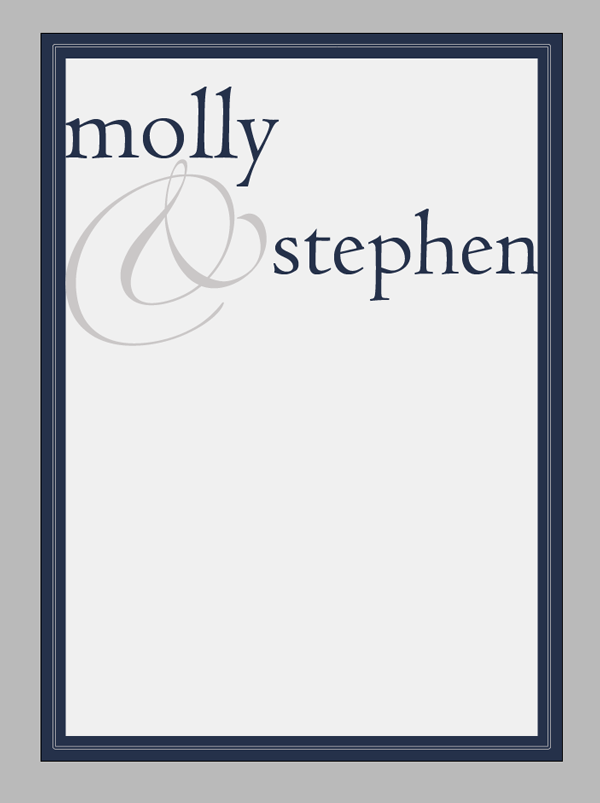
Select the Type Tool (T) and drag to create a text frame 104 mm in Width and 45 mm in Height. Center the frame on the page at Y position 12 mm. Type
name of bride (paragraph break) name of groom. Highlight the groom’s name and set the text alignment to Align Right. Highlight all the text and set the Font to Centaur MT Std Regular, Size 60 pt, Leading 72 pt and Font Color to Navy.

Step 8
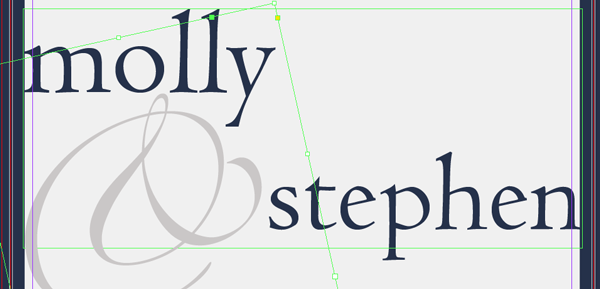
Select the Type Tool (T), as before, and drag to create a square text frame about 60 mm in diameter. Put your cursor into the frame and set the Font to Zapfino.Open the Glyphs panel (Window > Type & Tables > Glyphs) and select a swirly, ornamental & from the characters available. Double-click on the symbol in the panel to insert the glyph.


Step 9
Select the Type Tool (T) again and drag to create a large text frame 104 mm in Width and 67 mm in Height. Position this below the text frames you created in the previous two steps, at around Y position 71 mm.Type:
request the presence of
(paragraph break)
name of guest here
(paragraph break)
to celebrate with family and friends
(paragraph break)
on the occasion of their wedding,
(paragraph break)
to be held on
(paragraph break x 2)
Day Date Month Year
(paragraph break x 2)
at Venue
(paragraph break)
Location
Highlight all the text and set the Font to Centaur MT Ltd, Size 14 pt and Leading to 16.8 pt (Auto). Adjust the text alignment to Align Center, and the Font Color to Navy.
Highlight name of guest here alone and set the Weight to Italic. Adjust the Size to 21 pt, Leading to 25.2 pt and Font Color to Silver. Adjust the Leading of the line below it to 23 pt to even the text out.
Highlight the Day Date Month Year alone and adjust the Weight to Bold and Size to 15 pt. You can also pull out the name of the Venue in Bold too.
Finally, highlight the Location and adjust the Weight to Italic.

Step 10
To add a final flourish to the invitation, select the Type Tool (T) and create a small square text frame about 12 mm in diameter. Insert a decorative glyph from the selection under the Zapfino font in the Glyphs panel (Window > Type & Tables > Glyphs). Here I chose a decorative leaf glyph.


Your design is complete, as quick and simple as that!

To export your invitation ready for print, go to File > Export and select Adobe PDF (Print) from the Format drop-down menu. Under the General options, select Press Quality from the Adobe PDF Preset drop-down menu.


To create a Photoshop mock-up of your invitation, place a JPEG version of the invitation in Photoshop, layered on top of a rustic wooden texture, like this one from Photodune.

3. More Typeface Recommendations for Invitations
There are loads of beautiful, ornate fonts available in InDesign CC and Typekit. Here are some extra font suggestions for creating other invitation styles.For a vintage-inspired invitation, why not try Engravers LT Std to give a classic twist to headers? For this medium-size invitation, I contrasted soft colors, like silvers and pastels, with a Rich Black (try C=75 M=68 Y=67 K=90 to give your black a deep, inky quality).
Also used on this example, for the lower section of text, is New Century Schoolbook LT Std, set in All Caps and with Tracking set to 210.
The decorative flourishes are characters taken from the Centaur MT Std glyph set, set in coral and silver swatches.

For a more kitsch invitation which has a more friendly, approachable look, try using Sail (available in Typekit), set in All Caps, and arrange on a curved path (use the Ellipse Tool (L) and Type on a Path Tool (Shift-T) to replicate this effect).
For this large-size invitation, I adjusted the Page Orientation to Landscape, which gives you more room to the left and right of the page to add playful colored sections. A color palette of gold, pale pink, dark grey and white gives a warm, chocolate-box appeal to the design.
The decorative characters are taken from the Zapfino glyph set. There’s really no need to create or download custom graphics, because many typefaces have fantastic decorative characters automatically included as part of the glyph set.

I hope you have fun creating your wedding invitations!
Being able to choose from such a wide range of typefaces using InDesign CC and Typekit really means you can have huge flexibility over the look and style of your designs.
If you have any other fonts you like to use for formal invitations that aren’t mentioned here, please share them in the comments below!


