by

Adobe Bridge is a really useful tool for ‘bridging’ the content of your computer’s folders between your Adobe design applications. You can use the programme to organize files, and create sophisticated libraries of images and text documents ready to use in your layout designs.
Mini Bridge creates a miniature version of Bridge within your Adobe application, allowing you to drop content into your InDesign layouts quickly and easily. In this Quick Tip we’ll take a look at how you can improve the speed and flexibility of your workflow by incorporating Mini Bridge into your InDesign Workspace, and how you can best organize your folders and their contents for maximum efficiency.
This Quick Tip applies to InDesign CC, CS6 and CS5. You can also check out how to locate images in InDesign CS5 using Mini Bridge in this quick tip tutorial from Gavin Selby.
Step 1
First up, you need to install Adobe Bridge before you can access the Mini Bridge function in InDesign. Once installed you can access Mini Bridge in both Photoshop and InDesign.
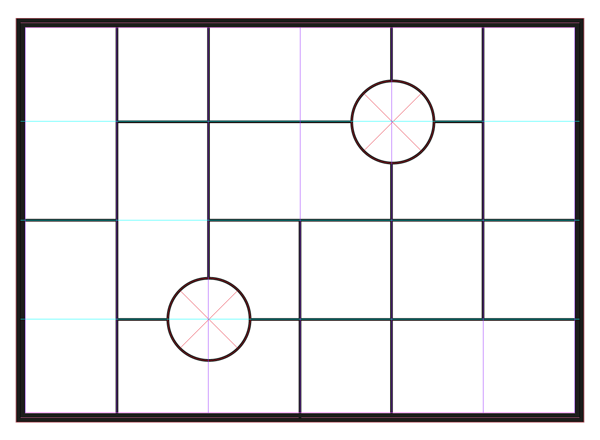
Once you have Bridge installed, you can open up InDesign and File > Open an existing document or create a new one. Here, I’ve opened a moodboard grid I created in my recent moodboard tutorial, ready for images to be placed.

Any document layout will work just fine for this tutorial—just create a new document if you haven’t got anything prepared, to practice using Mini Bridge.
Step 2
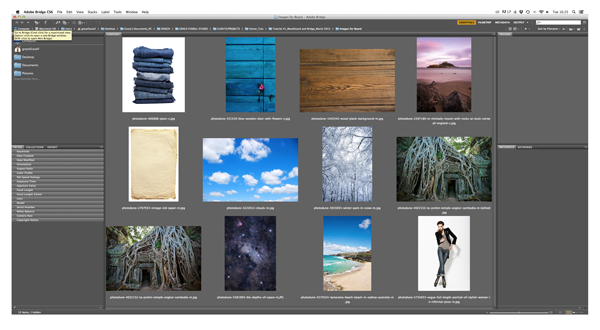
Bridge allows you to view a single folder of files at a time. So it’s a good excuse to get your folders nicely organized. Firstly, open up the full version of Adobe Bridgeby clicking the Bridge icon in the Application bar in InDesign. We’ll first take a quick look at the full Bridge application before using Mini Bridge.

With Bridge opened you can navigate through your folders and move things about if you need to. To drop a file into a different folder, drag the file icon in the centralContent window and drop into your chosen folder in the Folders panel (to the left side of the Bridge workspace, next to Favorites).
Try to group common elements together. If you have a group of images you want to use for a particular design project, group them in an ‘Images’ folder, and sit this folder within a project folder. Keeping your files grouped and organized will help you to get the most out of Bridge, and also help rectify situations when images are flagged up as modified or missing in InDesign—you can be optimistic that your image file is lurking somewhere in the folder you placed it in.
You can also view information about your image files using the right-hand Metadatawindow in Bridge, including useful things to keep in mind when designing your layouts, such as image resolution and file size; and you can also look at the camera data for the image, in a similar way as you might in Adobe Lightroom.
Click on Keywords, next to Metadata, and you can also view the keywords assigned to your image if you’ve downloaded from a stock image site.

You can also search for images by keyword using the Filter window, at the bottom left corner of the Bridge workspace.

Bridge also offers the option for creating Collections (Window > Collections Panel, then select New Collection from the bottom of the panel), which are groups of images only brought together in Bridge. This is useful if you don’t want to move files permanently to different folders on your computer.
Step 3
Once you’ve organized your files and folders, return to InDesign and to your document.
To open Mini Bridge, you can either Shift-click on the Bridge icon in theApplication bar at the top left of the workspace, or go to Window > Mini Bridgefrom the menu bar.

When Bridge first opens, it will either open at the last-used folder, if you’ve previously used Mini Bridge, or at your root Computer folder.
Click on the small arrow next to the folder name at the top of the panel to access subfolders and navigate through your folders, or click on Computer to access a drop-down menu of your computer’s principal drives as well as Recent Files andRecent Folders. From here you can also access a previously saved Collection(see Step 2, above). Here, I created a collection in Bridge called ‘Paper’.

Step 4
Now you can start to drop images into your InDesign layouts from Mini Bridge. To view the image previews at different scale, slide the bar at the bottom right of the Mini Bridge panel along to the left (smaller scale) or right (larger scale).
It’s best if you first create a frame for your image. From the Tools panel, select theRectangle Frame Tool (F), Ellipse Frame Tool or Polygon Frame Tool and drag (holding Shift to create a perfect shape) to create a frame on the page.
With the image frame selected, hop over to Mini Bridge and click on your chosen image to select it. Drag the image across and drop onto the frame. The frame will be filled with your image.


Repeat the process, selecting another image and dragging it across to another image frame.


Step 5
If you’re creating an image-heavy document, such as a moodboard like the one here, or perhaps a magazine or brochure, you can select several images together and ‘load’ them onto your cursor.
To do this, navigate to your folder of images in Mini Bridge (to view the details of the images used here, head over to this tutorial).
Holding Shift you can click and select several images at once, or use Command (Mac OS) or Control (Windows) to skip over images selectively as you pick and choose from a range of files. Once you’ve highlighted the images you want, drag your cursor outside of Mini Bridge and click once. A paintbrush icon will replace your cursor, alongside a preview of one of the images in your selection and the number of images loaded onto your brush.

Extra Tip: Picked up an image you didn’t want? Hit Esc on your keyboard to remove the top image from your selection of images once loaded onto your brush.
Hover over a prepared image frame and click to drop the first image into the frame. Repeat to drop the remaining images onto your document.

Conclusion
If you’re designing a document that’s image-heavy, like a moodboard (see image below) or magazine layout, get in the habit of using Adobe Bridge to organize your images, making use of the Collections feature to create custom groups of files for your projects.

Mini Bridge is a super useful little function that will help to streamline your InDesign workflow and make it more efficient. Mini Bridge allows you to extend the functionalities offered by Bridge directly into InDesign, which helps to promote a more flexible workspace without the need to be hopping in and out of different applications.

.webp)


