One of the most important steps you need to undertake when you first get a digital camera is to spend some time setting it up and customising it according to your own individual needs. For night photography it is no different.
The camera must be fine-tuned to maximise your chances of success, and in this article I'll give some setup options specifically aimed at helping night photographers fulfill their potential.
Armed with that knowledge you can then jump straight into customising some of the numerous settings found on your camera. This will save you time, minimise the chance of making a mistake, and help you to streamline your workflows.
Set and Forget
If you have previously owned a digital camera, you should be familiar with the interface and menu systems used to control these marvels of modern technology.
If not, you should spend some time reading through your manual to familiarise yourself with some of the jargon, conventions and concepts used when navigating the camera's graphical user interface and hardware controls.
The menu system on a modern digital SLR can be quite daunting, with various options for every conceivable parameter. Don't worry, as you will probably never use 90% of these options, and most should be left at default settings anyway.
Keep It Simple
Keeping things simple should be your mantra!
The initial step in setting up a digital camera when you first switch it on is to enter the correct date, time and location. This information, along with many other camera parameters, is embedded into the EXIF metadata of your digital camera files.
It is therefore very important to ensure that this information is accurate and entered correctly to help manage all of the photographs in your archive. After your photographs have been transferred from your camera to a computer system, this metadata can help you name your pictures.
I include the camera model, date and original file type in my file naming attributes. Because I put the year first, month second and day third, all files will display in chronological order.

I also incorporate a copyright message along with my name and e-mail address into the EXIF data on my photos. This ensures that your name and contact information is accessible to anyone who may wish to purchase or use one of your images and clearly identifies that the file belongs to you.

You should always format your camera's memory cards before you take any pictures, and I do this every time I begin a new shoot. Make sure to do this in your camera rather than on a computer, tablet or other device, as this will ensure data integrity and help to prevent any errors when saving images to the card. Caution in this step is needed! Be sure that you have archived any photos or digital files that might already be present on the card, as formatting it will erase all previously stored data, which may be lost forever.
Take Control
Once you have completed these initial steps, it's time to set up the camera to take photos.
You will need to make some decisions about how you wish to do this based on considerations such as subject type, post production workflows and other specific criteria that you might consider important. For night photography subjects I consider the following to be the most commonly used and important settings to take control of.
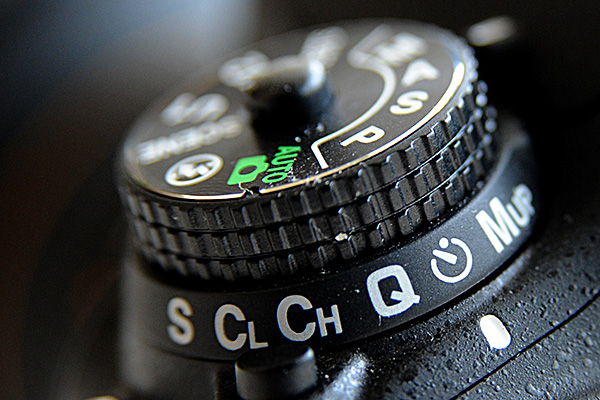
Shooting Mode
The exposure menu or mode dial on your camera allows you to control exposure settings. The exposure modes are generally designated with the letters M, A, S and P, which stand for Manual, Aperture priority, Shutter priority and Program modes.

You control exposure in one of three ways: by adjusting the aperture on your lens, changing the shutter speed, or setting an ISO value within the camera.
Having previously used fully manual film cameras, I treat my digital SLR in much the same way and usually use manual exposure mode to control the amount of light entering the camera. Manual exposure mode gives you complete control over all three exposure parameters.
Occasionally I will also use aperture priority for certain night photography scenarios. This means you set the lens to a specific aperture setting such as f8, and the camera will adjust shutter speed for you to give correct exposure.
Shutter priority and program mode aren't really suited to this particular style of photography, so I rarely if ever use them.
I will go into more detail on manually controlling a digital SLR in a future lesson, as I feel this is the best way to set up a camera for night photography subjects.
Image Quality Settings
Because of the mix of light sources present in many night photography subjects, it is best to shoot raw. This has several benefits...
Shooting raw gives you ultimate control over the look and feel of your images. When it comes time to post process your photographs, raw files allow for major changes to white balance and colour settings.
If you shoot using jpeg or tiff format, the colour is essentially "baked in" to the file and these file formats are far less flexible when it comes to processing colour.
Raw files also have more dynamic range than jpeg files and utilise up to 16 bits of data for each of the red, green and blue colour channels. This high bit depth allows the camera to better capture images in very high contrast light situations where the difference between shadows and highlights is extreme.
Jpeg files only use eight bits of data for each of the red, green and blue colour channels, which is equivalent to approximately seventeen million different colours. That might seem like a lot, but even with this number of available colours you can still get banding and other artefacts, which adversely affect image quality.
Jpeg images do have the advantage of a smaller file size. This allows you to store more images on the memory card, but they do this by using "lossy" image compression to reduce file sizes. This comes with a cost to image quality, as compression artefacts may be visible upon closer inspection.
If you do wish to shoot jpeg I would suggest you put it on the highest quality setting so that you minimise any visible compression artefacts in your shots.
Raw files, on the other hand, can be shot uncompressed, meaning file sizes, especially for images greater than 24 megapixels, can be huge.
They can also use a compression algorithm, making file sizes smaller, but this can be a "visually lossless" form of compression, meaning you won't see any visible artefacts in captured images. This is the option I choose to shoot with.
Colour Space
I use s-RGB colour-space, which is the default option. Adobe RGB theoretically has a larger gamut (range of colours) but is more complicated to work with. Just stick with s-RGB colour space and you won't go wrong.
Metering Mode
Your camera's built-in exposure meter will probably have a few different settings to cope with different types of lighting. Multi-zone, centre weighted, and spot metering modes are the most common.
I usually use multi-zone metering as it is more accurate for the majority of photographic situations you are likely to encounter on night photography excursions.
White Balance
If you shoot raw, white balance setting isn't really an issue as the raw sensor data allows extensive manipulation of colour balance in software after the photo has been taken.
For cityscapes I usually shoot raw with a tungsten or neon white balance setting. If you are unsure about how to shoot a scene, you can always use an auto white balance setting and tweak colour in post-processing to taste.
If you decide to shoot jpeg or tiff, you will need to accurately set white balance when you take the photo. That's why I don't recommend shooting with these file types, because there is often a mixture of different light sources in night photography, which can make setting white balance a challenge.
Focus Modes
This setting is dependent on whether you are using manual focus or auto-focus lenses. If you are using auto-focus lenses, it is best to use the single auto-focus mode rather than a continuous auto-focus mode.
Continuous auto-focus mode constantly maintains focus, which is more useful with subjects that are fast-moving like those found in motorsports. It also depletes the battery faster and may continually try to focus in the low light conditions common to night photography.
Once the auto-focus system has locked focus on your subject, you should switch to manual focus mode so that the lens does not continue to hunt or try to adjust focus again when you press the shutter button.

My Nikon cameras allow you to set the auto-focus activation to a button other than the shutter button. This is very handy as it means that after you have gained focus you don't have to switch to manual focus mode, as the system won't attempt to refocus when you press the shutter button.
With manual focus lenses you have no choice but to set the camera to manual focus mode.
In many night photography situations such as wide angle shots of cityscapes, I simply set the lens to infinity focus and leave it at that. If there are no subjects close to the camera, there should be enough depth of field to have everything within the frame in focus.
If you have subjects close to your camera and wish to maximize depth of field for your chosen aperture, you could use the hyperfocal markings found on many manual focus lenses.
See my manual focus vs. auto-focus lens article for more information on this subject.
Non-CPU Lenses
If you are using manual focus lenses which don't have a data chip in them, it is a good idea to program the focal length and maximum aperture details into the camera if this option is available to you.
My Nikon cameras have this ability, and I can program up to ten different non-CPU lenses into my camera in this way. I have assigned one of the customisable function buttons on my camera body to quickly change this information via a command dial when I swap lenses.

Image Stabilization
Since you will be shooting most night photography subjects from a tripod or stable camera platform, you should turn any image stabilisation options off. Depending on which camera system you are using, this may be a switch on the lens or a menu item in the camera itself.
Having stabilisation switched on when the camera is on a tripod can actually degrade image quality.
ISO Settings
You want to manually set ISO value to the lowest possible setting and avoid using auto ISO.
By selecting your camera's base ISO setting, which is generally around ISO100, you will keep noise in your images to a minimum. This isn't always possible, and in some situations you will need to increase the ISO value.
Noise Reduction Settings
There are generally two types of noise reduction settings available in camera: high ISO noise reduction and long exposure noise reduction.
High ISO noise reduction is only necessary for certain subjects such as astrophotography. It is generally used for ISO values above 1600. I use the "normal" setting to reduce noise and it seems to work pretty well in most situations without too much loss of detail in the images. As I have previously stated, you are better off trying to use a low ISO setting in most situations, so you won't need to use this option except in special circumstances.
Long exposure noise reduction is used for exposures over one second duration. It helps to decrease noise from the sensor overheating during long exposures and can help to remove hot or dead pixels.
Long exposure noise reduction also doubles the length of time the camera needs to process and save images as it does a "dark frame" exposure. This means your batteries will only last half as long.
Both types of noise reduction can be done on files in software, so you can leave these options off if you prefer to do noise reduction at a later stage.
Custom Menu
Most cameras allow you to add commonly used menu items to a custom menu. This is a very handy feature and allows you quick access to settings that you change on a regular basis.

LCD Display Setting
Your LCD display is a very important tool for checking critical focus and colour integrity, and for getting correct exposure.
Because night photography is shot in low light, the display is easily readable so you shouldn't have to adjust brightness to compensate for direct sunlight. So I generally leave mine as is.
Once you have taken a shot, you should use the display to zoom into your subject to see if everything is focussed correctly. The ability to quickly check your shots is one of the big advantages of digital cameras. It also is very handy for checking correct exposure.
Modern cameras usually have a histogram display available so that you can check if you are over- or under-exposing your images. I always use the histogram to check my exposures, and I will go into more detail about how to use this feature in a future tutorial.
Exposure Bracketing
This option allows you to take several images in quick succession with a range of different exposures. This not only gives you the option of selecting a picture with the best exposure, but you can also combine the separate files into a single high dynamic range image using software.
I usually use a bracket setting of -2 stops underexposed, -1 stop underexposed, correct exposure, +1 stop overexposed and +2 stops overexposed for a total of five bracketed images with four stops of exposure latitude.
When doing bracketed exposures you should set the camera to a continuous shooting mode and hold down the shutter button or remote trigger so it fires off a quick succession of images.
Virtual Horizon
This function allows you to level your horizon line. It can be very handy in low light situations where you don't have a clear view of the horizon, and it also helps to ensure that vertical lines such as those in buildings are straight.
Shutter Settings
Most night photographs use shutter speeds of between one and ten seconds, and most cameras will allow you to set shutter speeds up to 30 seconds duration.
If you require a longer shutter speed than this, you will need to set the camera to the "bulb" setting and use a cable release or remote trigger to keep the shutter open for longer durations.
If you don't have a remote trigger or wired cable release available, you can use the self timer function to avoid touching the camera during exposure.
Conclusion
That pretty well covers the majority of important settings used in night photography.
In my next article I will look at the relationship between shutter speed, ISO and aperture. Then I will move on to putting that theory into practice by setting up a camera in manual exposure mode for night photography.
Until then take care.

.webp)


