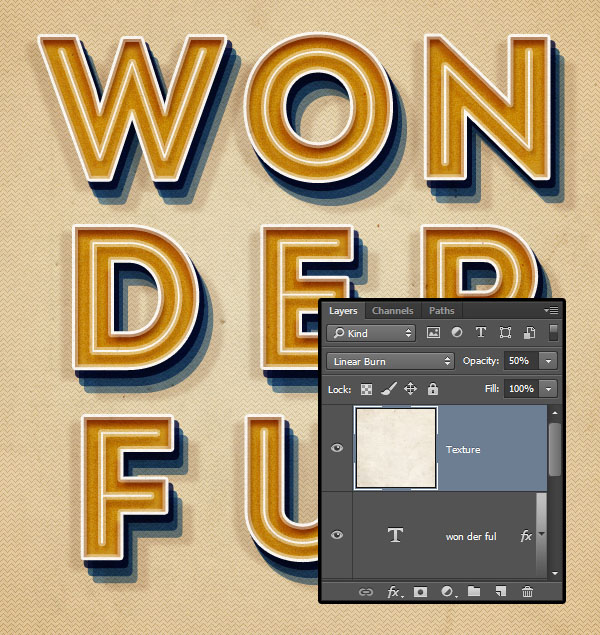
The latest Photoshop update comes with a couple of pretty awesome new layer style features, such as multiple layer style instances and stroke overprint. This tutorial will show you how to use those features to create a one-layer-only, retro text effect. Let's get started!
Tutorial Assets
The following assets were used during the production of this tutorial:
- Intro Inline Regular font
- Grungy paper texture v.5 by bashcorpo
- 30 Simple Patterns by mslooten
1. Create the Background
Step 1
Create a new 950 x 950 px document, and duplicate the Background layer twice. Change the second copy's Fill value to 0.

Step 2
Double click the Background copy layer to apply a Gradient Overlay effect with the following settings:
- Style: Radial
- Scale: 150%
- Click the Gradient box to create the gradient using the colors
#ede6cfto the left and#e1c194to the right.

This will apply the main gradient fill.

Step 3
Double click the Background copy 2 layer to apply a Pattern Overlay effect with the following settings:
- Blend Mode: Soft Light
- Pattern: Sawtooth

This will add a subtle chevron pattern to the gradient fill.

2. Create the Text
Step 1
Create the text using the font Intro Inline Regular, the Size 200 pt, and any color you like since we'll be using a Color Overlay effect later on.
If you are adding more than one line of text, open the Character panel (Window > Character), and change the Leading value to 190 pt.

Step 2
In order to space out the letters evenly, you'll need to place the cursor between each two letters you want to adjust, and type in a suitable Tracking value.
The values used here are:
- W/O, O/N: -50
- D/E, E/R: 100
- F/U, U/L: 150

3. Add the Stroke and Use the Stroke Overprint
Double click the text layer to apply the following layer style:
Step 1
Add a Stroke with these settings:
- Size: 3
- Position: Inside
- Opacity: 48%
- Color:
#fffaf3 - Check the Overprint box

Step 2
The Overprint option is a new improvement to the Stroke effect.
What it does is that it allows the translucent inner stroke's fill (with an Opacity value less than 100%) to blend with the color of the shape or text it is applied to.

Step 3
When the Overprint option is unchecked, the shape or text fill will be completely knocked out, and the background behind the translucent stroke will be shown instead.

4. Add Multiple Layer Effect Instances
Step 1
A couple of effects have a little + icon to their right (the Stroke, Inner Shadow, Color Overlay, Gradient Overlay and Drop Shadow effects).
When you click that + icon, you can add up to 10 instances per layer of the effect next to it.
So if you click the + icon next to the Stroke effect, you'll notice that another tab ofStroke will appear below the one you already have, with the same settings and values applied.

Step 2
Click the second Stroke effect instance to activate it, and use the following settings for it:
- Position: Outside
- Opacity: 100%
- Color:
#ffffff

You'll see that this applies another stroke effect to the text, without the need to use another separate layer or layer style.

5. Add the Inner Shadows
Step 1
Add an Inner Shadow with these settings:
- Color:
#ab6b18 - Opacity: 80%
- Distance: 8
- Size: 5

Step 2
Add another instance of the Inner Shadow effect with these settings:
- Color:
#d9953d - Uncheck the Use Global Light box
- Angle: 63
- Distance: 11
This will enable you to add inner shadows with different Angle values using only one layer, and the same layer style.

6. Add the Inner Glow and Color Overlay Effects
Step 1
Add an Inner Glow with these settings:
- Blend Mode: Color Burn
- Opacity: 100%
- Noise: 100%
- Color:
#e7dabc - Source: Center
- Size: 35

Step 2
Add a Color Overlay with these settings:
- Color:
#d09c2d

7. Add the Drop Shadows
Step 1
Add a Drop Shadow with these settings:
- Color:
#394485 - Opacity: 100%
- Distance: 8
- Spread: 100
- Size: 4

Step 2
Add another instance of the Drop Shadow effect with these settings:
- Color:
#4e85c2 - Uncheck the Use Global Light box
- Angle: 119
- Distance: 17

Step 3
Add a third instance of the Drop Shadow effect with these settings:
- Color:
#2d6db5 - Opacity: 61%
- Angle: 121
- Distance: 26

Step 4
Add a fourth instance of the Drop Shadow effect with these settings:
- Color:
#c1a89a - Opacity: 35%
- Angle: 41
- Distance: 13
- Spread: 47
- Size: 9

Step 5
Add a fifth instance of the Drop Shadow effect. This instance will be very similar to the fourth one, so instead of clicking any Drop Shadow's + icon, make sure to click the + icon next to the fourth Drop Shadow instance.
This will create a fifth instance below the fourth one, with exactly the same settings. Change the following ones:
- Angle: 130
- Distance: 38

And voila! There you have it. A pretty complex retro text effect created using only one text layer and one layer style.

You'll also find all the effect instances added to the layer effects list of the layer.

8. A Few Other New Options
Step 1
In addition to the + icon, you'll also see a set of new icons at the bottom left corner of the Layer Style box. The first one to the left is the fx icon.
When you click the fx icon, you'll get a menu with a few options, as well as all the layer effect names, which you can click to add the effects as well as new instances.

Step 2
The Delete Hidden Effects option will get rid of all the unused or inactive effects and instances. You can click an effect's name from the fx menu to show or add it back any time you like.

Step 3
The Show All Effects option will show all the effects, whether they are used or not.

Step 4
The Reset to Default List option will simply set everything back to its default, including getting rid of any added effect instances.

Step 5
The Move effect up and Move effect down icons can be used to change the order of the effect instances, and the Delete effect icon will remove the selected effect or instance.

9. Add the Texture
Once you're done with the layer style, place the Grungy paper texture v.5 image on top of the text layer, resize it as needed, and place it as you like.
Then, change its layer's Blend Mode to Linear Burn, and its Opacity to 50%.

Congratulations! You're Done
In this tutorial, we created a simple gradient with a subtle pattern background.
Then we created a text layer, and adjusted a couple of its settings such as the leading and tracking values.
After that, we used a couple of layer effects, along with the new layer style features, to create a retro text effect.
Finally, we added a simple grungy texture to finish off the effect.
Please feel free to leave your comments, suggestions, and outcomes below.


