I
love my Macbook Air. It is a workhorse in an insanely portable package.
I do, however, have one complaint: The hard drive. It is small. Think
smaller than an iPod classic. So I’ve been forced to come up with some
tricks to both maximize my existing space as well as keep the space I
have tidy.
In this tutorial, I will share a few of these tricks. Including:
How to find and remove large files and duplicates.
Basic .zip/compression techniques that makes the big stuff smaller.
How to use a Time Capsule for additional storage.
The benefits and use of cloud storage.
Screencast
Managing Your Mac’s Hard Drive Space
A Megabyte Saved Is a Megabyte Earned
Finding and removing large files or duplicates is a great way to create and maintain free space on your hard drive.
Click on the Finder Application
Click the Finder icon on your dock. Finder will launch in All Files
mode. You will be presented with a list of files already sorted by
size. In fact, Finder will even group these files. Example groups are 1-100 MB or 100 MB-10 GB.
Start going through the files in the largest file group. Trash any
file that is either a duplicate or no longer needed. If you must keep
the file, that is ok. I will show you how to offload it to the cloud
later on in this tutorial.
All Files sorted by file size
Deleting the file won’t free up the space on your hard drive. You
must permanently remove it by emptying your trash. To empty your trash,
move your cursor down to the trash can icon on your dock and secondary
click on it. Choose Empty Trash. You will be prompted for a confirmation that you wish to permanently erase all the items in Trash. Confirm by clicking Empty Trash.
Empty the Trash
If You Can’t Delete It, Zip It
Archiving, or zipping, if you will, is a technique in which
you can take one or many files and convert them into a single compressed
file called an archive. For this example, I will demonstrate on a
single file, but keep in mind that this will work on a folder containing
multiple files as well.
Original image size
I’ve downloaded a video tutorial file and placed it on my desktop. By secondary clicking on the file, then choosing Get Info, you see this file is 72.6 MB in size.
Compress the file
Now, secondary click that same file, but this time I will choose Compress “TogglingV2.mp4”. You
will note a second file has appeared. This is a .zip, or compressed,
version of that file. By checking the size of this compressed file, you
will see a small, but noticeable size reduction. The more files you
compress, the more space you will free up!
The compressed file is smaller
There are several better third party compression tools out there. I
would encourage you to learn more about compression to help minimize the
size of all the large files you keep on your hard drive.
Get a Time Capsule. They’re Amazing!
Time Capsules are neither the cheapest routers or Network Attached
Storage (NAS) devices on the market, but they provide more than their
cost in value. Here are just a few reasons I opted for a Time Capsule
over attempting my own router and NAS combo:
The 802.11ac frequency provides the fastest available wifi bandwidth. When it comes to internet speeds, the faster, the better.
The Airport Utility available on both OSX and iOS devices makes Time
Capsule setup dead simple. Anyone who has fiddled with the user
interface software in other routers will attest to just how horrible it
can be.
Two (or three) Terabytes of storage is nothing to laugh at. And by enabling Back to My Mac
on the Time Capsule, I can easily access any file I store on the Time
Capsule from any internet connection. This means the only files I need
to keep on my MacBook’s hard drive are ones that I need offline.
Airport Utility
To enable Back to My Mac on your Time Capsule, launch the Airport
Utility program, then click on the image of your Time Capsule. Under
the Back to My Mac panel, click the + button, then enter your AppleID credentials.
Add Back to My Mac
Once enabled, your Time Capsule will appear in the sidebar of your
finder regardless of whether you are home or away. As long as you have
internet, it will be there.
Finding your Time Capsule
Use Cloud Storage
Cloud storage is using a 3rd party server space to securely store
files. Much like with the aforementioned Time Capsule, using a service
like Dropbox, Box.net, Google Drive, or iCloud
can significantly help toward maximizing your storage space. Sign up
for one or all of these free services and start offloading files to
their computers, thereby freeing up space on yours. As long as you have
internet access, you'll have access to your files.
If you use or store a lot of Pages, Numbers, or Keynote files, I
would recommend using iCloud as their default save location. It is
built right in to OSX.
The best part is that you can access any of those documents without
your computer! You can access, edit, and save them from your iPhone,
iPad, or even a borrowed PC via the web browser.
iCloud.com
To access the docs bring up a web browser and go to www.icloud.com.
Log in with your AppleID credentials, then choose the type of file you
would like to access. Any files you have saved to the cloud will be
listed there.
Pages on iCloud
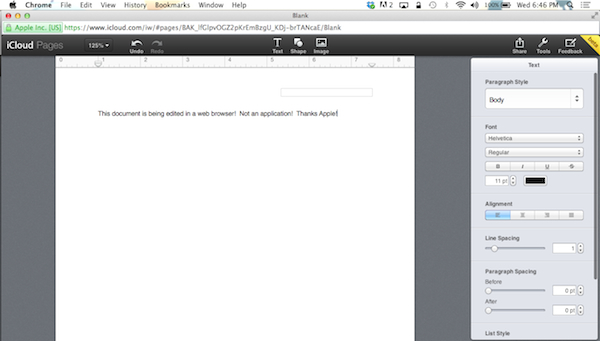
Double click on the document and you will be brought to a fresh
browser screen with a user interface remarkably similar to the native
application.
Demo Page document on iCloud
Conclusion
Nowadays files seem to be getting larger and larger, leaving us, as
end users, scrambling to find ways to better manage our storage. Using
just one or two of the techniques above will help you keep a clean hard
drive with more available space. Enjoy!
Unknown
Lorem ipsum dolor sit amet, consectetur adipisicing elit, sed do eiusmod tempor incididunt ut labore et dolore magna aliqua. Ut enim ad minim veniam, quis nostrud exercitation.
Medical Disclaimer
The information on this site is not intended or implied to be a substitute for professional medical advice, diagnosis or treatment. All content, including text, graphics, images and information, contained on or available through this web site is for general information purposes only. Krobknea makes no representation and assumes no responsibility for the accuracy of information contained on or available through this web site, and such information is subject to change without notice. You are encouraged to confirm any information obtained from or through this web site with other sources, and review all information regarding any medical condition or treatment with your physician. NEVER DISREGARD PROFESSIONAL MEDICAL ADVICE OR DELAY SEEKING MEDICAL TREATMENT BECAUSE OF SOMETHING YOU HAVE READ ON OR ACCESSED THROUGH THIS WEB SITE.


.webp)

