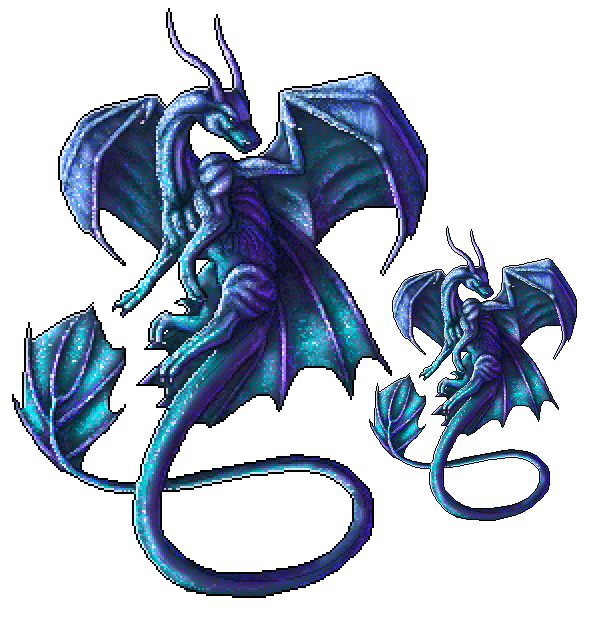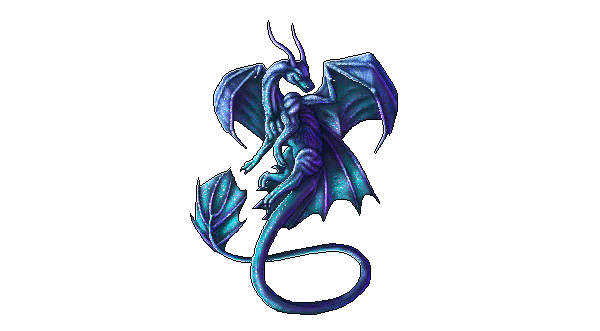
For I long time avoided pixel art, because it looked so stiff to me. After all, we need to consciously limit ourselves to an old style coming from times when we were, in fact, limited. But now we have so many advanced tools, we can create photo realistic pictures, so restricting our capabilities is like cutting the wings off the creation process. However, we can't deny that nowadays, when artists try to be more and more realistic in their works, pixel art is still eye-catching.
The problem is pixel art seems not to obey the rules of normal painting. You'd like to turn on some music and paint almost unconsciously, but it doesn't work here. Suddenly lines look rugged, colors don't want to blend, and everything looks like your creations in Microsoft Paint from years ago—even if you're a good artist in general!
Is there any way to create pixel art without giving up on the spontaneous, quick method of creating? Do we really need to count pixels one by one to simulate a smooth edge? And why actually do we need to restrict ourselves to typical MS Paint tools when working in a powerful Photoshop? The answer is, we don't.
In this tutorial I'll show you the laziest way possible to create a believable semi-pixel art—maybe not the most perfect and clear, but one that will not restrict your artistic freedom with careful building.
1. Prepare the Sketch
As for every drawing, we need the line art started with a sketch. There's no need to start in pixel scale—sketch your picture in any way you like, on computer or in your sketchbook. If you want to use the same sketch as me, here's a quick method for it. However, I suggest creating your own line art and adjusting my further advice to it.
Step 1
Start with a simple, messy sketch picturing your main idea.

Step 2
Create the simple blocks of the body. Imagine they're all in 3D.

Step 3
Add the blocks for big details that weren't included in your first sketch.

Step 4
Add all the details you need. It doesn't need to be clean line art, just make sure to include everything you'll want to have in the final work.

2. Prepare the File
Step 1
Create a New File (Control-N) and set the size to 245 x 331 (or less). We need to choose something small enough for the pixels to be prominent, but also big enough to save some space for details.

Step 2
Paste your sketch into the newly created file. Use Free Transform Tool (Control-T)when holding Shift to resize the sketch and adjust it to the area. Name the layerSketch.

Step 3
By coming to View > Show > Pixel Grid you can turn on and off a kind of helpful guide lines. They are thin white lines showing the borders of pixels. You need to decide what view do you prefer, and sometimes it may be easier to turn it off, especially when shading and coloring.

Step 4
Lower the Opacity of the Sketch layer to create a template for the line art. Choose any value that fits you, then lock the layer.

3. Create the Line Art
Step 1
Create a New Layer (Control-Shift-Alt-N) and grab the Pencil Tool (B) with the size of 1px. Then simply draw the outline with the pencil, as if you were doing it in a bigger scale with a brush. Don't care about the rugged edge!


Step 2
The rugged edge is created by cooped pixels. A smooth line in a small scale should contain as little pixels as possible, without breaking the continuity. The easiest method to do it is to make sure all the pixels contact through only one way (side or corner, never both).

The lines we've created don't follow this rule at all, because Photoshop has a different view on smooth lines. We'll need to review all the lineart to find the redundant pixels!


Step 3
Use the Eraser Tool (E) in Pencil Mode. Make sure Transfer is unchecked in theBrush Settings (F5), so that it was independent from the pen pressure. Using size of1px erase the redundant parts.


There's one exception to this rule. Sharp, tapered shapes may need to be "closed" with an additional pixel, otherwise they would look open from distance.

That's what we're aiming for. Name the layer Outline.

Step 4
Now we need to create a Clipping Mask to define the "inside" of the dragon. Do the following:
- Select the Magic Wand Tool (W) and change its tolerance to 0;
- Deselect Anti-alias;
- Select the areas outside of the dragon body with the Magic Wand Tool;
- Control-Shift-I to inverse the selection.

Step 5
Create a New Layer under Outline and fill the selection with the Paint Bucket Tool (G). Use something about 50% gray (
#808080). Nam the layer Clipping Mask.
Step 6
Drag the Sketch between Clipping Mask and Outline. Click Outline and Sketch when holding Shift to select them both, then hit Control-Alt-G to create a Clipping Mask.

Step 7
Now we need to define the internal line art. Create a New Layer under the Outline and draw the lines with pixels.

Step 8
Clean the lineart just as we did before. Name the layer Line art.

4. Define the Form
The line art is done, now we need to create a 3D form of it. We'll do it using black and white as indicators of light and shadow.
Step 1
This way we'll want to use a bigger pencil creating more diverse strokes. Just checkTransfer in Brush Settings and make sure it's set to Pen Pressure (works with tablets only!).

Step 2
Create a New Layer under Lineart. Name it Ambient Occlusion 1. We're going to define the form without caring about light and shadow at the moment.
The method for it is simple. Choose color a bit brighter than the base and paint subtly the areas between lines of the line art. Don't get too close to them! If you push your pen gently enough, you will get varied opacity strokes.


Step 3
Change the Opacity of Line art to 10%. This way it'll become a part of the shading.

Step 4
Create a New Layer and name it Ambient Occlusion 2. Again, select a bit brighter shade and paint over the previous strokes, trying not to touch their borders.


Step 5
Time for shadow. Create a New Layer and name it Shadow. Change its Blending Mode to Multiply. Use gray, Soft Brush (not a pencil this time!) to paint the shadows as you'd normally do in non-pixel art.


Step 6
The strokes we've used are soft and are making the picture less "pixel" that we'd like. We can fix it easily. Duplicate (Control-J) Shadow layer, turn off the visibility of the original, then select the copy (name it Shadow 2). Go to Filter > Convert for Smart Filters. Hit OK, then go to Filter > Noise > Add Noise and change the options to your needs.


Step 7
Turn on the Shadow layer back. See if they fit each other. If you want more pixel look, change the Opacity of the Shadow layer or even delete it. You can always change the amount of noise by double-clicking its Add Noise property.


Step 8
Create a New Layer and paint illuminated areas with white soft brush. Use Screen Blending Mode to make it more shining. Name the layer Light.


Step 9
Again, we need to make it harder in appearance. Repeat the process, this time using a larger amount of noise.


Step 10
Make sure everything looks just as you want it.


Step 11
The body is still very smooth, so let's use more tricks to fix it. First, you can change theOpacity of Line art to make it more clear. Also, create a New Layer and add messy white pixels on the highlight.


Step 12
Blend the messy white pixels with a bit darker pixels.


You can do the same trick with shadowed area and black/dark gray pixels.


5. Add Colors
Step 1
Create a New Layer and name it Color Base. Use the Paint Bucket Tool (G) with dark, unsaturated version of the main color you want to use (in my case,
#496d91). Then change its Blending Mode to Multiply.
Step 2
Turn off the visibility of Color Base. Create a New Layer for every color you want to use. Grab a Soft Brush in Dissolve mode and paint the areas you want to color. Don't care about accuracy now, be as messy as you want. Then turn on Color Base, change the Blending Mode of the color layers to Color, and, if necessary, change the Opacityof them to blend them in.


Step 3
Create a New Layer and name it Color Light. Use a soft white Brush in Normal mode to paint the illuminated areas. Then change the Blending Mode of the layer toOverlay.


Step 4
Create a New Layer, name it Pixel Light. Draw messy, bright dots all over the previously defined area with the Pencil Tool. The goal is to make it more pixel in look.


Step 5
Change the Blending Mode of Pixel Light to Color Dodge and lower its Opacity to blend into the Color Light.

Step 6
Create a New Layer and name it Color Highlight. Use the Pencil Tool and white color to paint tiny dots of light in the brightest areas. You can use Screen Blending Mode for it.


Step 7
Create a New Layer, name it Color Shadow. Use a Soft Brush to paint over the shadow areas with a color that could be an ambient light. In my case, it's purple. Change its Blending Mode to Color and lower the Opacity if you find it necessary.


Step 8
Create a New Layer and name it Reflected Light. Use the Pencil Tool to draw reflected light with a brighter version of the previous color. Keep it in shadow area only! Then change the Blending Mode of the layer to Overlay.


6. Final Polish
Step 1
We need to take care of the outline. As you can see, it looks great on the black background, but if we want to make the background transparent, we won't be able to control the color of the outline.

Create a New Layer just under Outline and name it Smoothing. Use white Pencil to draw a line on the right of the black outline. Copy its flow to avoid cooped pixels. Change the Blending Mode of the layer to Screen and lower the Opacity if needed.


Now we've got a decent outline that fits every background without transparency on the edges.

Step 2
When you're ready to save the file, hit Control-Shift-Alt-S to Save for Web. Select GIFas the format. You can safely check Transparency, because we made sure there's no half-transparent pixels in the outline.

You can also make your picture even more pixelated by playing with the options. Lowering the amount of colors is the easiest one, but Web Snap and Lossy will give you cool effects without changing the colors.


We're Done!
In this tutorial we've learned how to create a pixel art effect when you're too lazy and impatient to do it the proper way—or when you're like me and you're too used to painting workflow. It works the best for big pixel artworks, but you can modify it to smaller ones too. I hope you enjoyed the lesson!


.webp)
