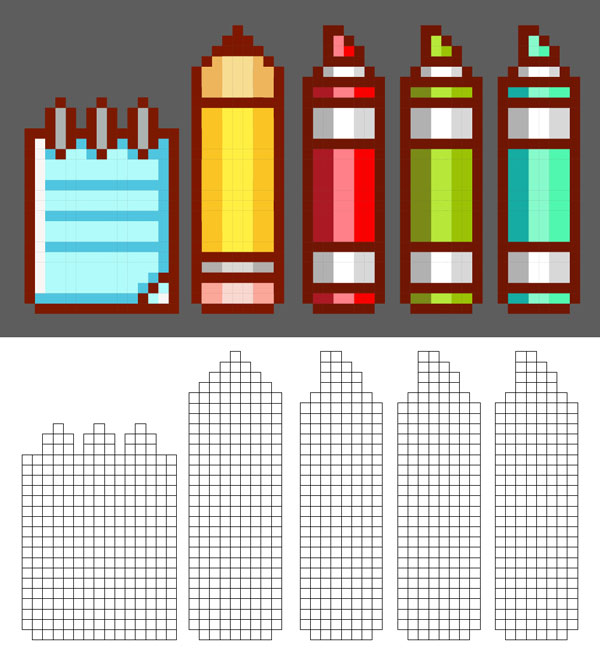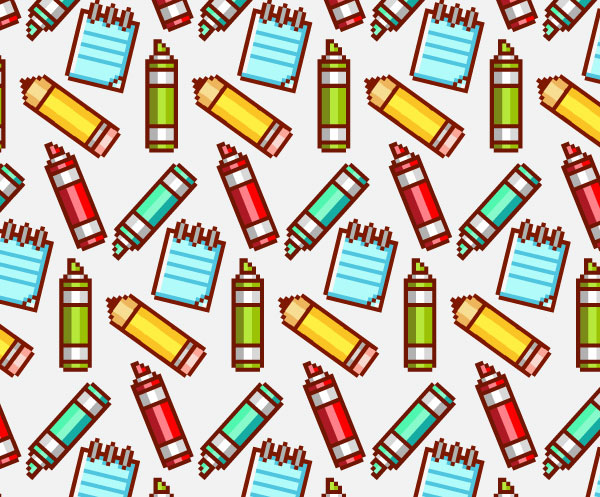
In this beginner tutorial, you'll learn techniques for creating forever scalable pixel art in Adobe Illustrator. With the use of the Rectangular Grid Tool and the Live Paint Bucket Tool, we'll create simple, cute little pixel art icons, and then I'll show you how to bust them out of the grid, creating lossless icons, pixel art patterns, and more.
1. Setting Up Your Document
Step 1
Open up Adobe Illustrator CC 2014 (this tutorial is quite usable with other versions of Adobe Illustrator, but this is what all of my screenshots come from), and create a New Document. I like working in a square, 800 px by 800 px document. You can use a smaller or larger file if your needs call for that.

Step 2
From the Toolbar, grab the Rectangular Grid Tool (found under the Line Segment Tool (/). Double-Click the tool to bring up its options. Enter in your document's size for the Width and Height. Enter 30 for both the Horizontal and Vertical Dividers.

Step 3
Make sure your rectangular grid lines up with your Artboard. Select your grid and set the Stroke color to black, or whatever color you like best so that you can easily see the grid.

2. Drawing the Notebook's Outline
Step 1
Select your grid and grab the Live Paint Bucket Tool (K) (in the Toolbar under the Shape Builder Tool (Shift-M)).
- Click on the grid to make a Live Paintgroup.
- Deselect and start filling in a couple of the grid spaces, using brown (
#801800) as your fill color.

Step 2
You can either click one grid space at a time, or click and drag along your grid to fill in multiple spaces in one go. Regardless of your method, fill in a rectangle outline of 15 pixels across and 18 pixels down.

Step 3
Using the Live Paint Selection Tool (Shift-M), select the brown box in the lower left corner of the brown rectangle and Delete it. Then, using the Live Paint Bucket Tool, fill in three diagonal boxes in the lower right corner.

Step 4
For the notebook's spirals, start two grid spaces to the left and fill in two boxes up, one box diagonally up, and two boxes down. Skip one column and repeat twice.
Then, use the Live Paint Selection Tool to delete the space from the brown rectangle outline so your notebook spirals have four white spaces from the top to the bottom (see below).
Fill in three spaces below the notebook outline that connect diagonally to finish the spiral outlines.

3. Filling in and Extracting the Notebook
Step 1
Change your fill color to blue (
#4dc6e1) and fill in the notebook, starting with the right edge and bottom edge. Fill in spaces beneath each spiral shape and then, five rows from the top of the notebook, fill in a horizontal line (see below).
Step 2
Fill in two more horizontal lines, each with two rows between them. Then, using light blue (
#b6f9ff) as your fill color, fill in large spaces at once, rather than just a column or row).
Step 3
Fill in the rest of the notebook page (except for a single white column on the left side). With gray (
#b1b1b1), fill in the four spaces in each spiral.
Step 4
Once finished with your pixel art design, Select the grid, Right-Click, and hit Ungroup. Then, go to Object > Live Paint > Expand to turn your Live Paint Group into objects. Hit Divide in the Pathfinder panel so your filled-in spaces will be separate from the grid. Finally, use the Magic Wand Tool to select the stroked grid and Delete it. We'll go over this process again for the other icons on this tutorial.

4. Creating a Simple Pencil
Step 1
Use the Rectangular Line Grid Tool to create another grid for your vector pixel art. Once again, use the Live Paint Bucket Tool to start filling in spaces with brown.
Fill in four diagonal spaces going to the upper right and then three diagonal spaces going to the lower right to create the pencil's point. The rest of the pencil's top is four spaces down on either side of the point and nine spaces across.

Step 2
The sides of the pencil are 19 spaces down and the bottom is seven spaces across. Don't forget to fill in the top three rows for the pencil's lead and two rows of seven spaces near the bottom for the metal bit of the eraser.

Step 3
We need two colors for each section of the pencil: the wood, the yellow body, the metal bit, and the eraser. The darker color fills in two full columns on either side of the lighter color, which fills in three columns. The colors are as follows:
- Wood: Tan (
#eeb55c) and Light Tan (#f8dd92) - Yellow Body: Yellow (
#fbc423) and Light Yellow (#ffef42) - Metal Bit: Gray (
#b1b1b1) and Light Gray (#d8d8d8) - Eraser: Pink (
#f8a8a0) and Light Pink (#f8d8d0)

Step 4
Finally, let's repeat the process of extracting your vector pixel design from the rectangular grid. Select the grid, Right-Click, and hit Ungroup. Then, go to Object > Live Paint > Expand to turn your Live Paint Group into objects. Hit Divide in the Pathfinder panel so your filled-in spaces will be separate from the grid. Finally, use the Magic Wand Tool to select the stroked grid and Delete it.

5. Creating a Small Set of Markers
Step 1
This design is similar to the pencil, so I'll go over the outline rather quickly. Set up your line grid in the same fashion as the notebook and pencil.
- The tip is chiseled and starts with filling in two spaces to the right and one down diagonally.
- The tip is four spaces high, four spaces across, and has three on the diagonal.
- Fill in two spaces on either side of the marker tip. Then fill in eight spaces across for the top of the marker body.
- Complete the top half of the marker with sides that are seven spaces down on either side. The bottom and the stripe near the top are eight spaces across each.
- Finally, the body of the marker is 21 spaces down on either side and eight spaces across on the bottom. There are three rows of brown across in the body of the marker (see below).

Step 2
Like the pencil, the colors of the marker are separated into columns.
- Start with bright green (
#b7e835) in the center two columns. I decided that green should be filled into four of the seven sections. - Fill in the two columns on the right side of each of the four green sections with medium green (
#9dc107). - The left side of the green sections are filled in with dark green (
#768d12). - The other three sections are filled in with three shades of gray: dark (
#b1b1b1), light (#ffffff), and medium (#d8d8d8).

Step 3
For the third and final time in this tutorial, let's review the steps of extracting vector-based pixel art from a rectangular grid:
- Select the grid, Right-Click, and hit Ungroup.
- Go to Object > Live Paint > Expand.
- Hit Divide in the Pathfinder panel. Finally, use the Magic Wand Tool to delete the grid.

6. Changing Colors for Alternate Designs
Step 1
One way of easily changing colors is to Copy (Control-C) and Paste (Control-V) the grid design before you extract your vector-based pixel art icon from the rectangular grid. Then you can easily refill Live Paint spaces.

Step 2
Alternatively, Select your design, go to Edit > Edit Colors > Recolor Artwork, and change the hues of your selected object. I find this to be the quickest way of changing an object's colors.

Step 3
Create as many variations of your little pixel art icons as you see fit. Make sure each design's squares are Grouped (Control-G) together. Below, you can see the Preview (Control-Y) mode versus the Outline mode, showing all of your scalable vector squares that make up each design.

Great Job, You're Done!
Now that you've got the technique down, you can create icon sets, printable seamless patterns with the Pattern Options panel, mobile game assets, and more. While pure pixel art this is not, the principle of working on a small scale is the same, with the advantage of resizing the artwork in a lossless format. Share your vector-based pixel art creations with us in the comment section below!


.webp)
